In this tutorial, we’ll walk through how to manage parent profiles for your clients
in the Answers4College Advisor Portal. You’ll learn how to create, edit, and
update parent information using the Parent Management tools.
1. Introduction
Log in to the Advisor Portal and click on the Clients menu from the left sidebar.
You’ll see a list of all clients you’ve created.
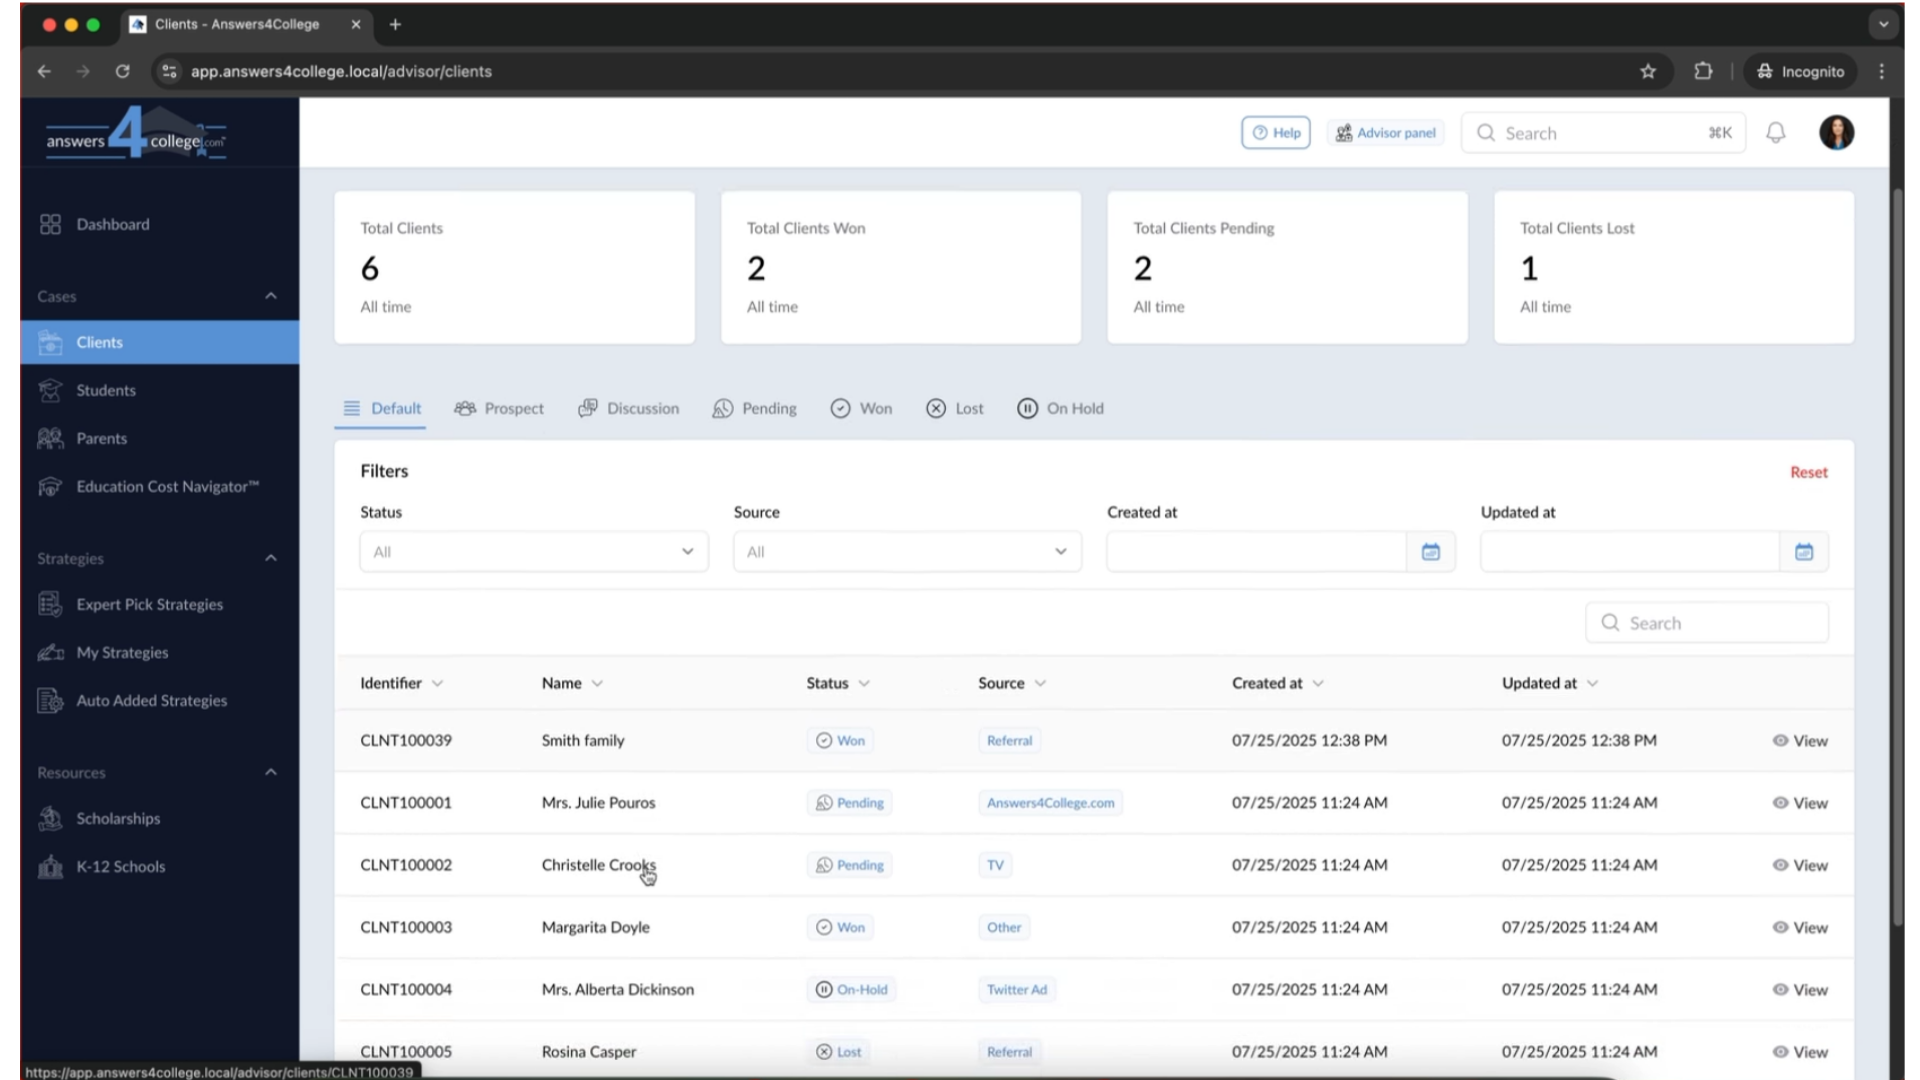
2. Select a Client
Click on a specific client to open their Client Overview
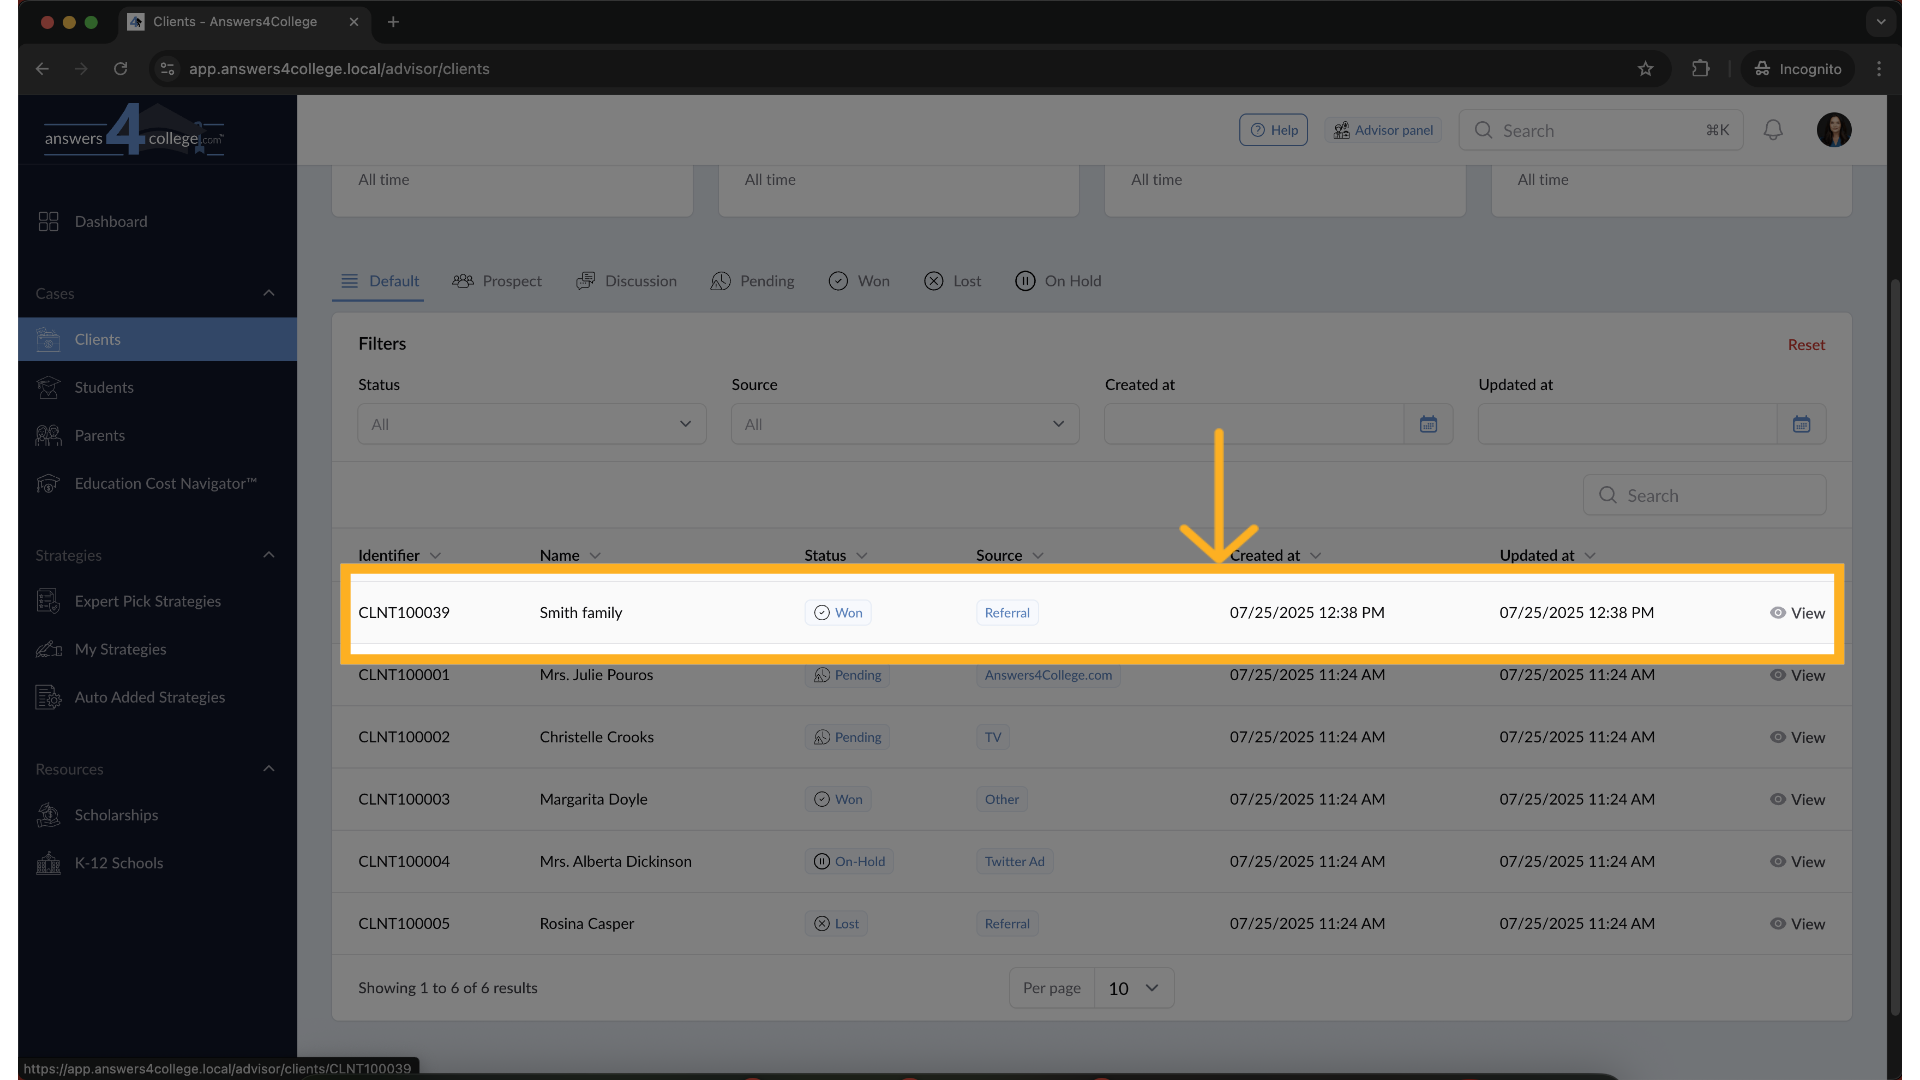
3. Open the Parents Section
In the client’s left-hand menu, click on Parents to manage parent profiles for that client.
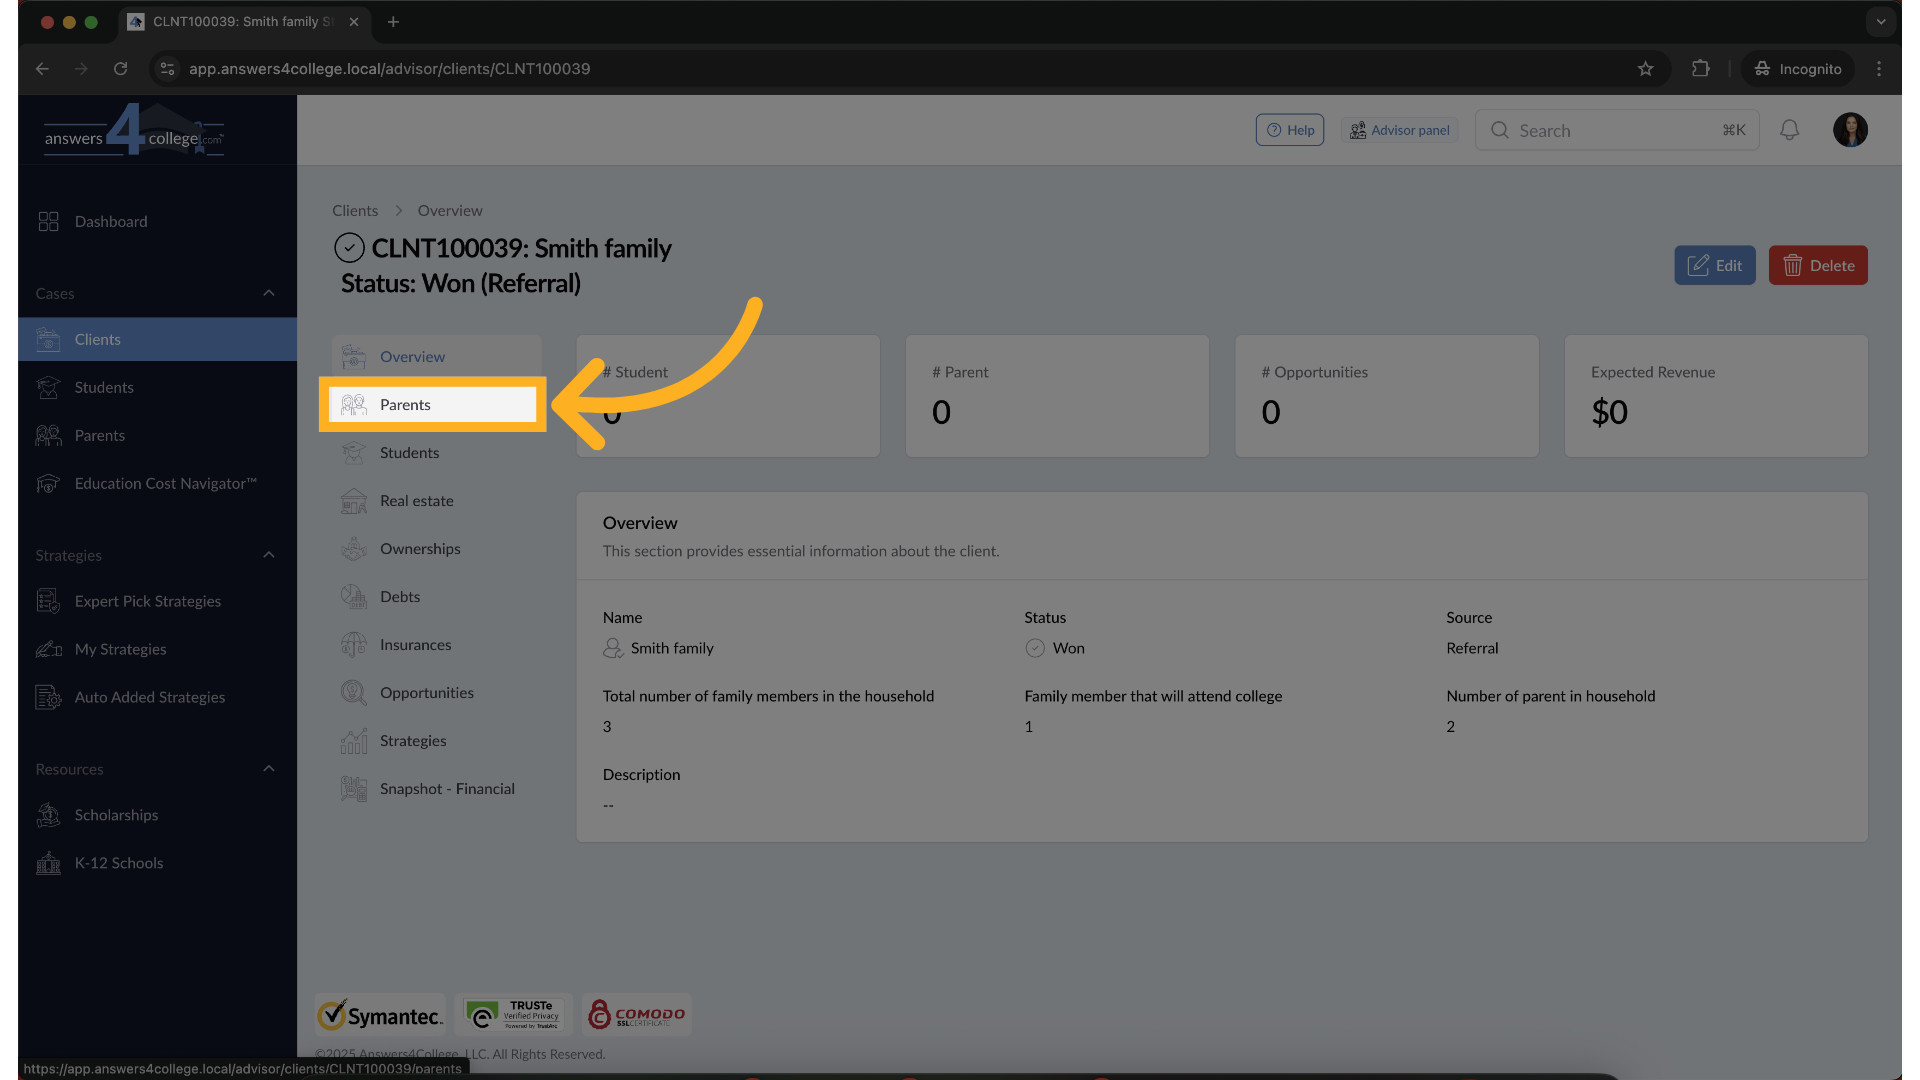
4. Creating a Parent
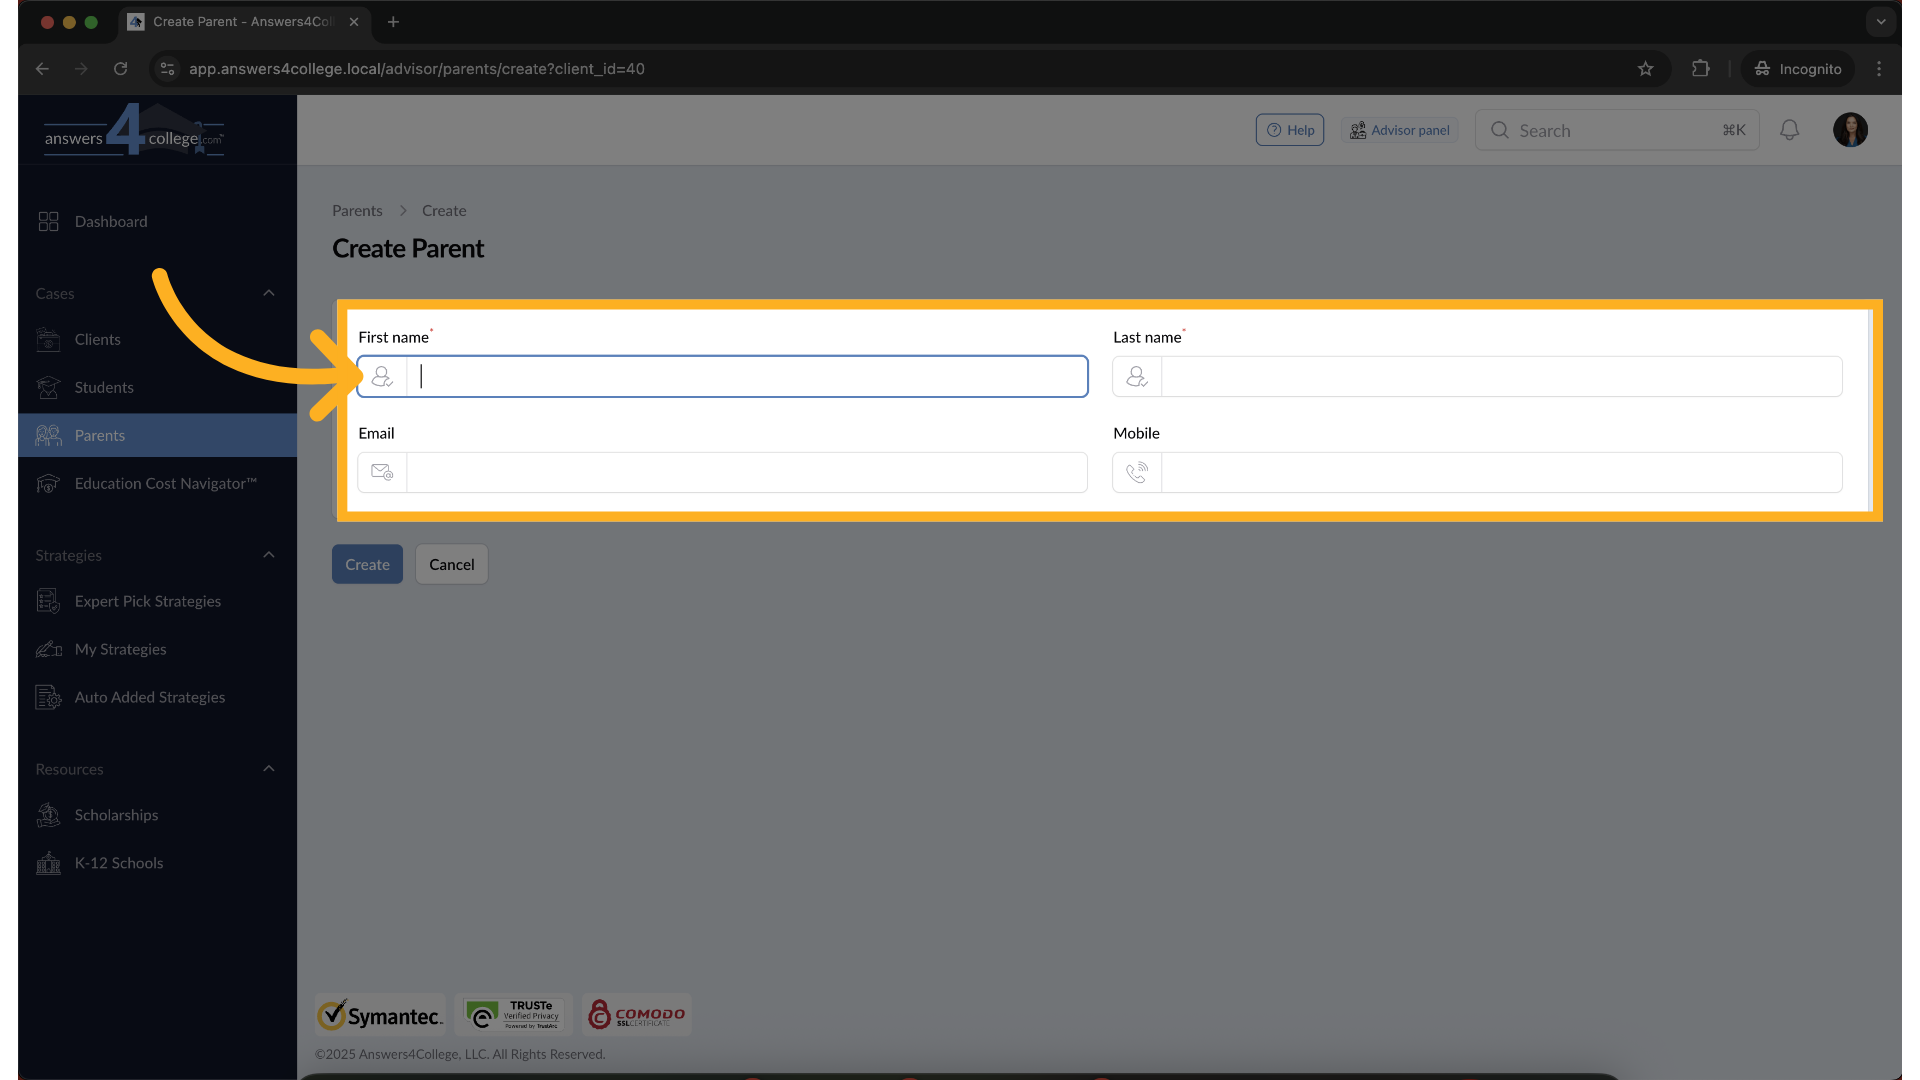
If no parents are currently associated with the client, click Create Parent.
5. Enter details
Fill out the required fields in the form, such as first and last name.
6. Click "Create"
Once the form is complete, click the Create Parent button to save the profile.

7. Redirect to Parent Profile
After creation, you will be redirected to the Parent Overview page where you’ll see a summary of the parent's information.
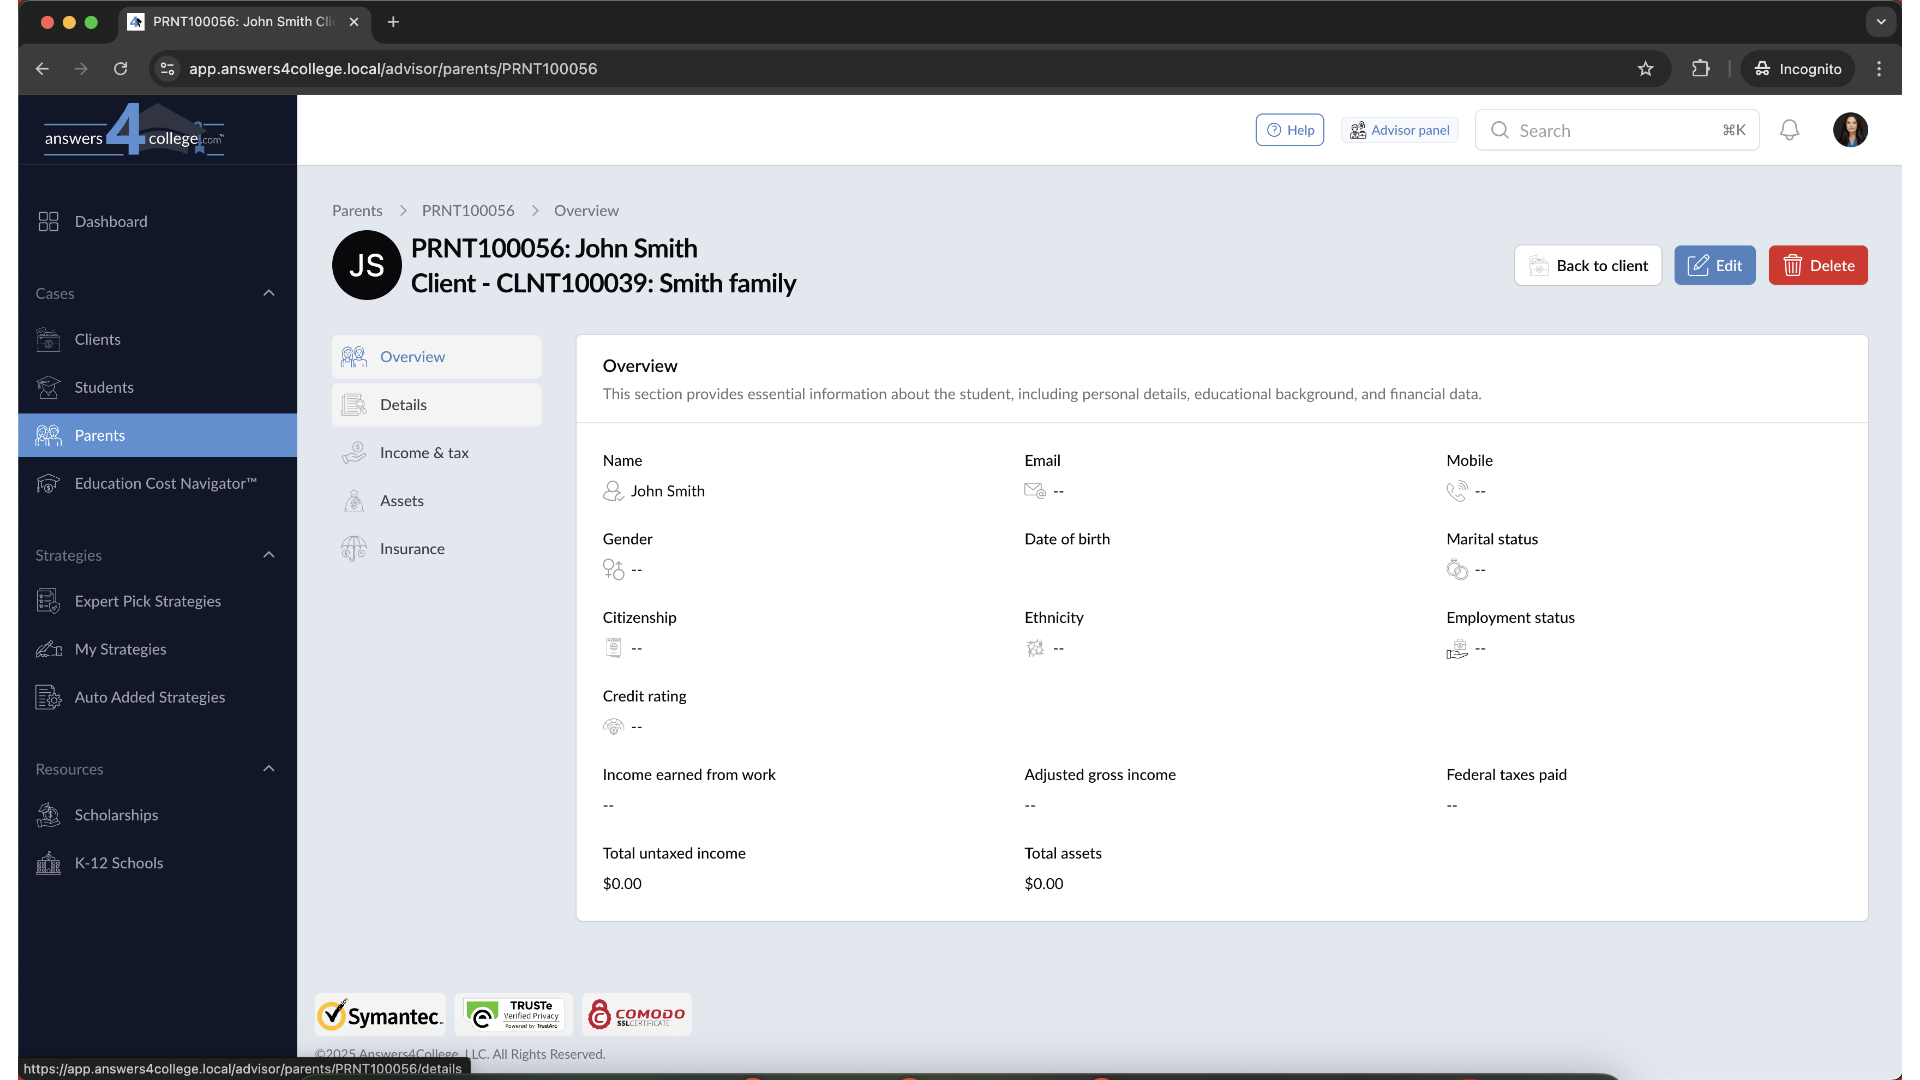
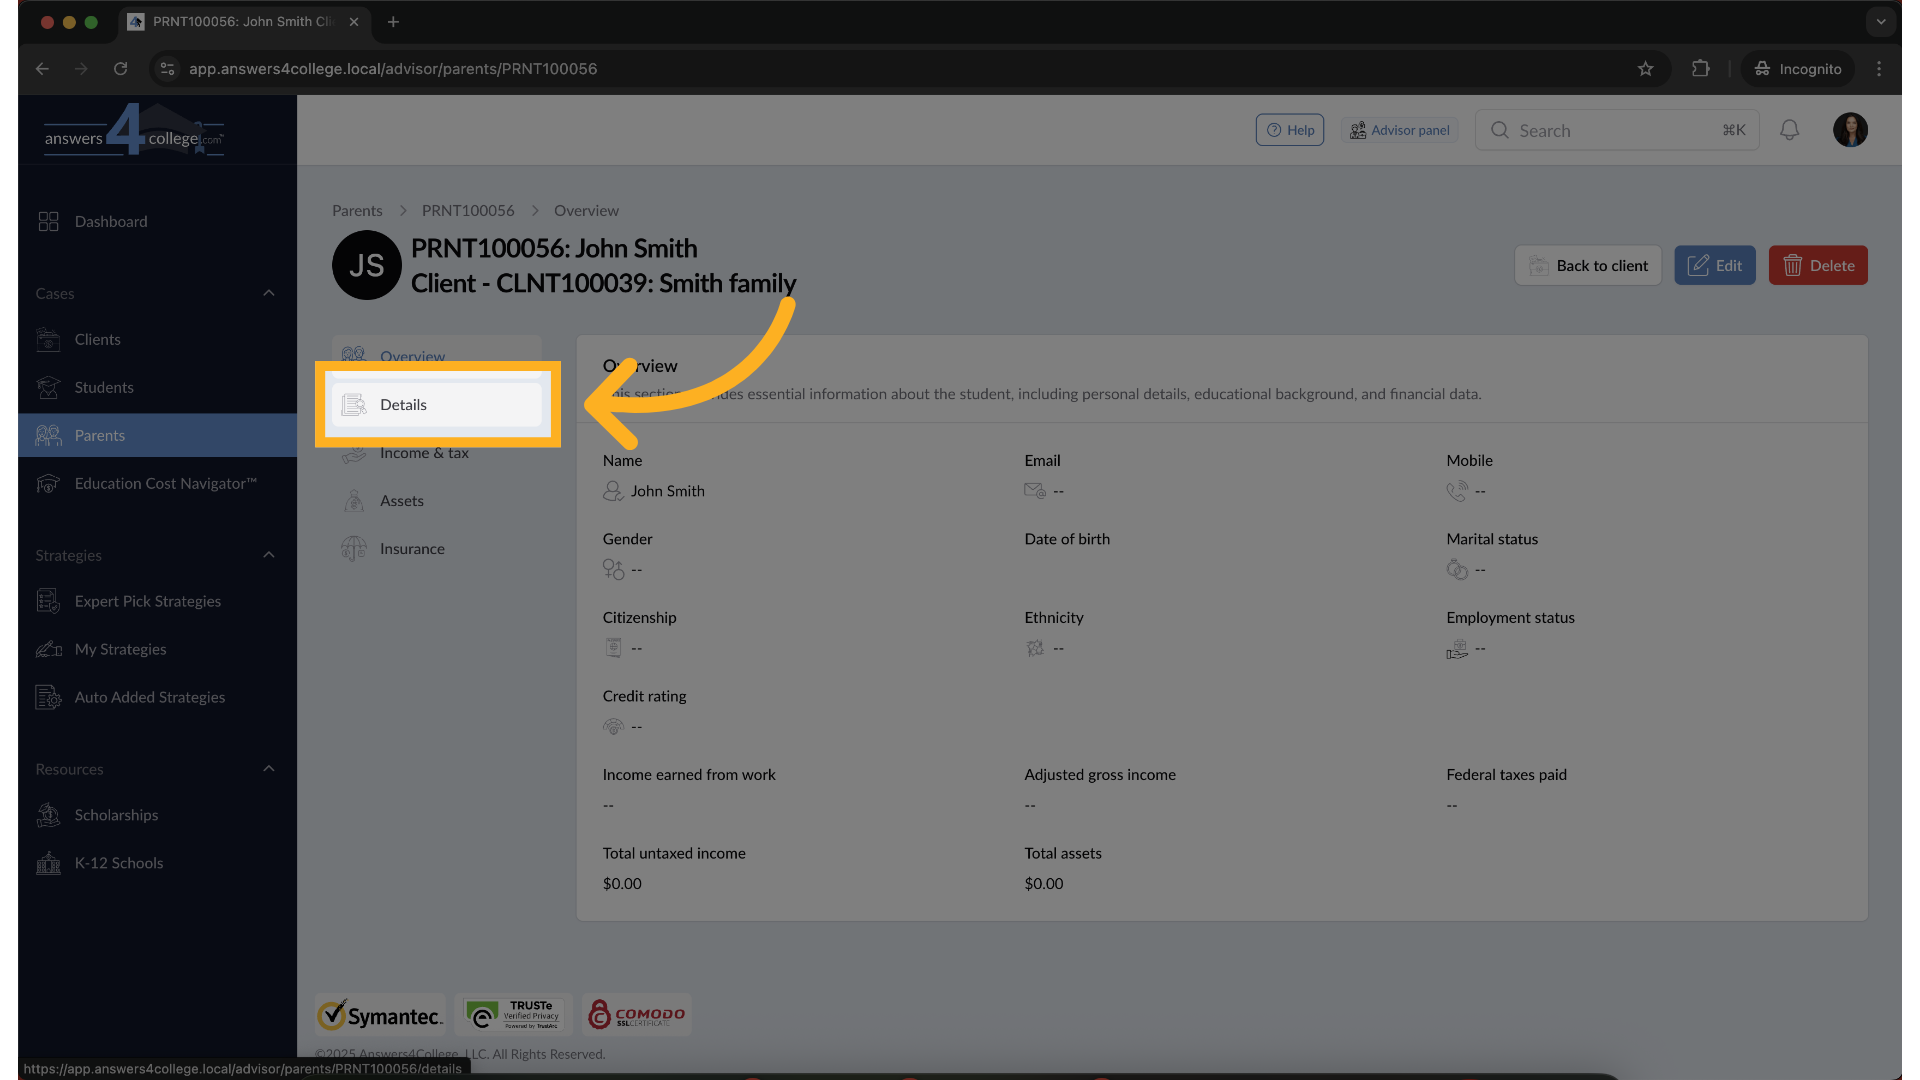
8. View Parent Details
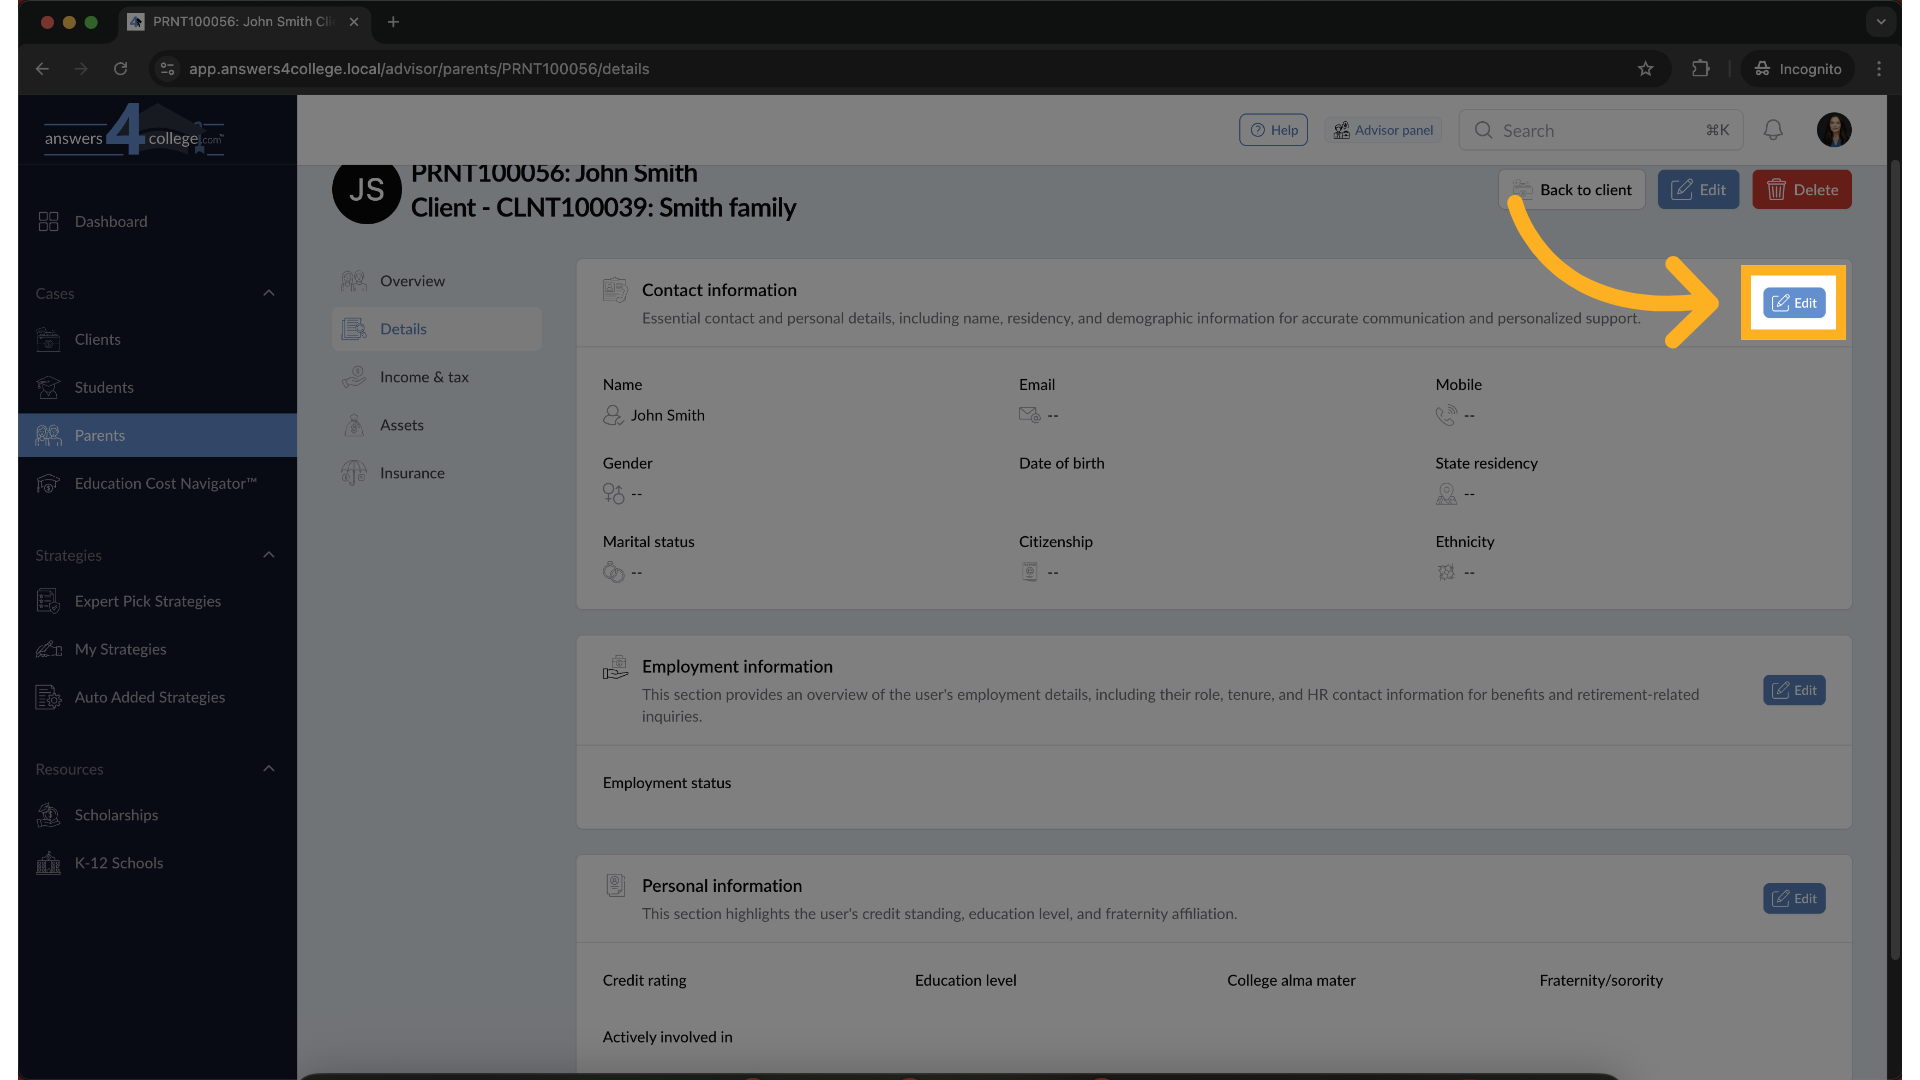
Click on Details from the left-hand menu to view contact, employment, and personal information.
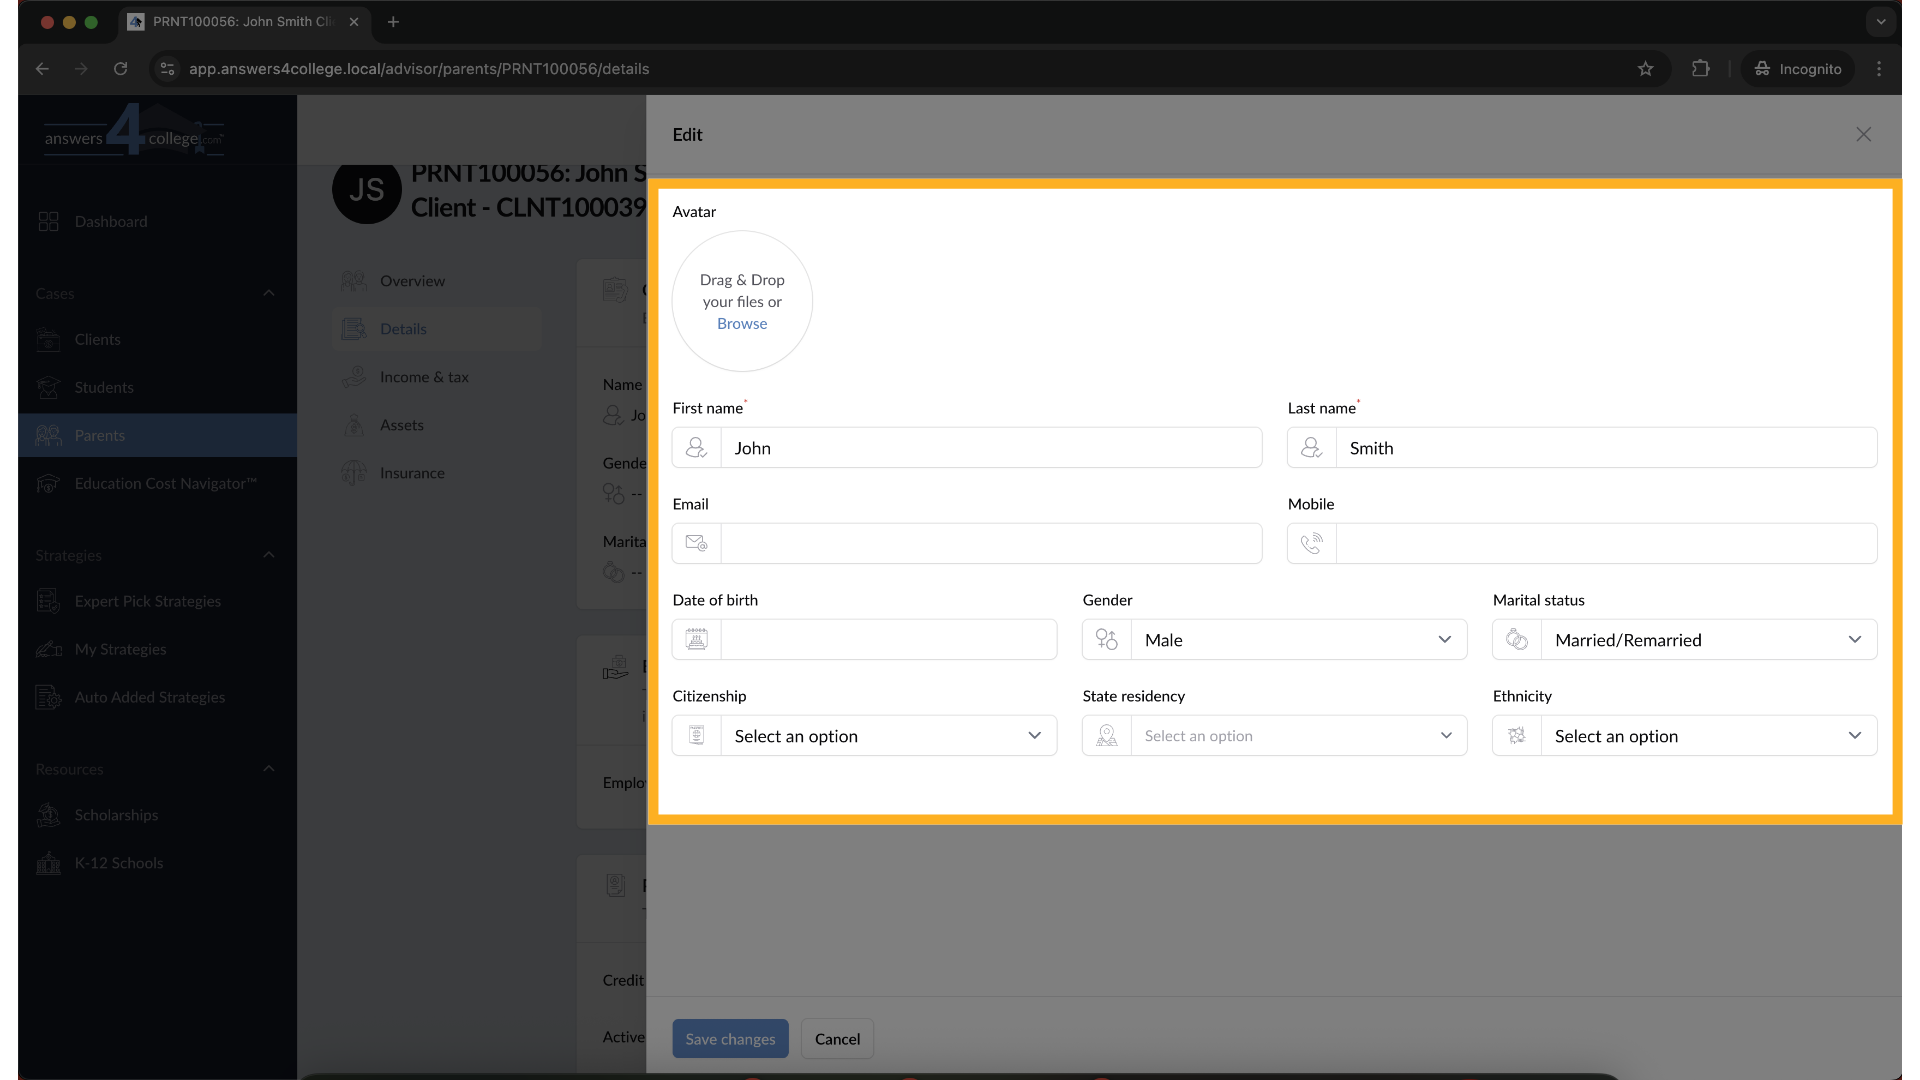
9. Click “Edit” to Update Parent Information
Ready to make changes? Click the Edit button in the Details section. This will open a new page where you can update the parent’s profile.
10. Make the Necessary Changes
Update any information—whether it's contact details, employment, or personal data. Tooltips may appear to help clarify certain fields as you type.
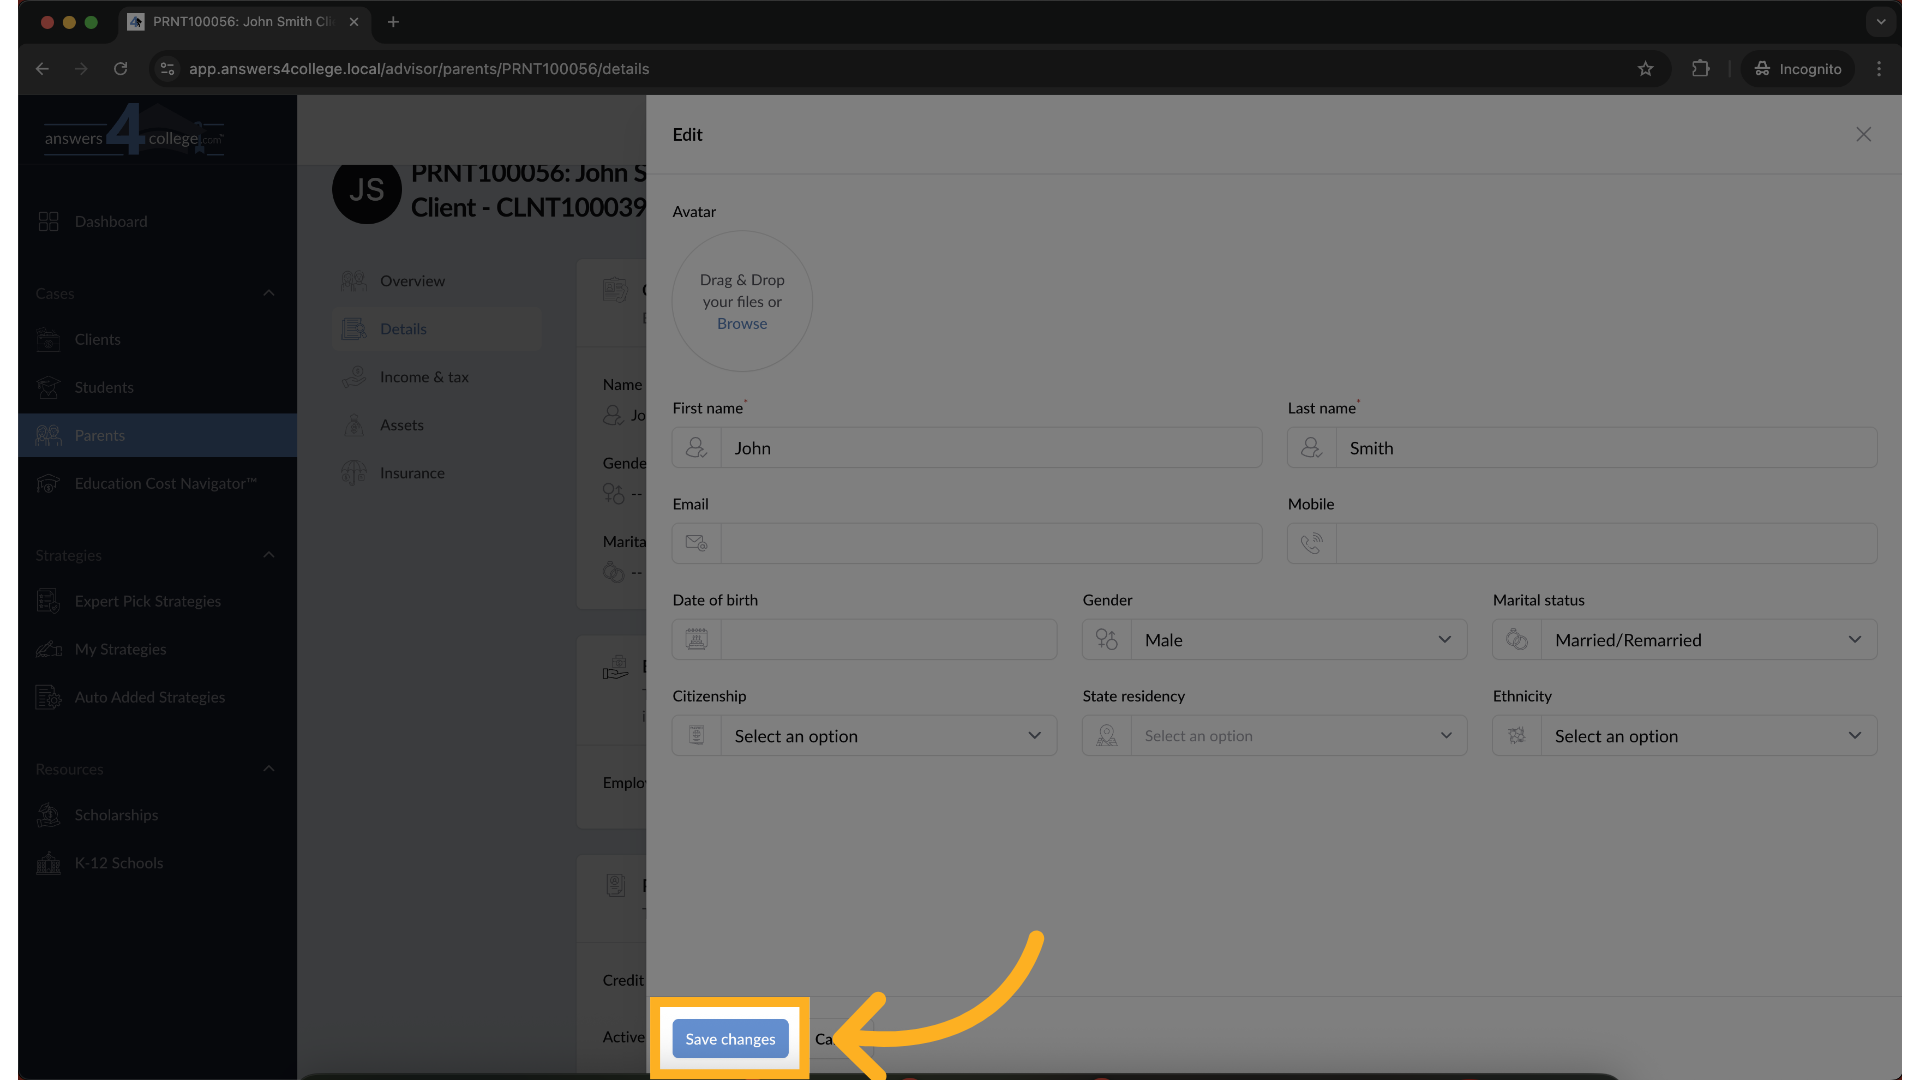
11. Save Your Changes
Once you’ve reviewed and filled in everything, click Save Changes to update the profile. You’ll be taken back to the overview, and your edits will be applied instantly.
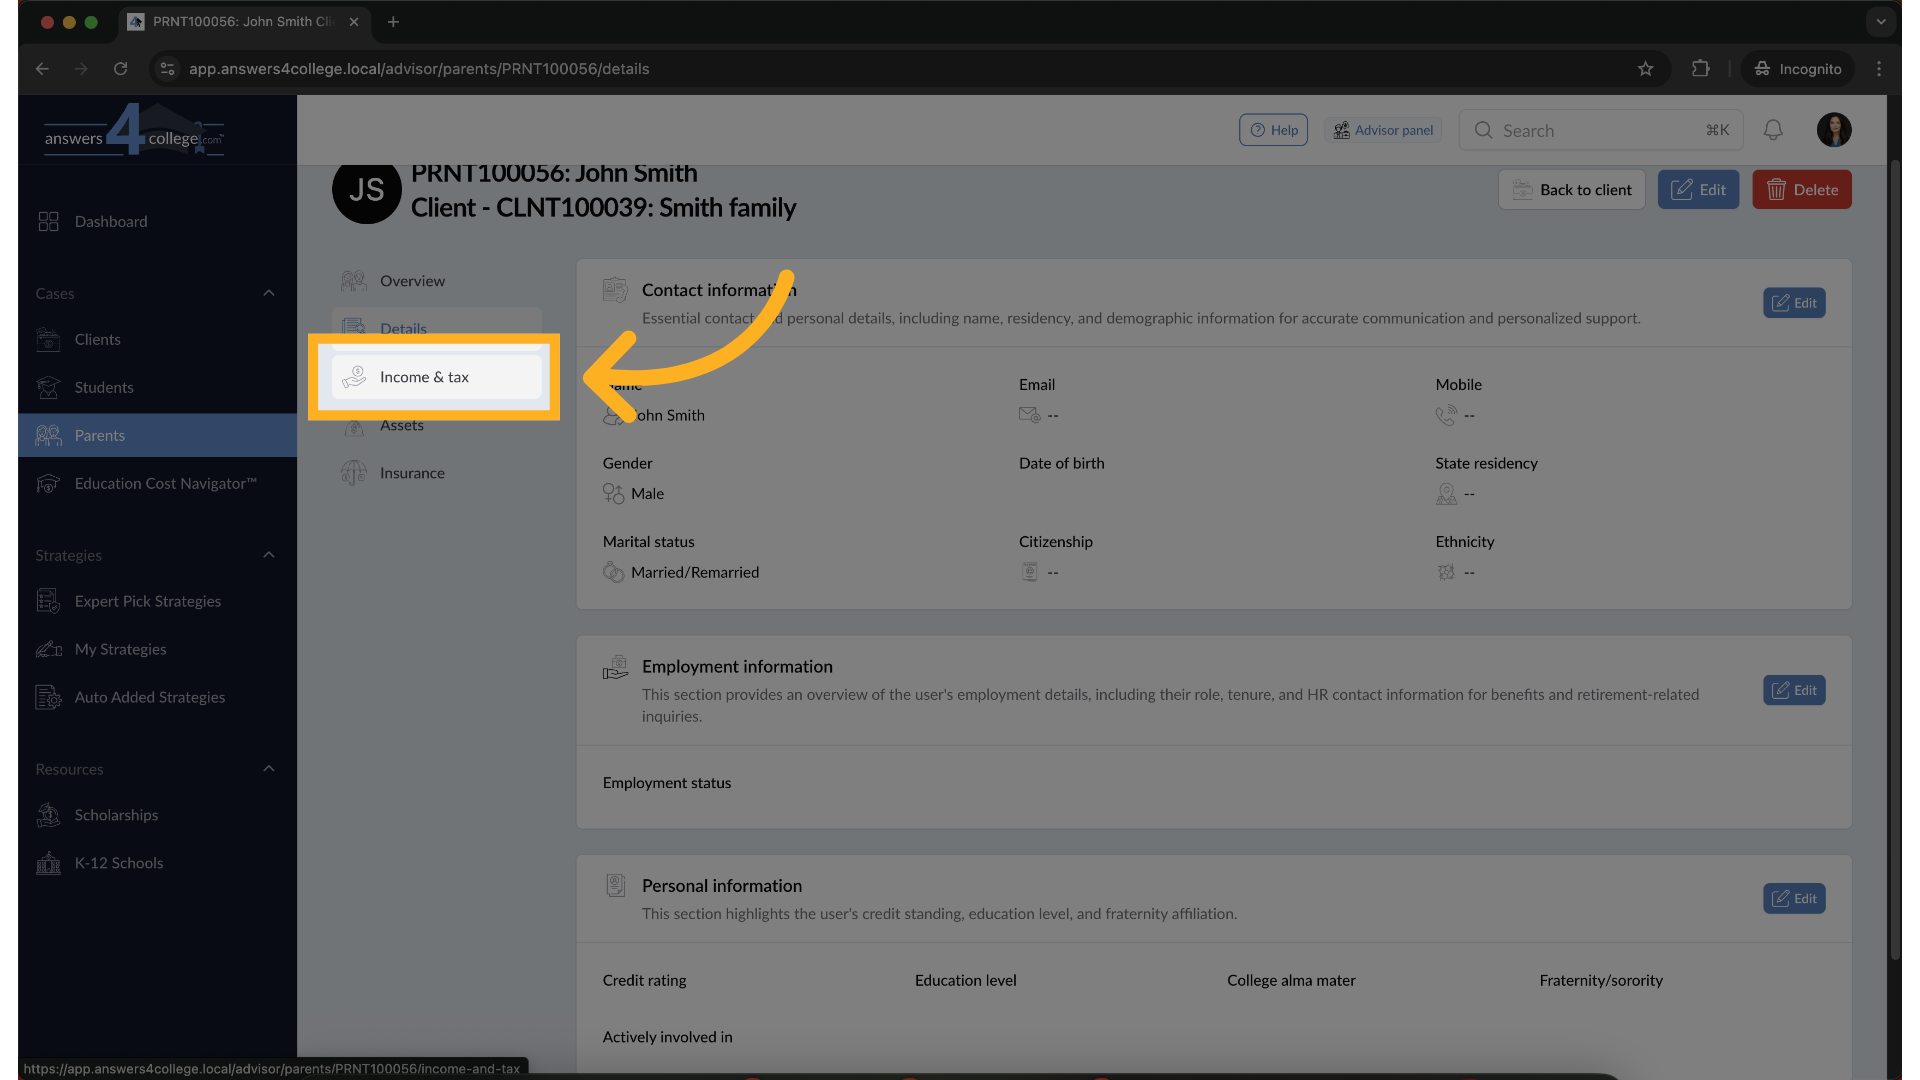
12. Navigate to the Income & Tax Section
From the parent profile menu on the left, click on Income & Tax to view all income-related fields, including earned income, taxes paid, and untaxed income.
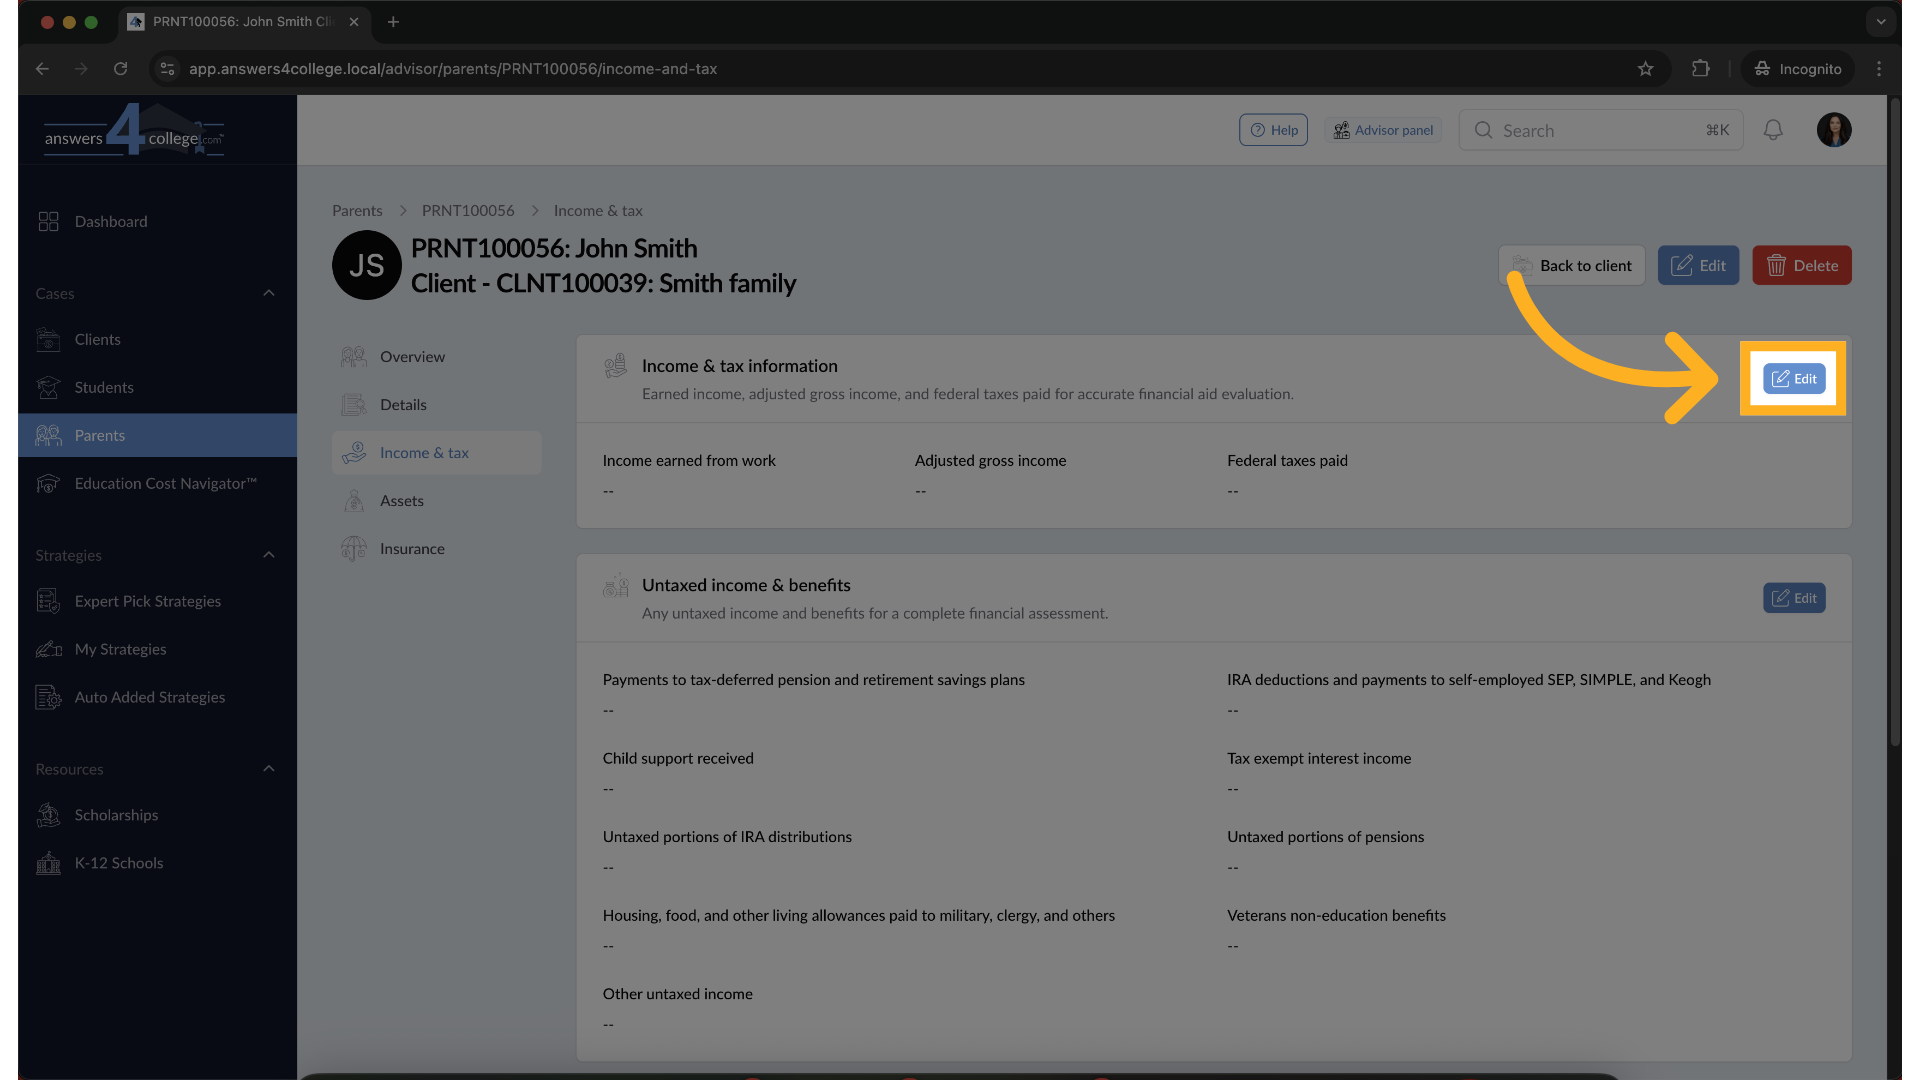
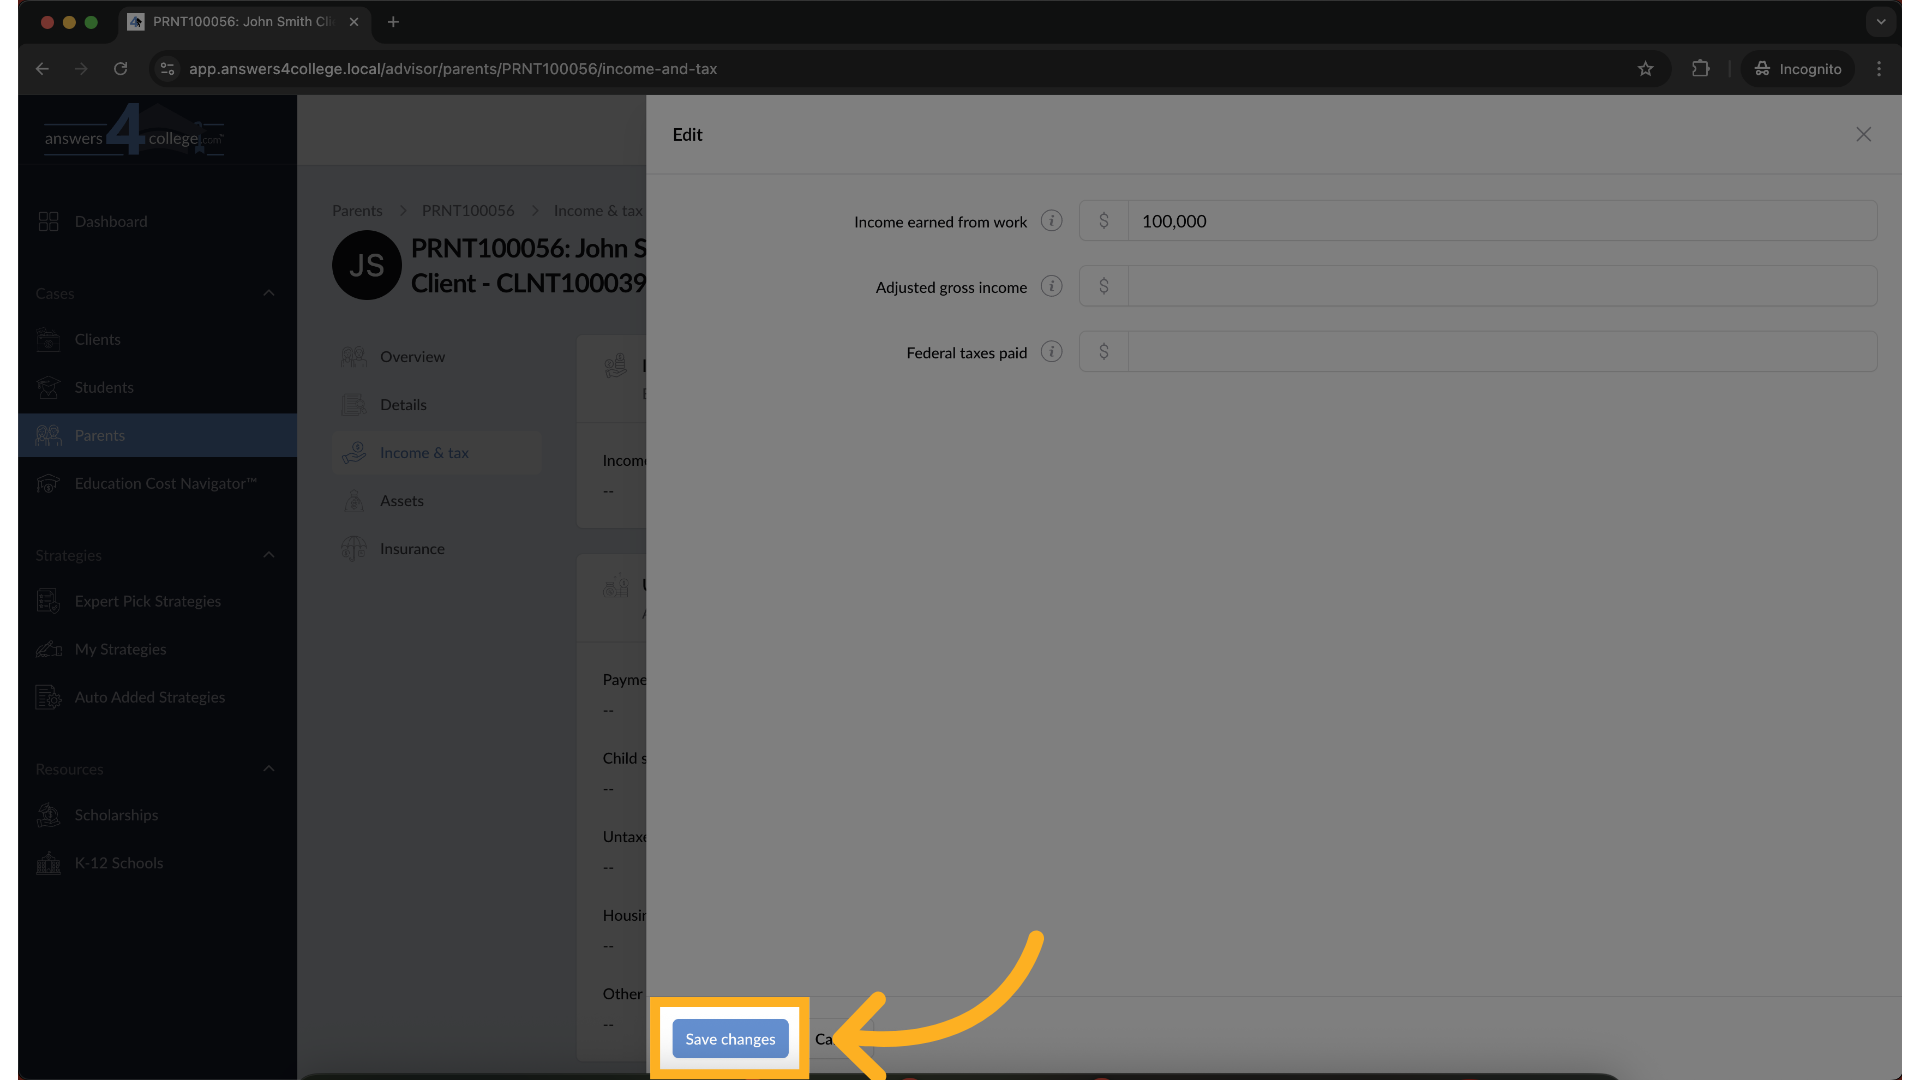
13. Edit Income & Tax Details
Click the Edit button to start updating income information. Each field includes tooltips or descriptions to guide you—like Federal Tax Paid, which refers to IRS Form 1040, Line 22.
14. Save Changes
Once you've entered or updated the necessary values, click Save to apply the changes. Your updates will now be reflected in the parent profile.
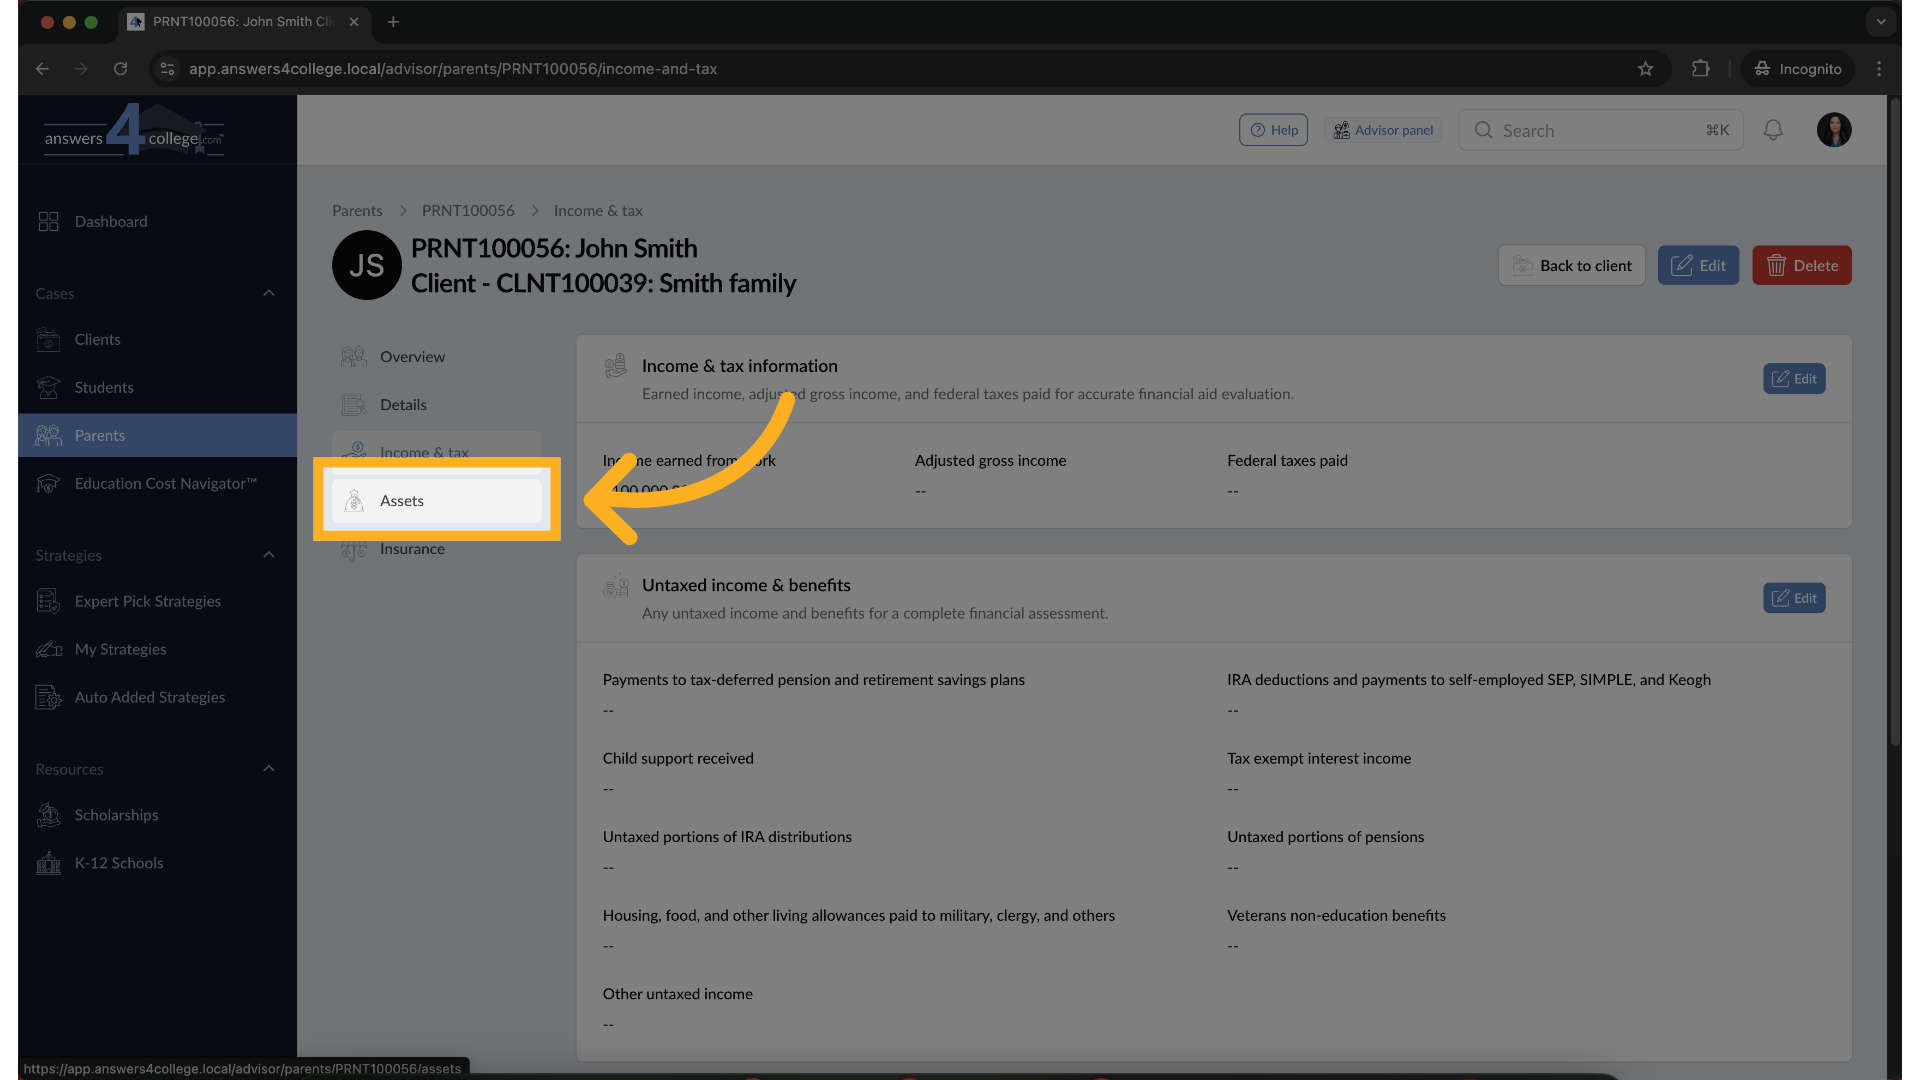
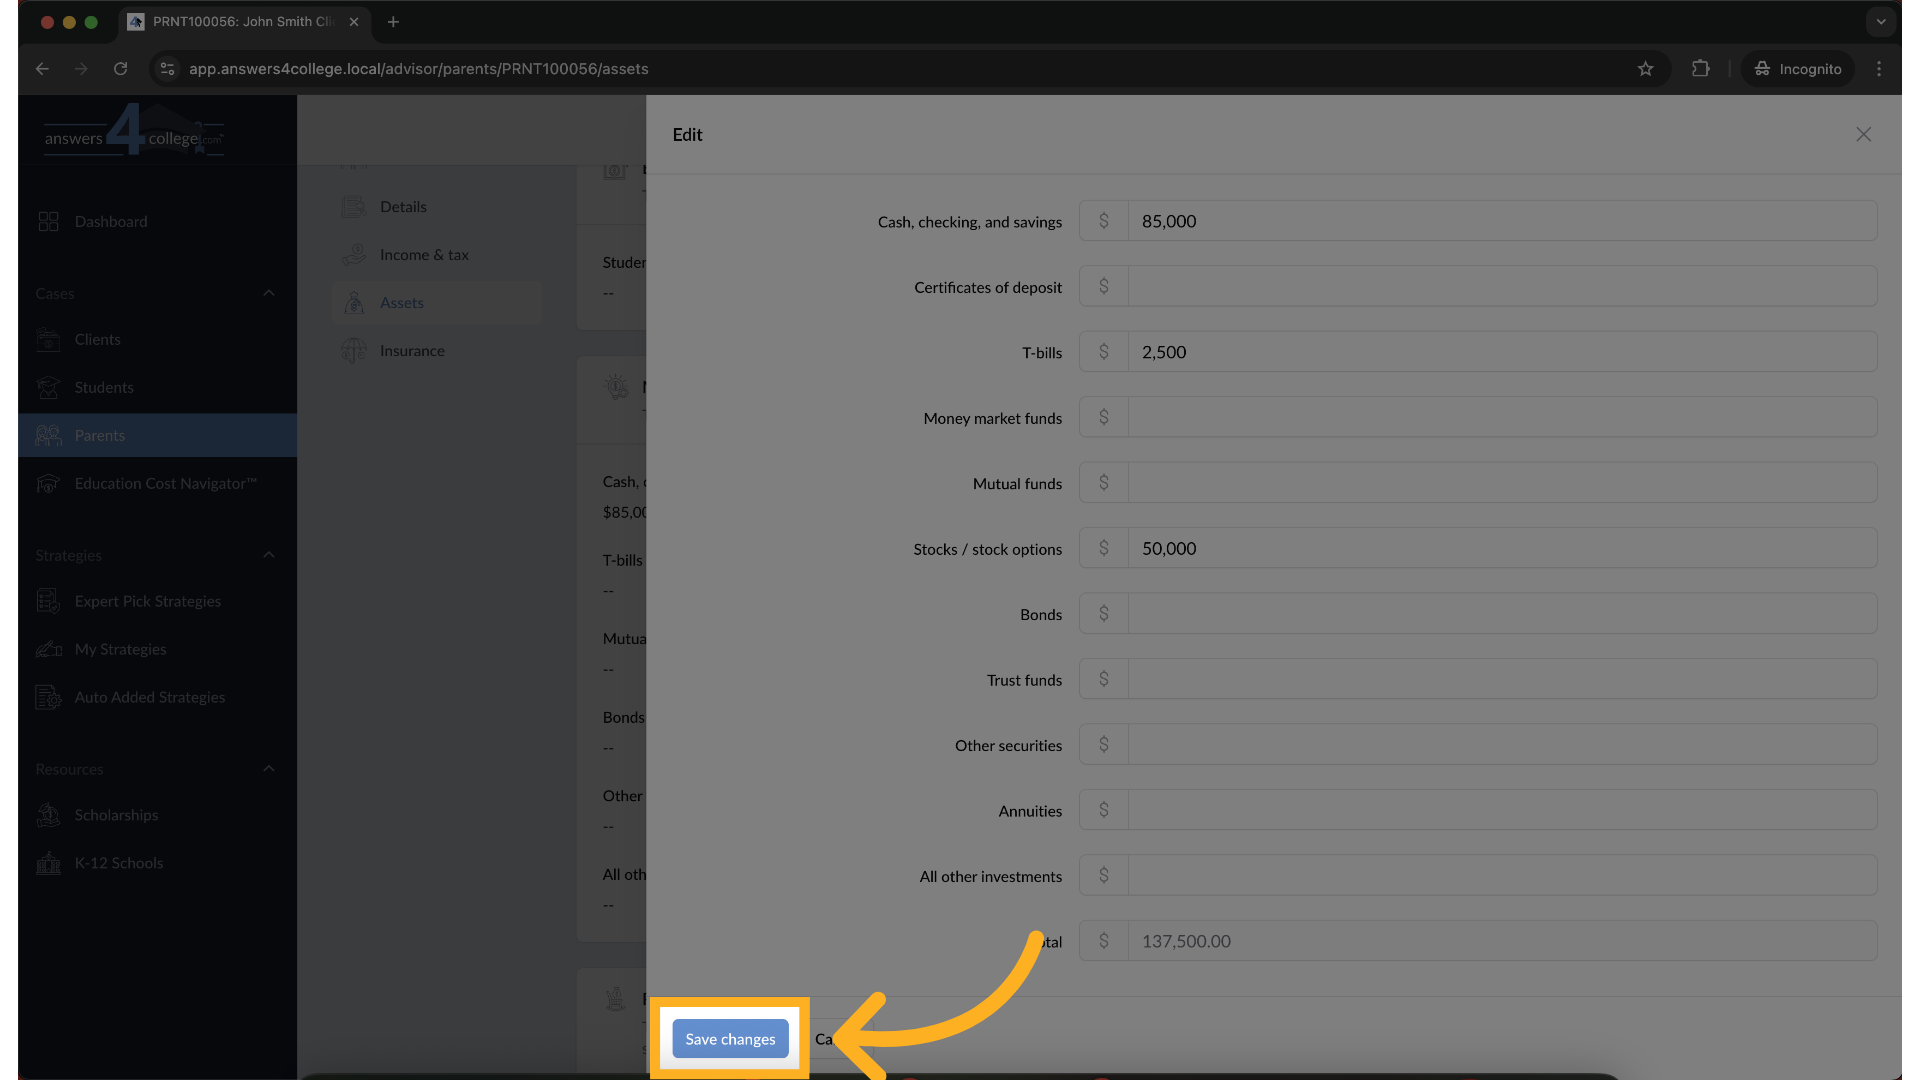
15. Navigate to the Assets Section
From the parent profile menu on the left, click on Assets to view the parent’s financial asset information, including savings, investments, and other holdings.
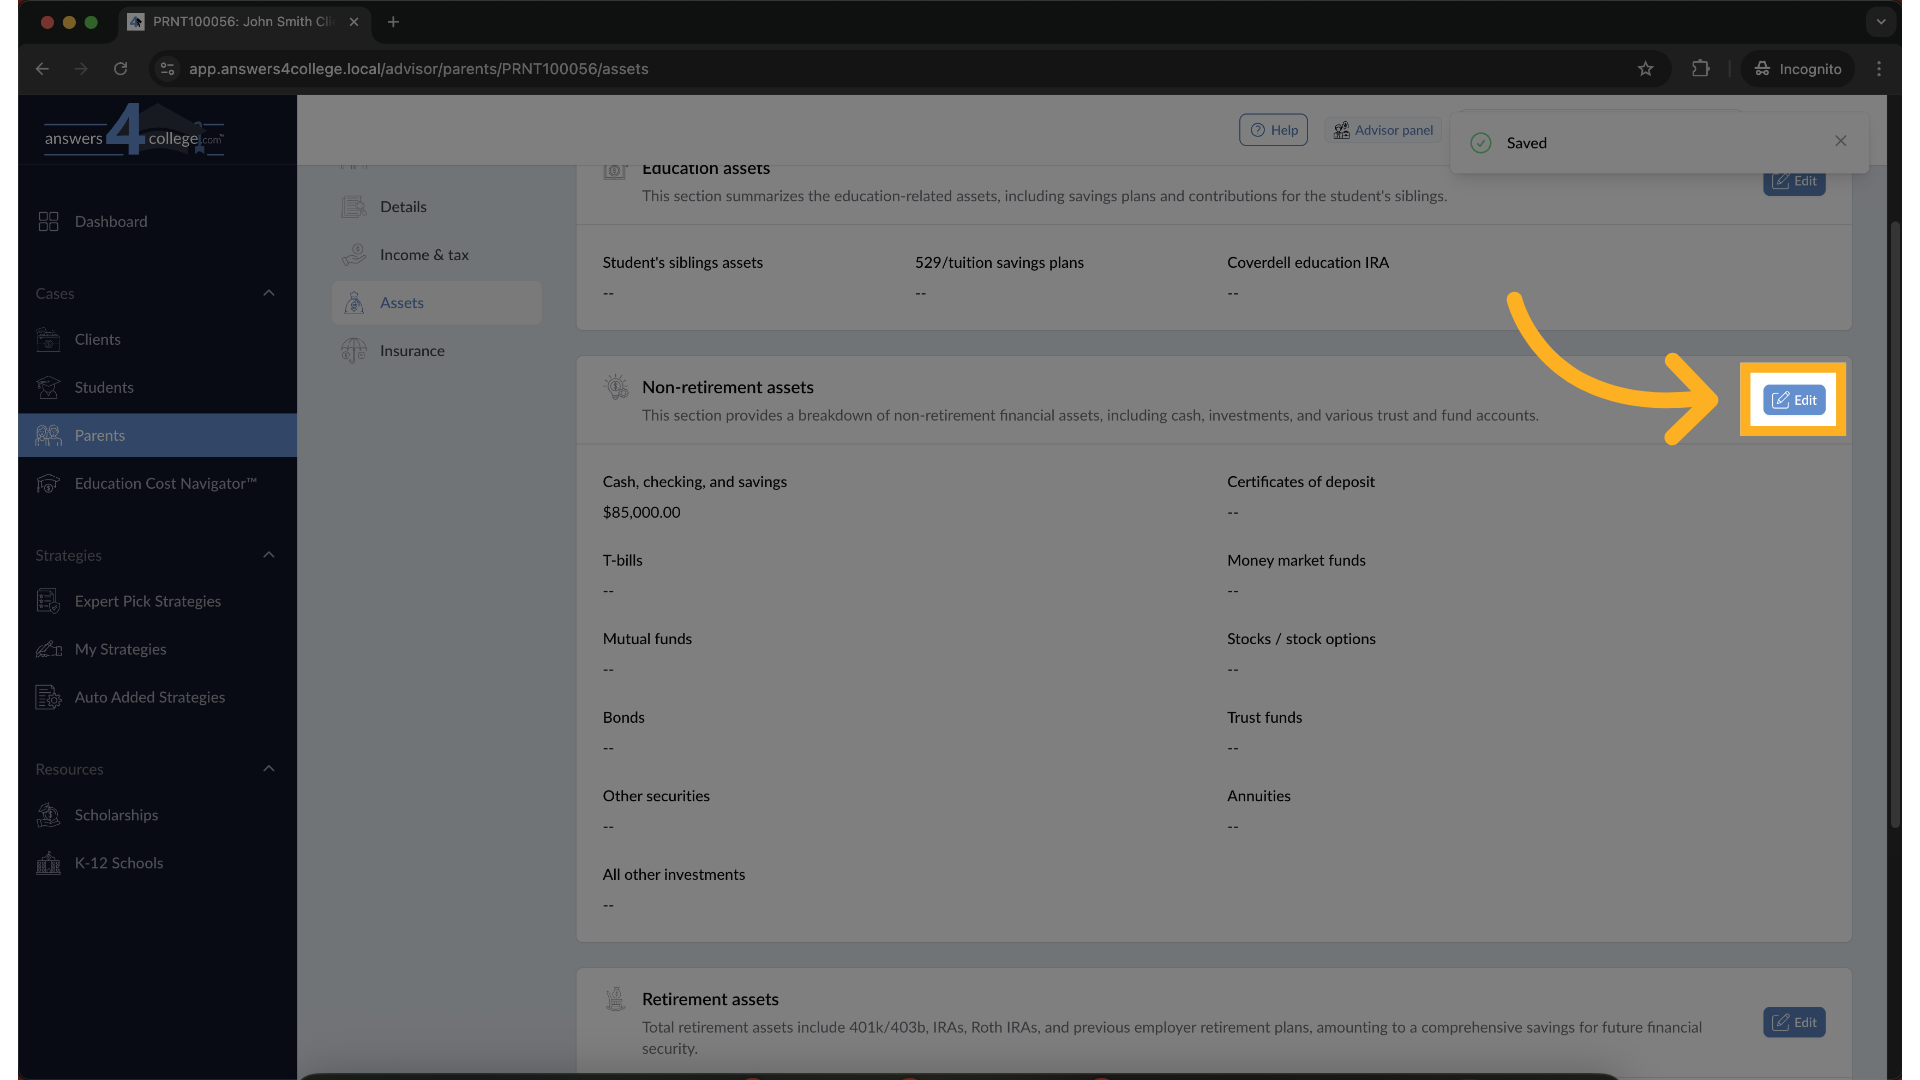
16. Click Edit to Update Asset Details
Click the Edit button to begin updating the asset values. You can enter details for each type of asset—like bank accounts, T-bills, or investment funds.
17. Enter Asset Values
Fill in the values for each asset type. At the bottom of the page, you’ll see a running total of all assets.
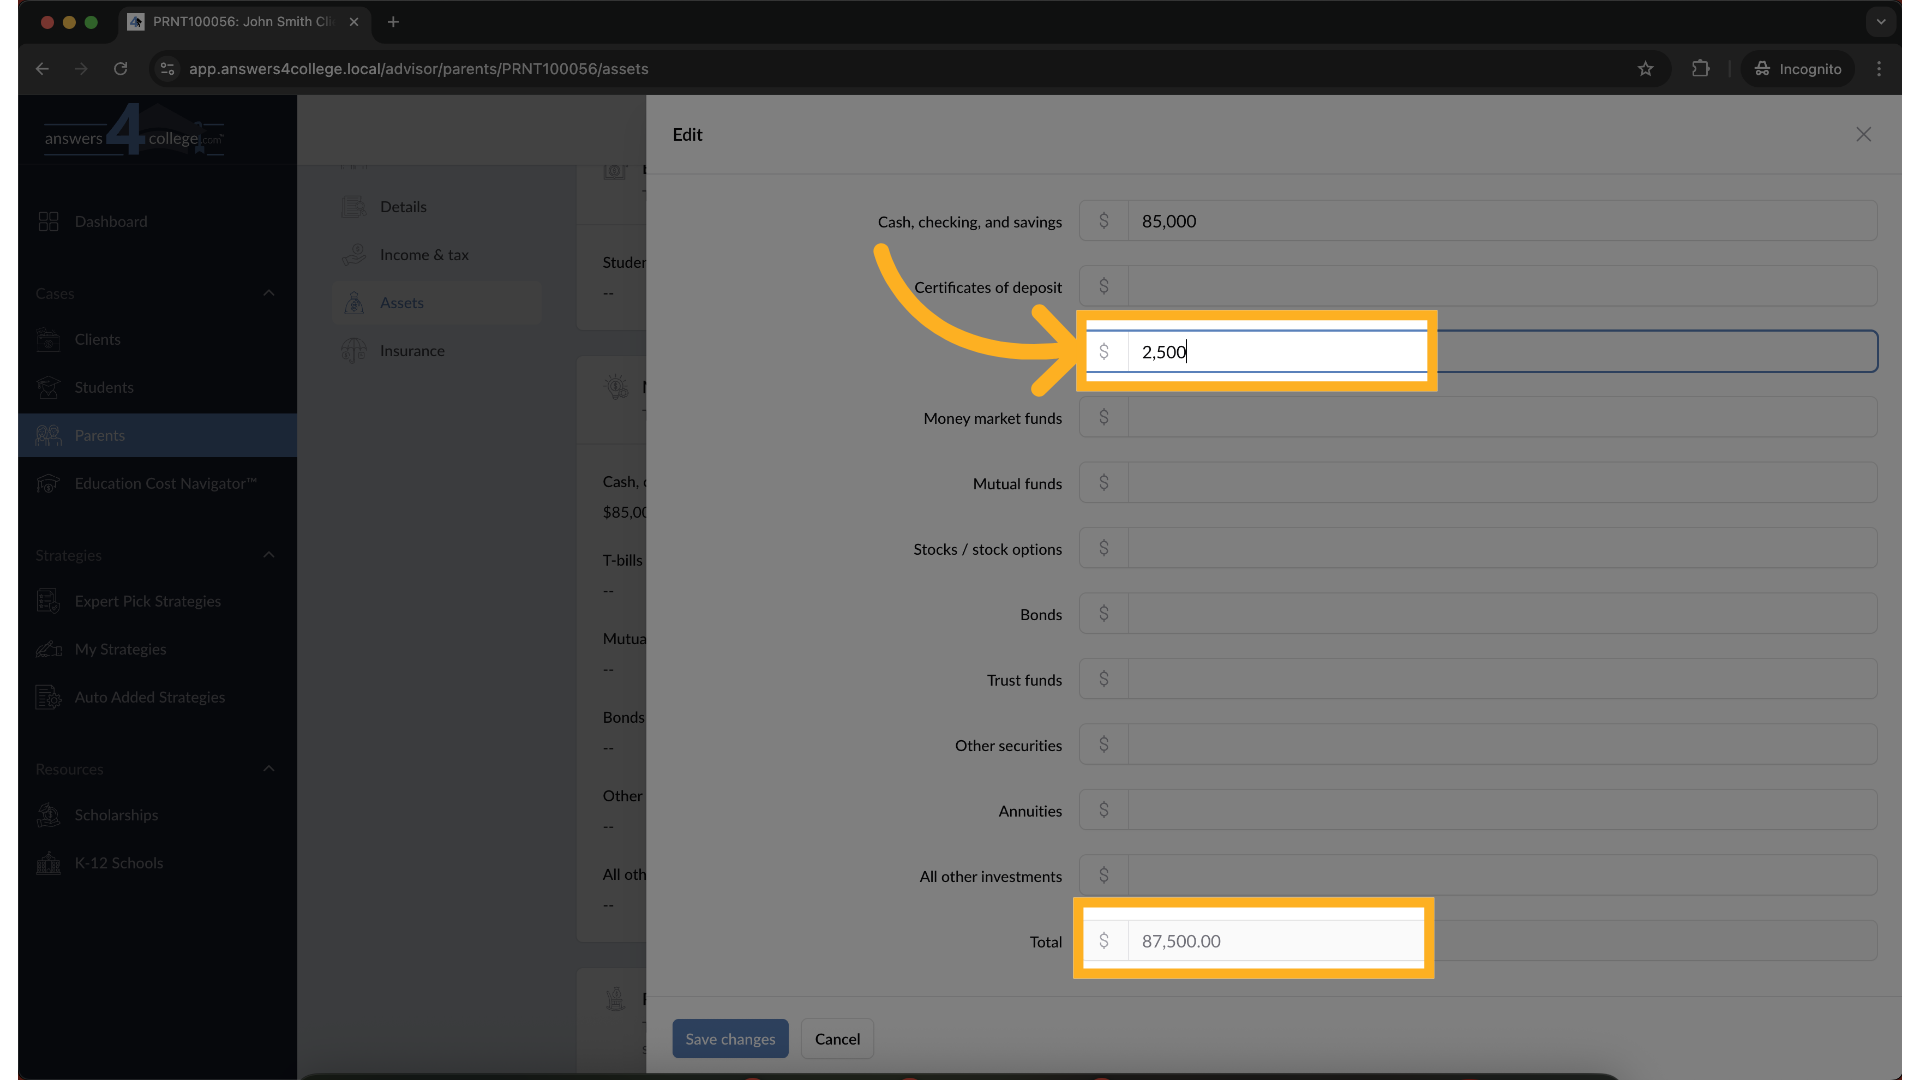
18. Click "Save changes"
Once you're done, click Save to apply the changes.
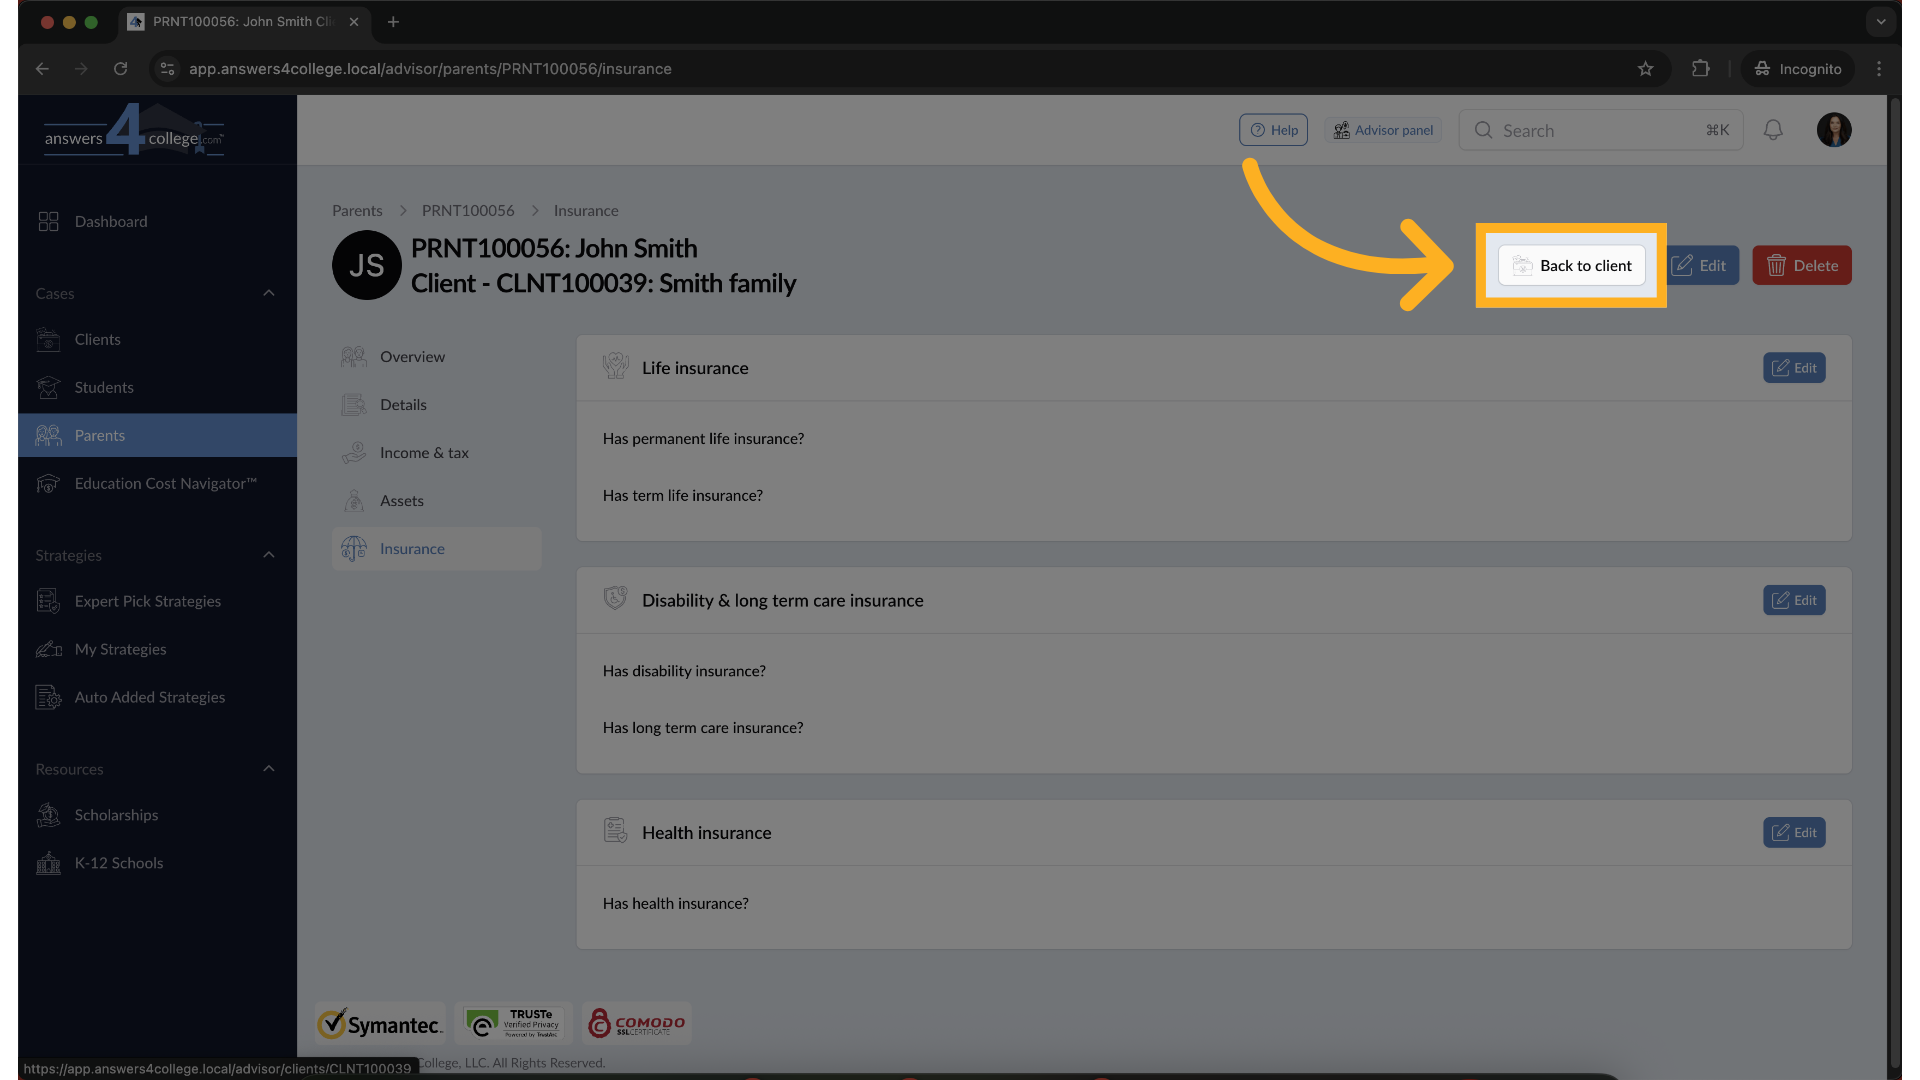
19. Return to the Main Client Page
Once you’ve finished updating the parent’s information, click Back to Client in the top right corner to return to the client’s overview page.
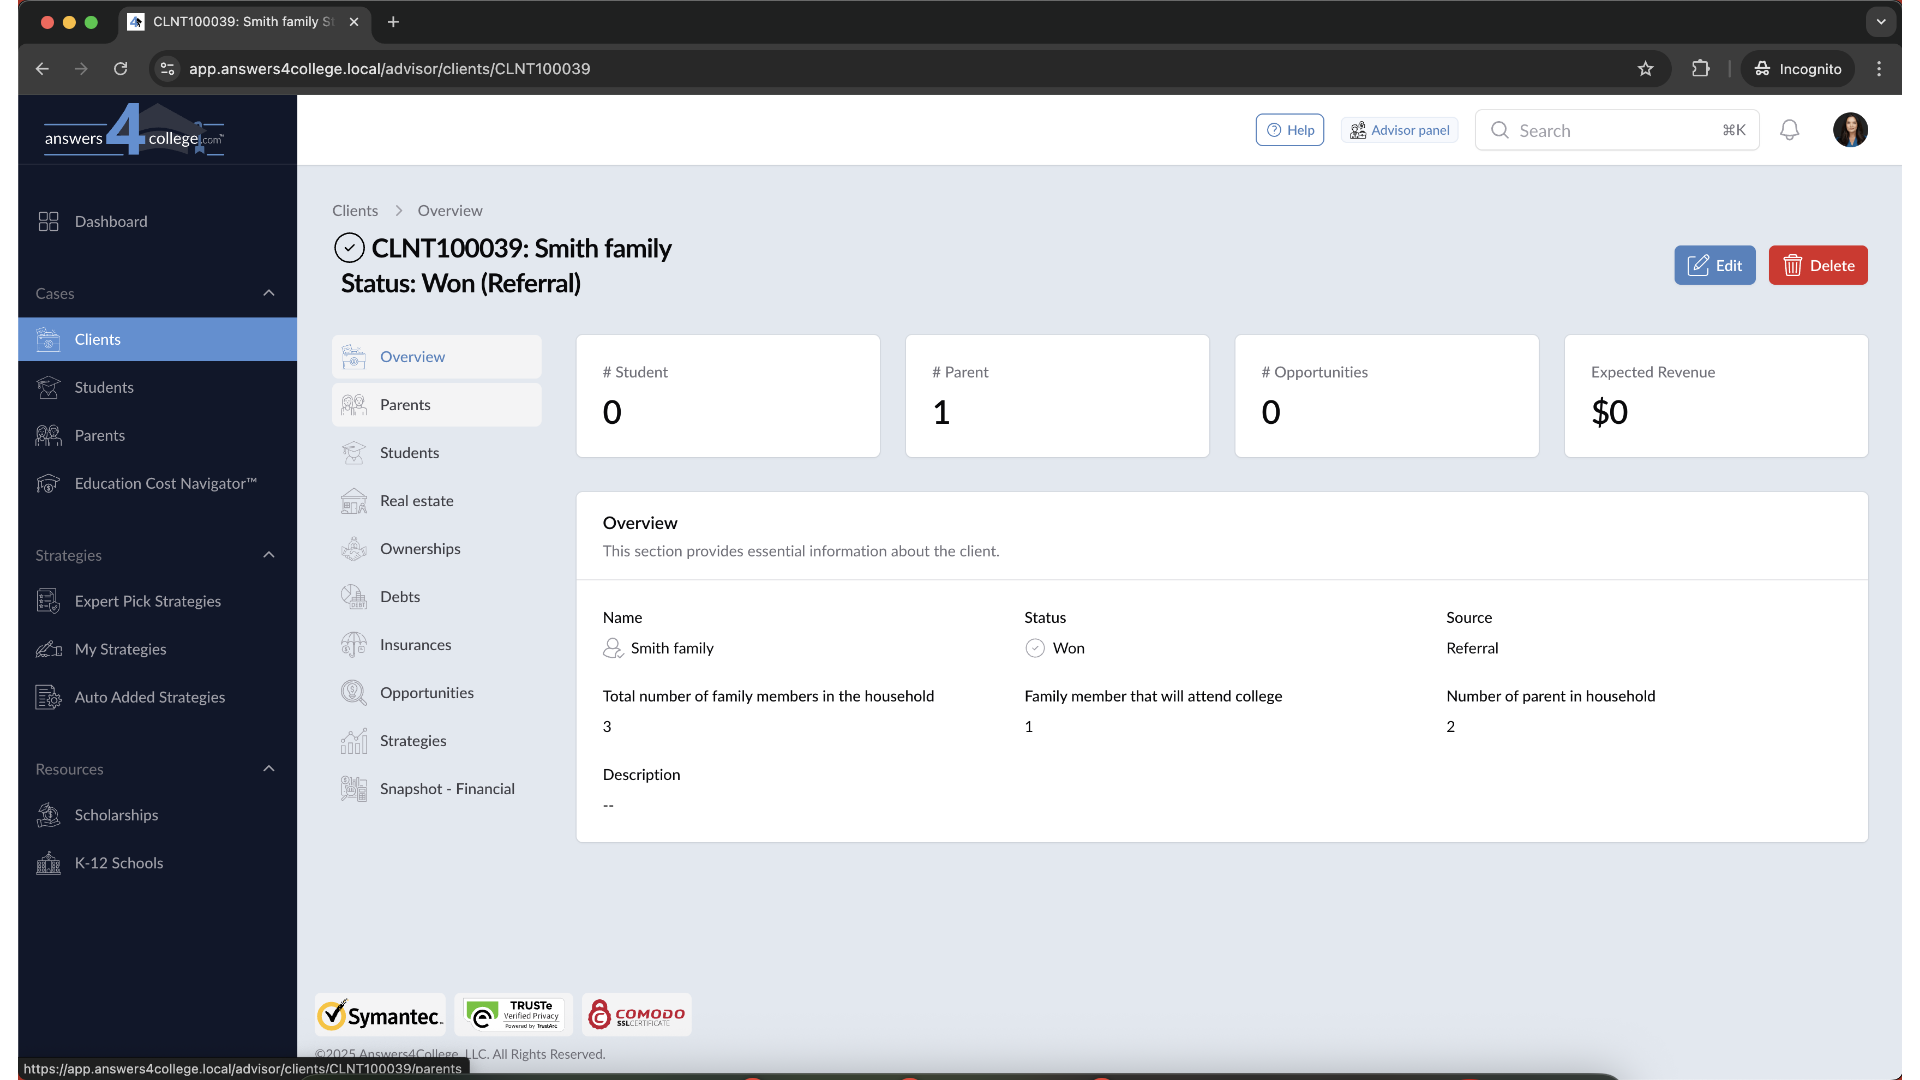
20. Review Updated Client Summary
You’ll now see a summary showing the client’s current status, including the number of parents linked, any added students, and other relevant details.
The guide covered a comprehensive walkthrough of managing parent profiles in the Parent Management application. From creating new profiles to editing details and updating information, the instructions provided ensure a seamless process for employee training.
Comments
0 comments
Please sign in to leave a comment.