Welcome! In this tutorial, we’ll guide you step-by-step on how to manage
student
profiles for your clients using the Student Management feature in the Answers
for College Advisor Portal.
1. Log in
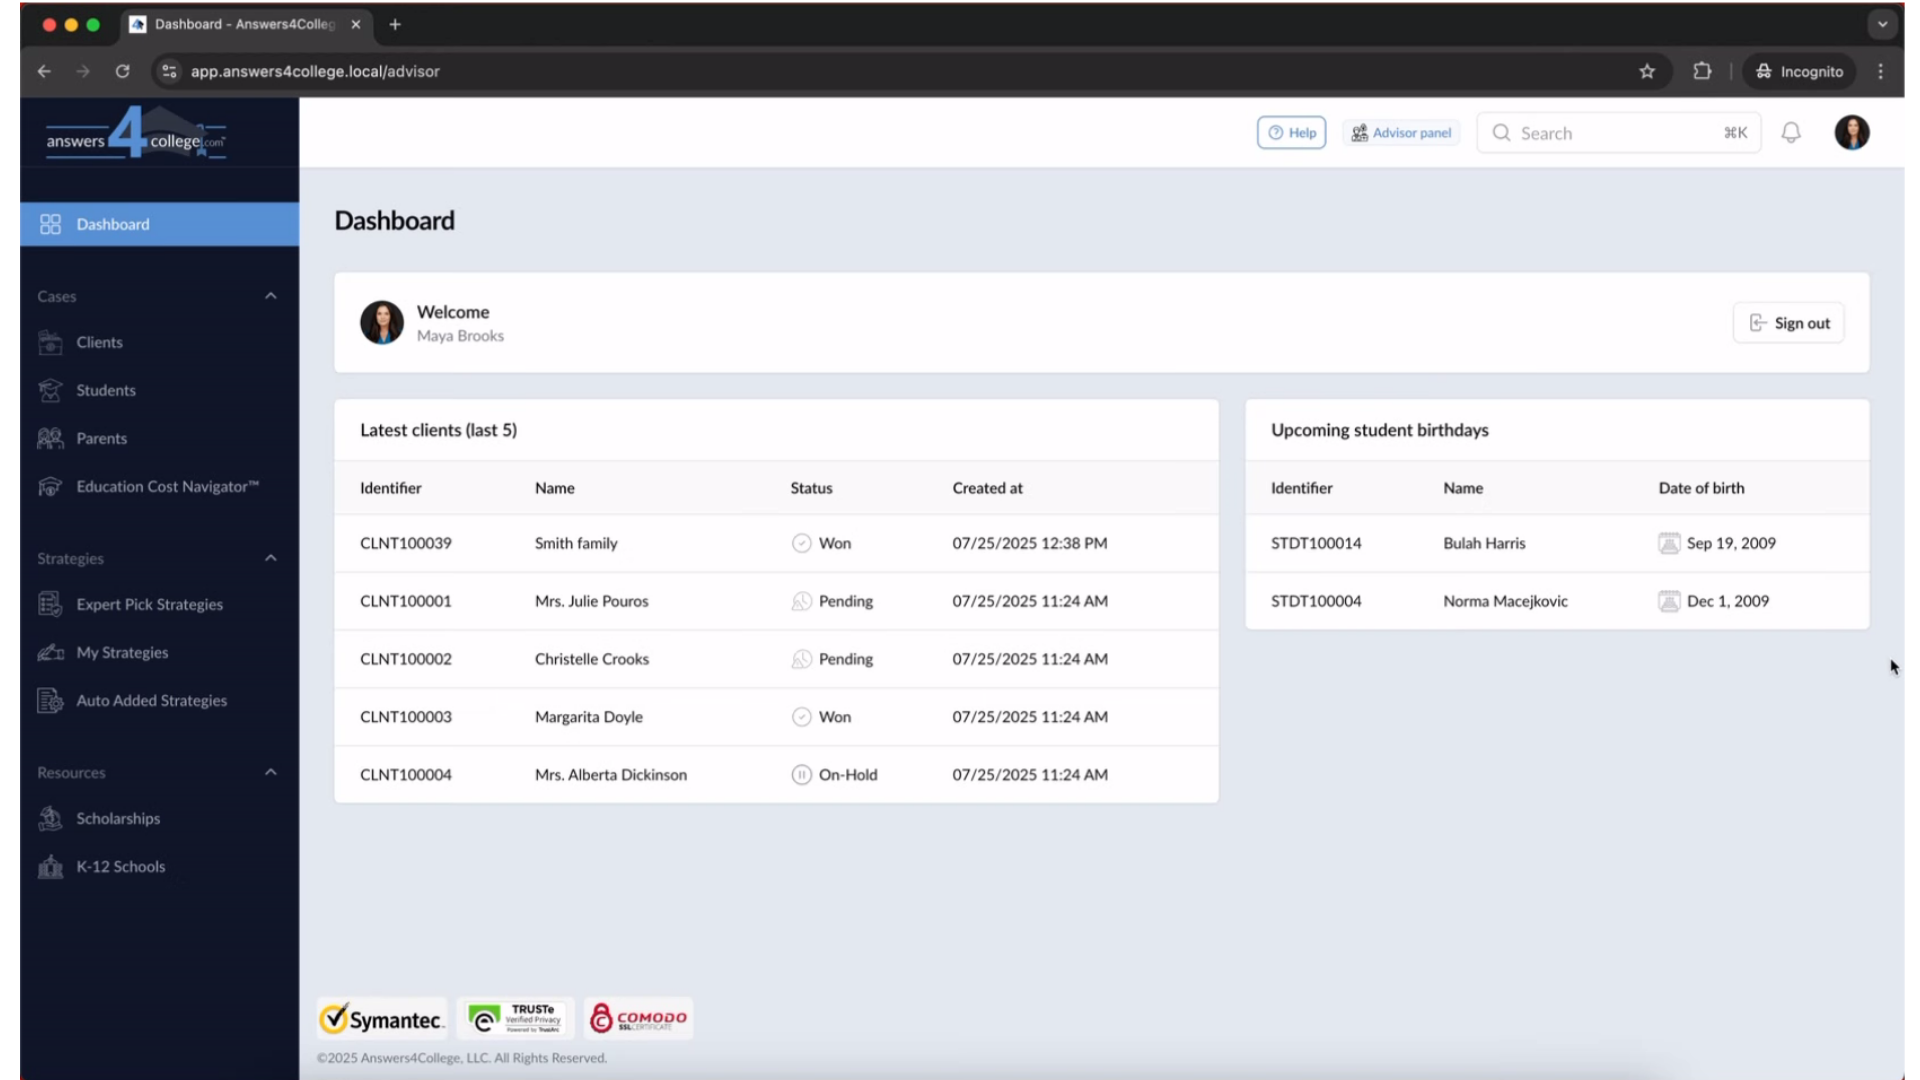
Let’s get started! First, log into your Advisor Portal.
2. Head to Clients
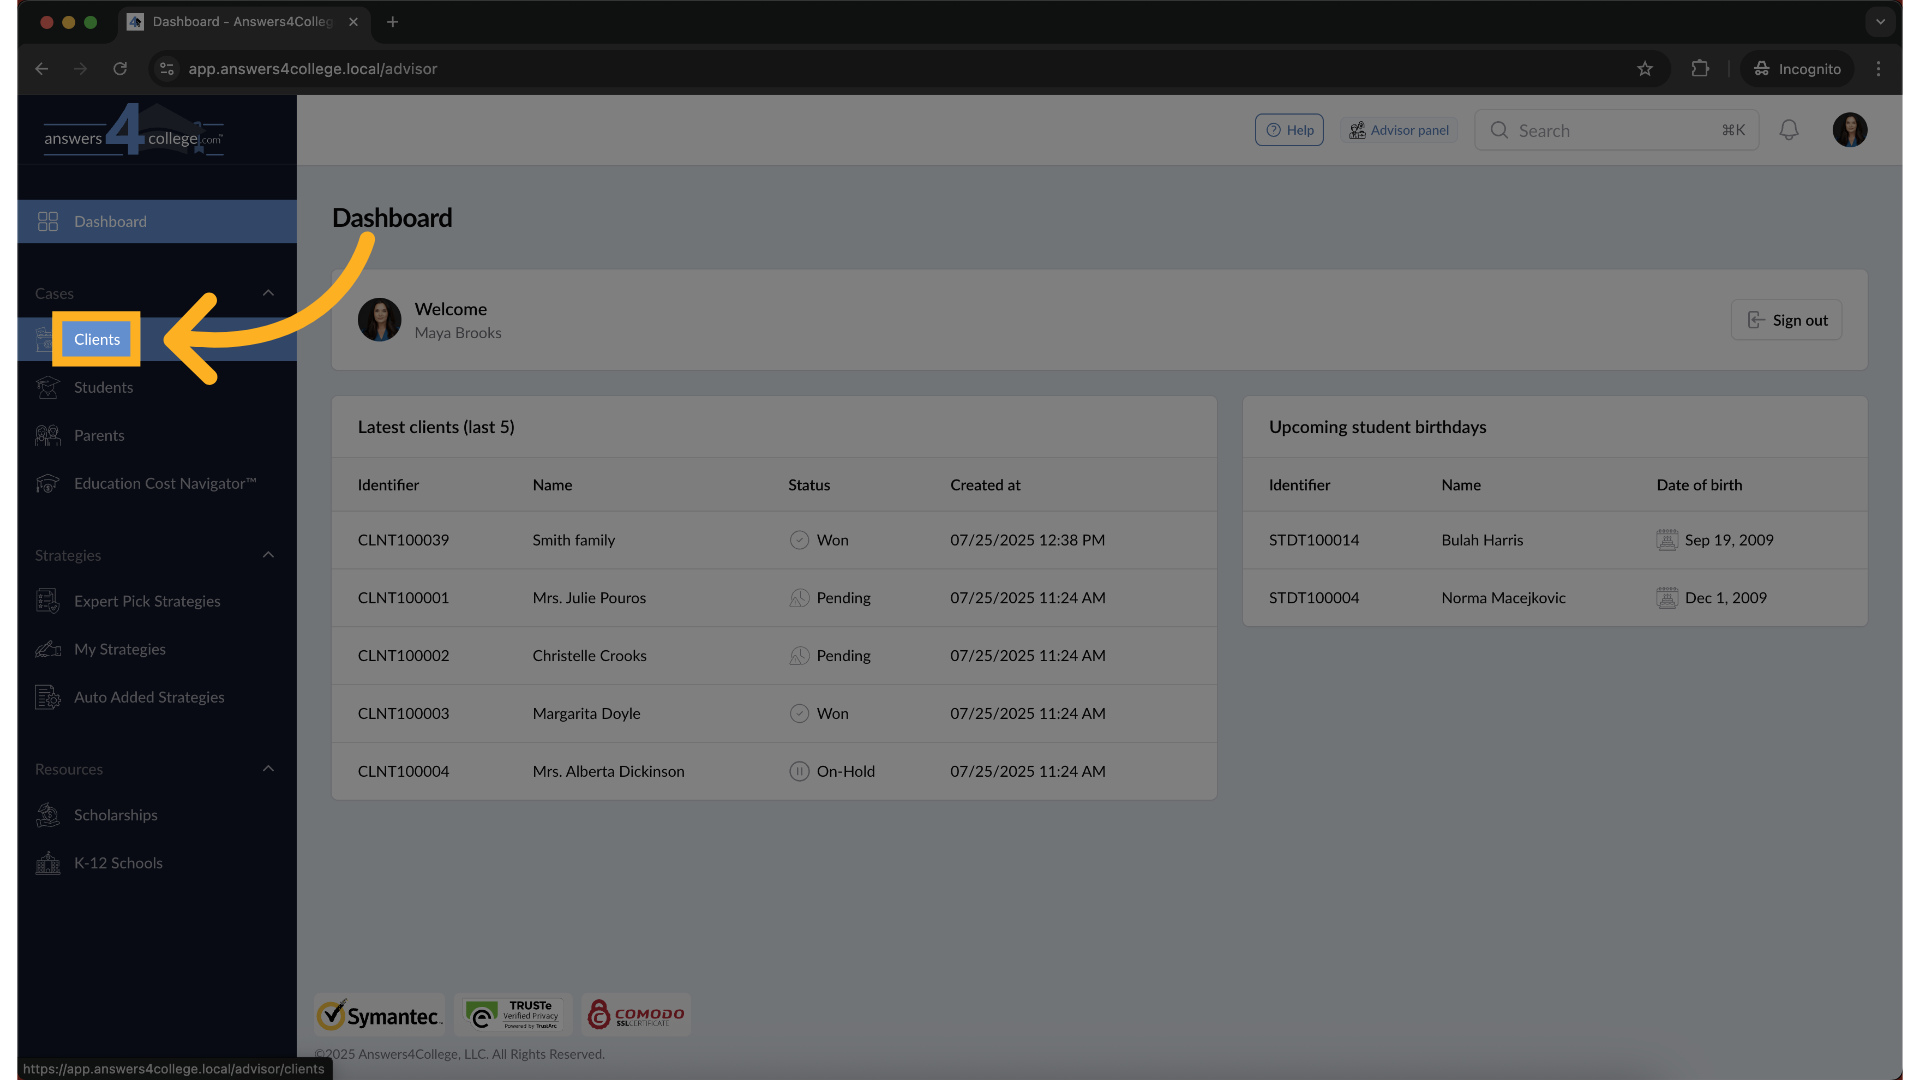
On the left-hand sidebar, go ahead and click on Clients—this will bring up
the full list of your client accounts.
3. Select a Client to Work With
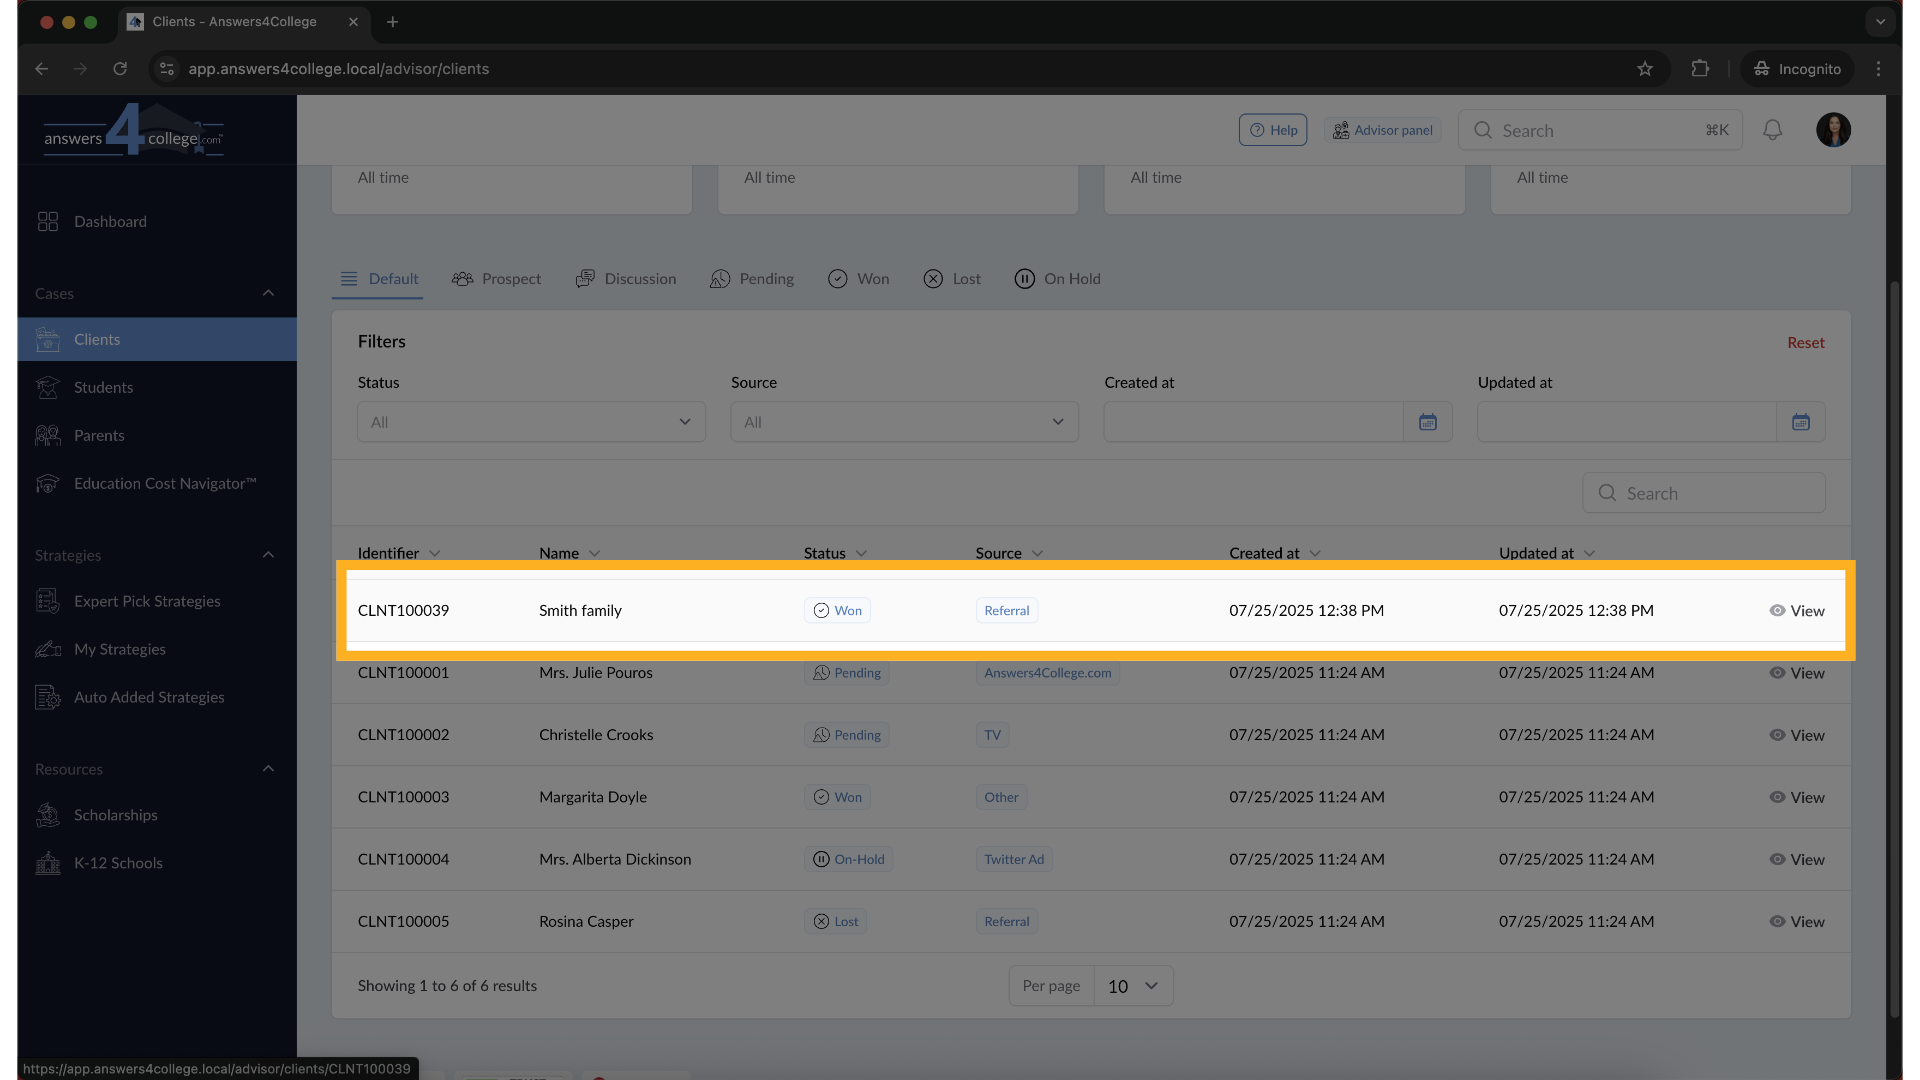
Now, find the client you want to manage and click directly on their name.This
will open up the Client Overview where all activity for this family is managed.
4. Open the Student Section
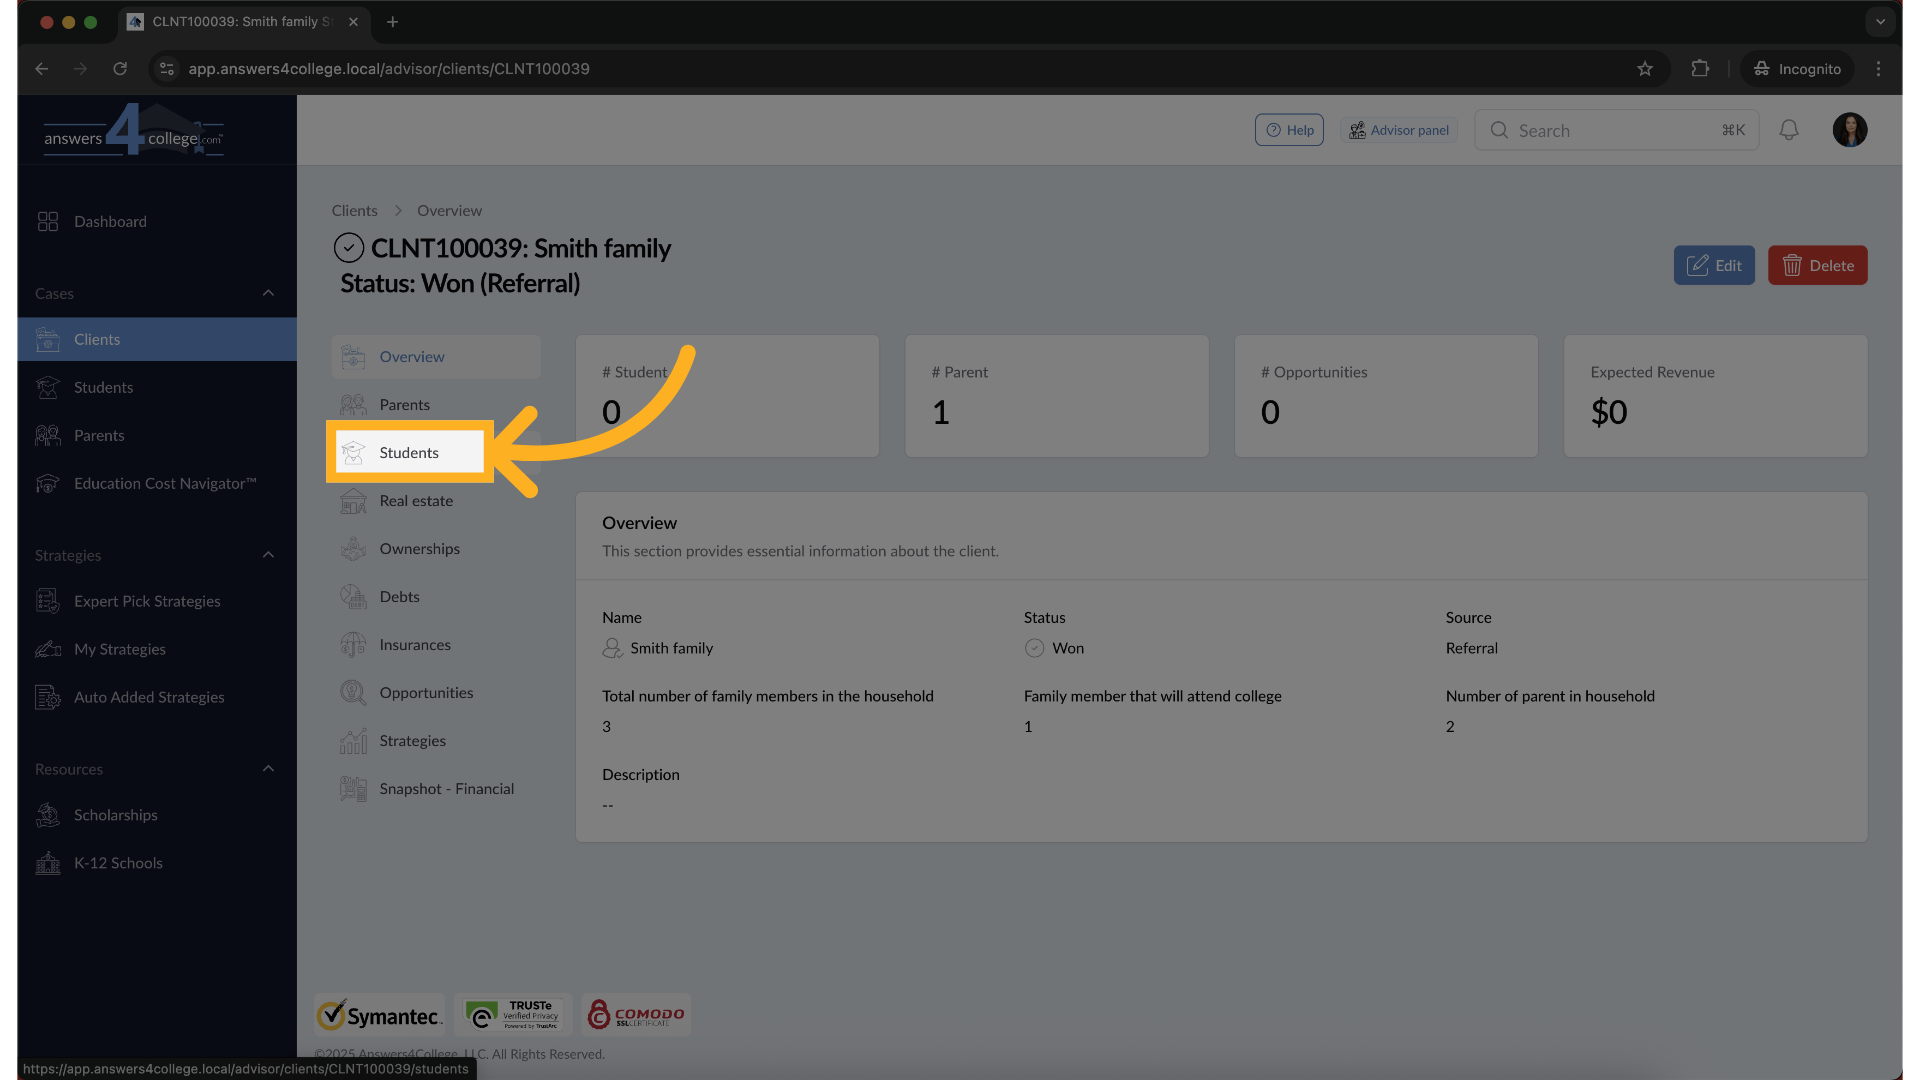
On the left side of the client’s profile, click on Students.This is where
you’ll view, add, or edit student profiles connected to this client.
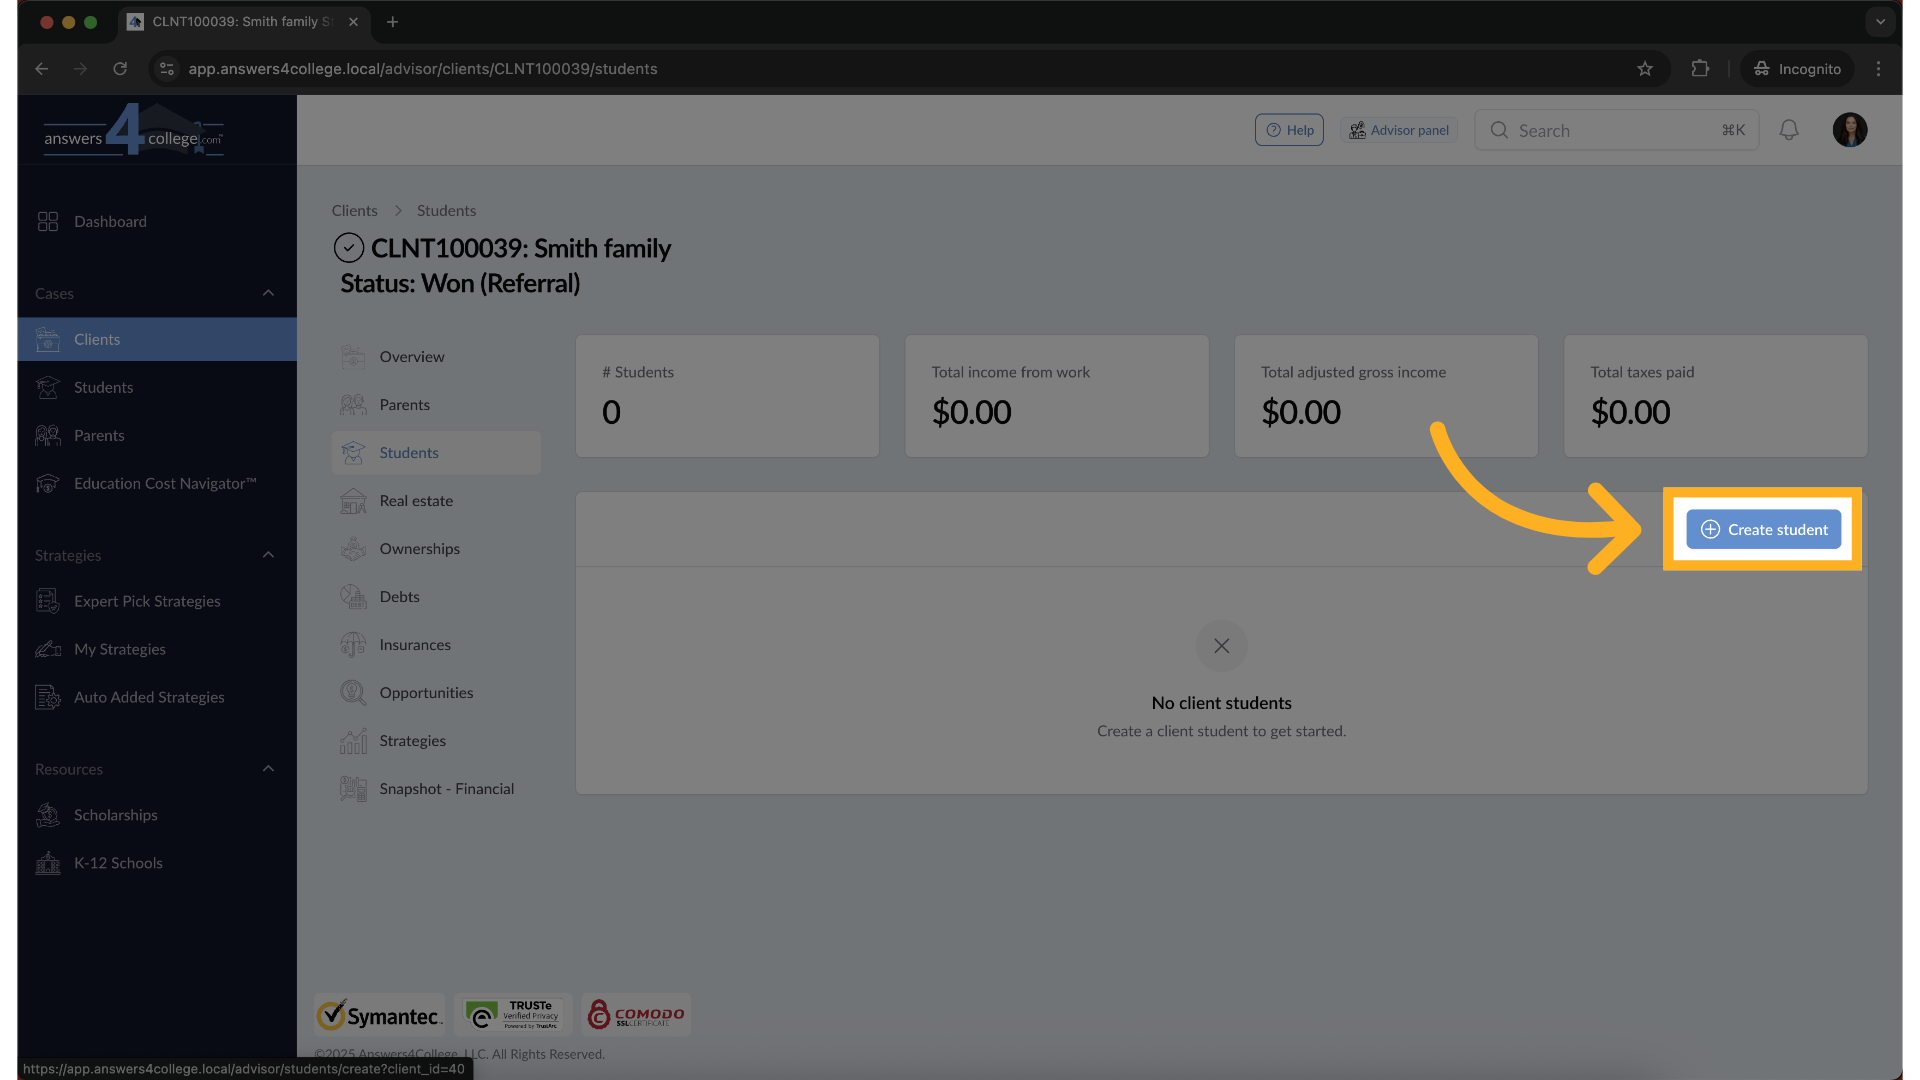
5. Add a New Student
If no student exists yet, don’t worry—it’s easy!Click the Create Student
button to start setting up a new student profile.
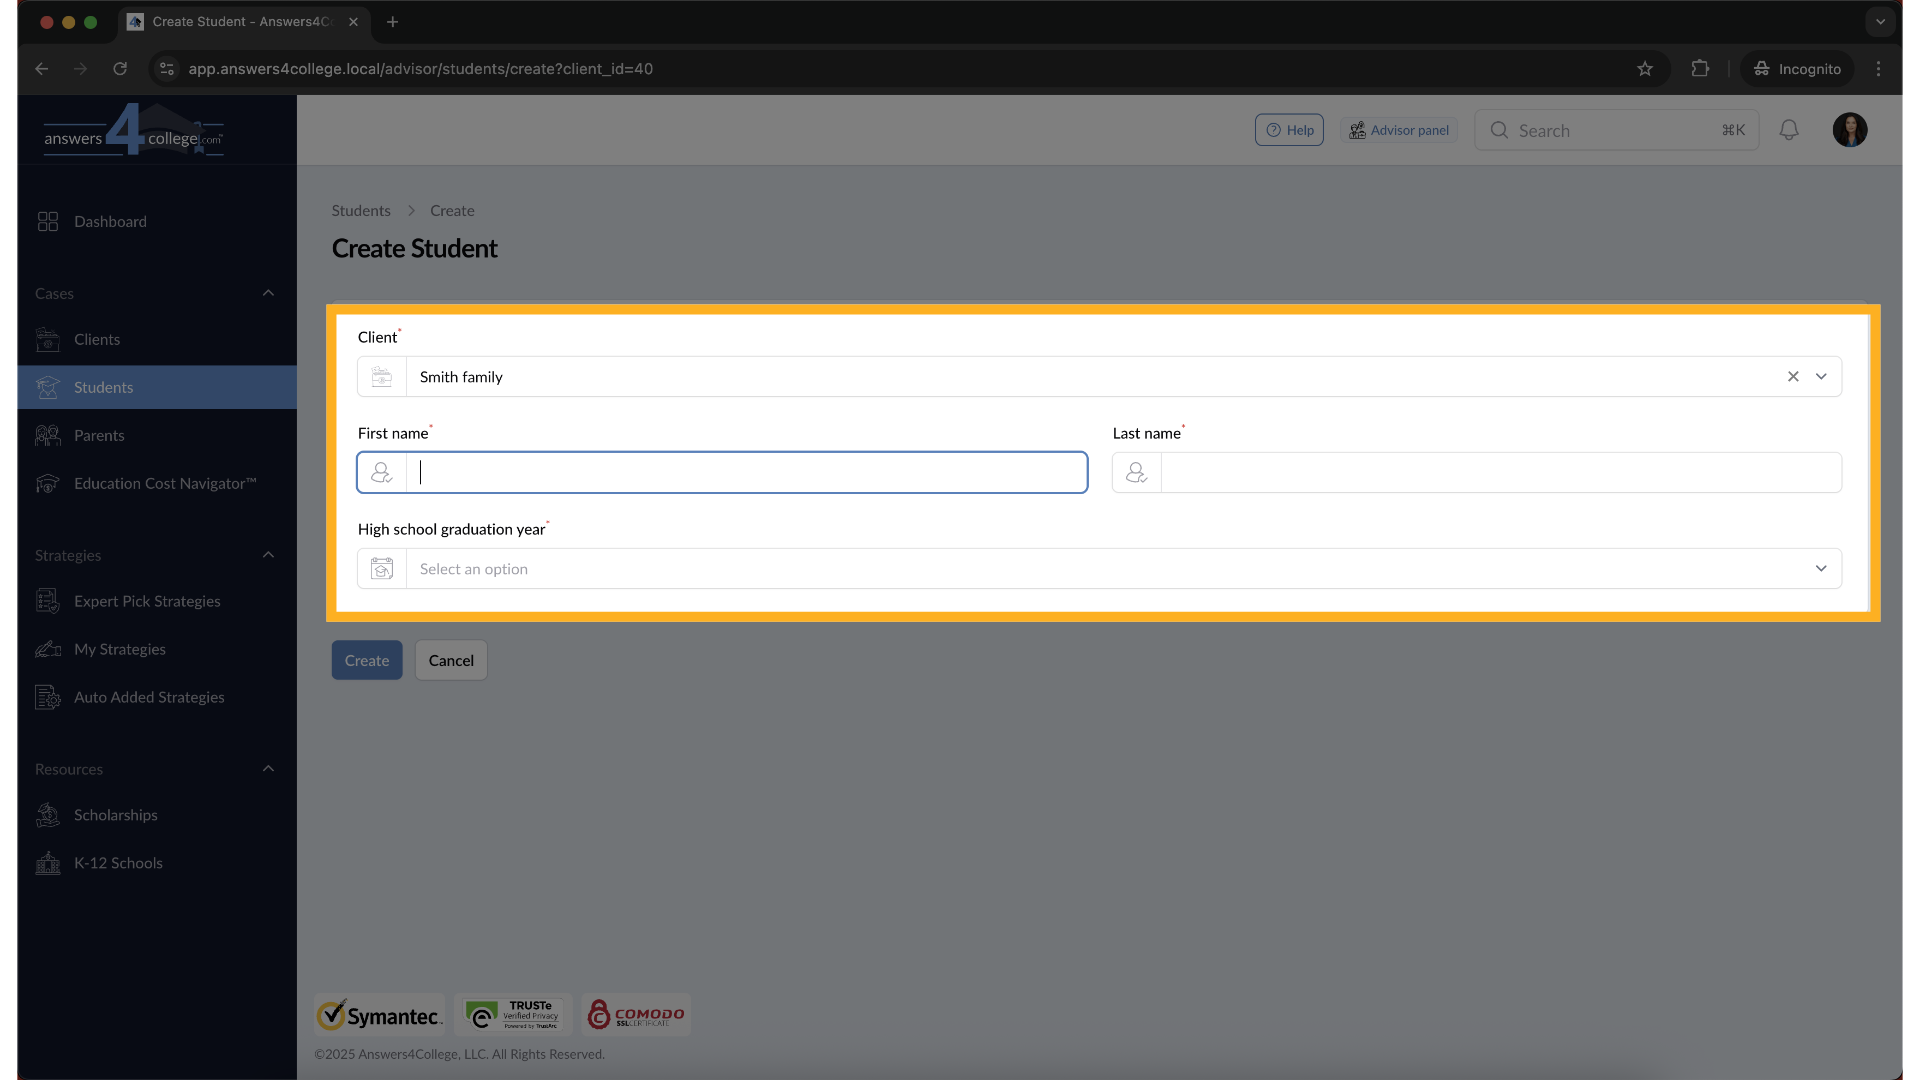
6. Fill in Student Details
You’ll now see a short form. Go ahead and fill in the First Name, Last Name,
and High School Graduation Year—these are required to proceed.
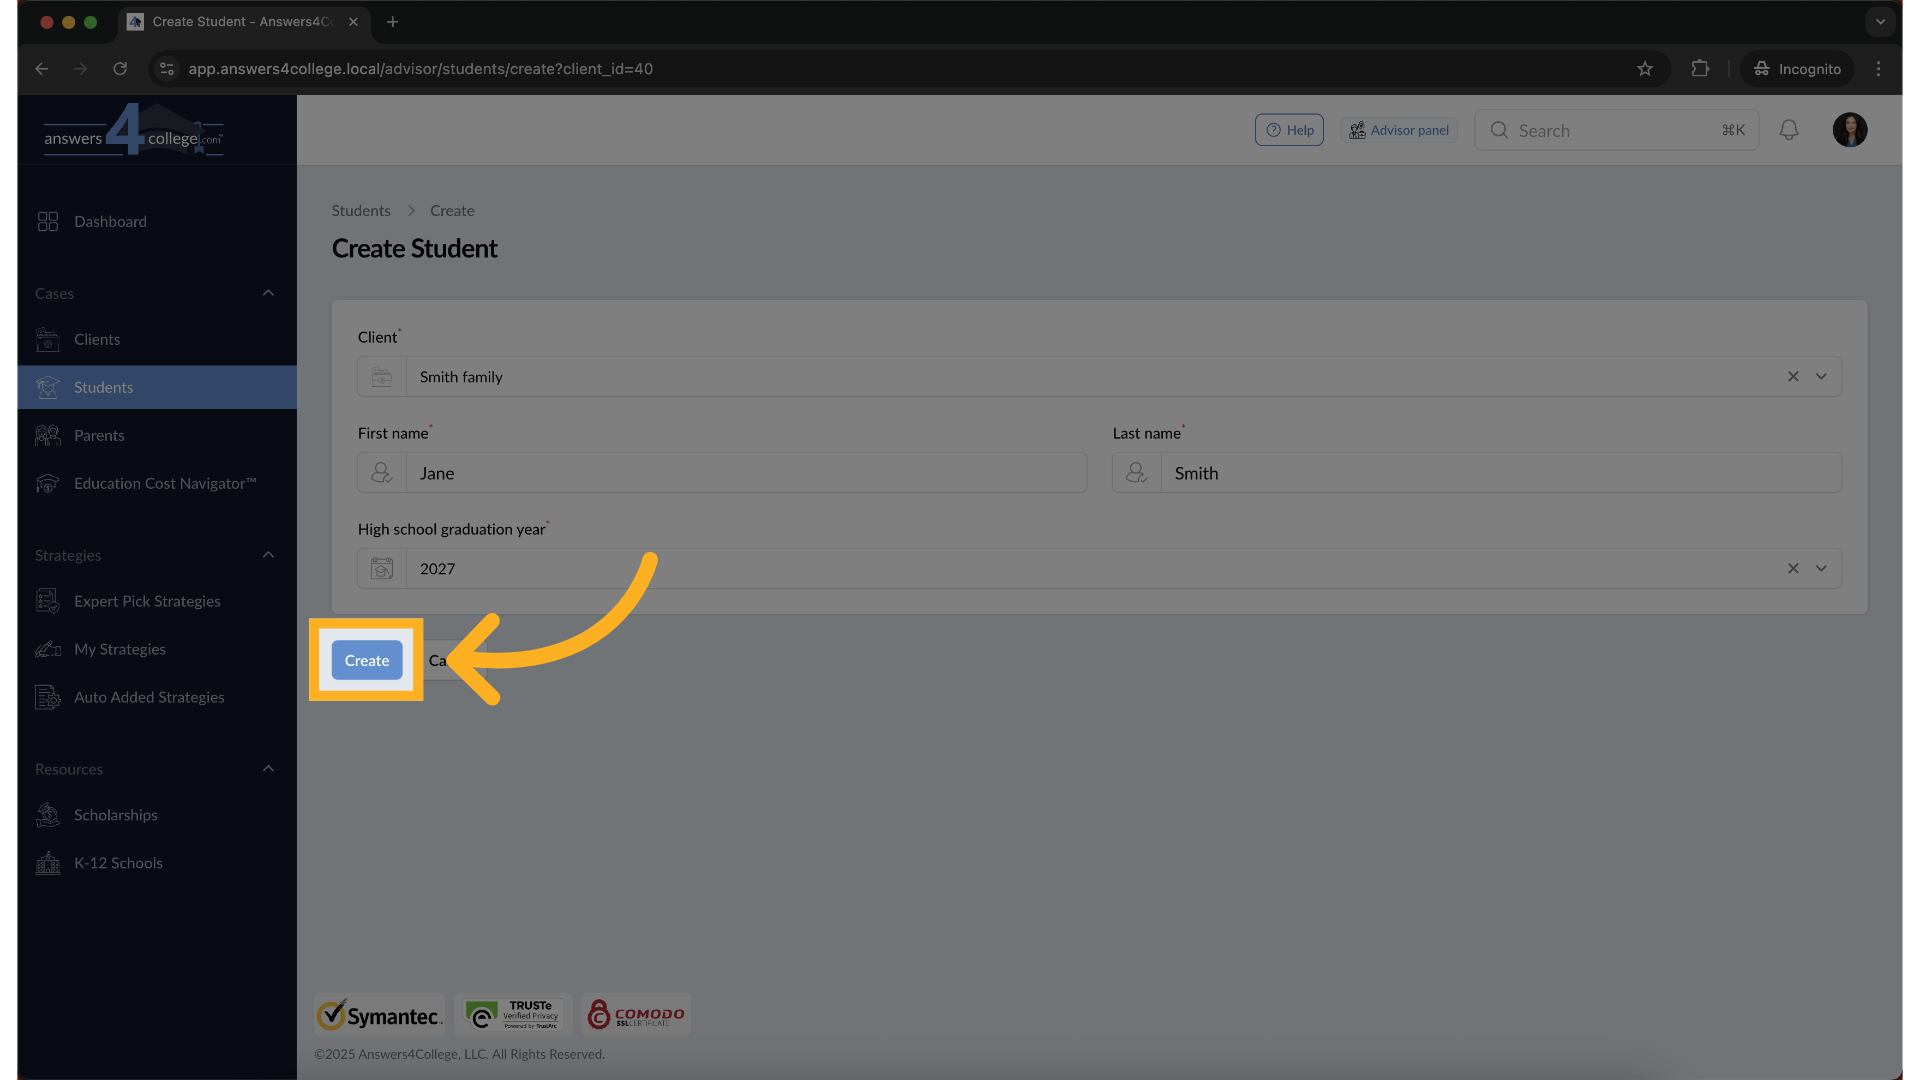
7. Create the Student Profile
Once everything looks good, click the Create button at the bottom of the
form. Nice job! You’ve now created a student profile.
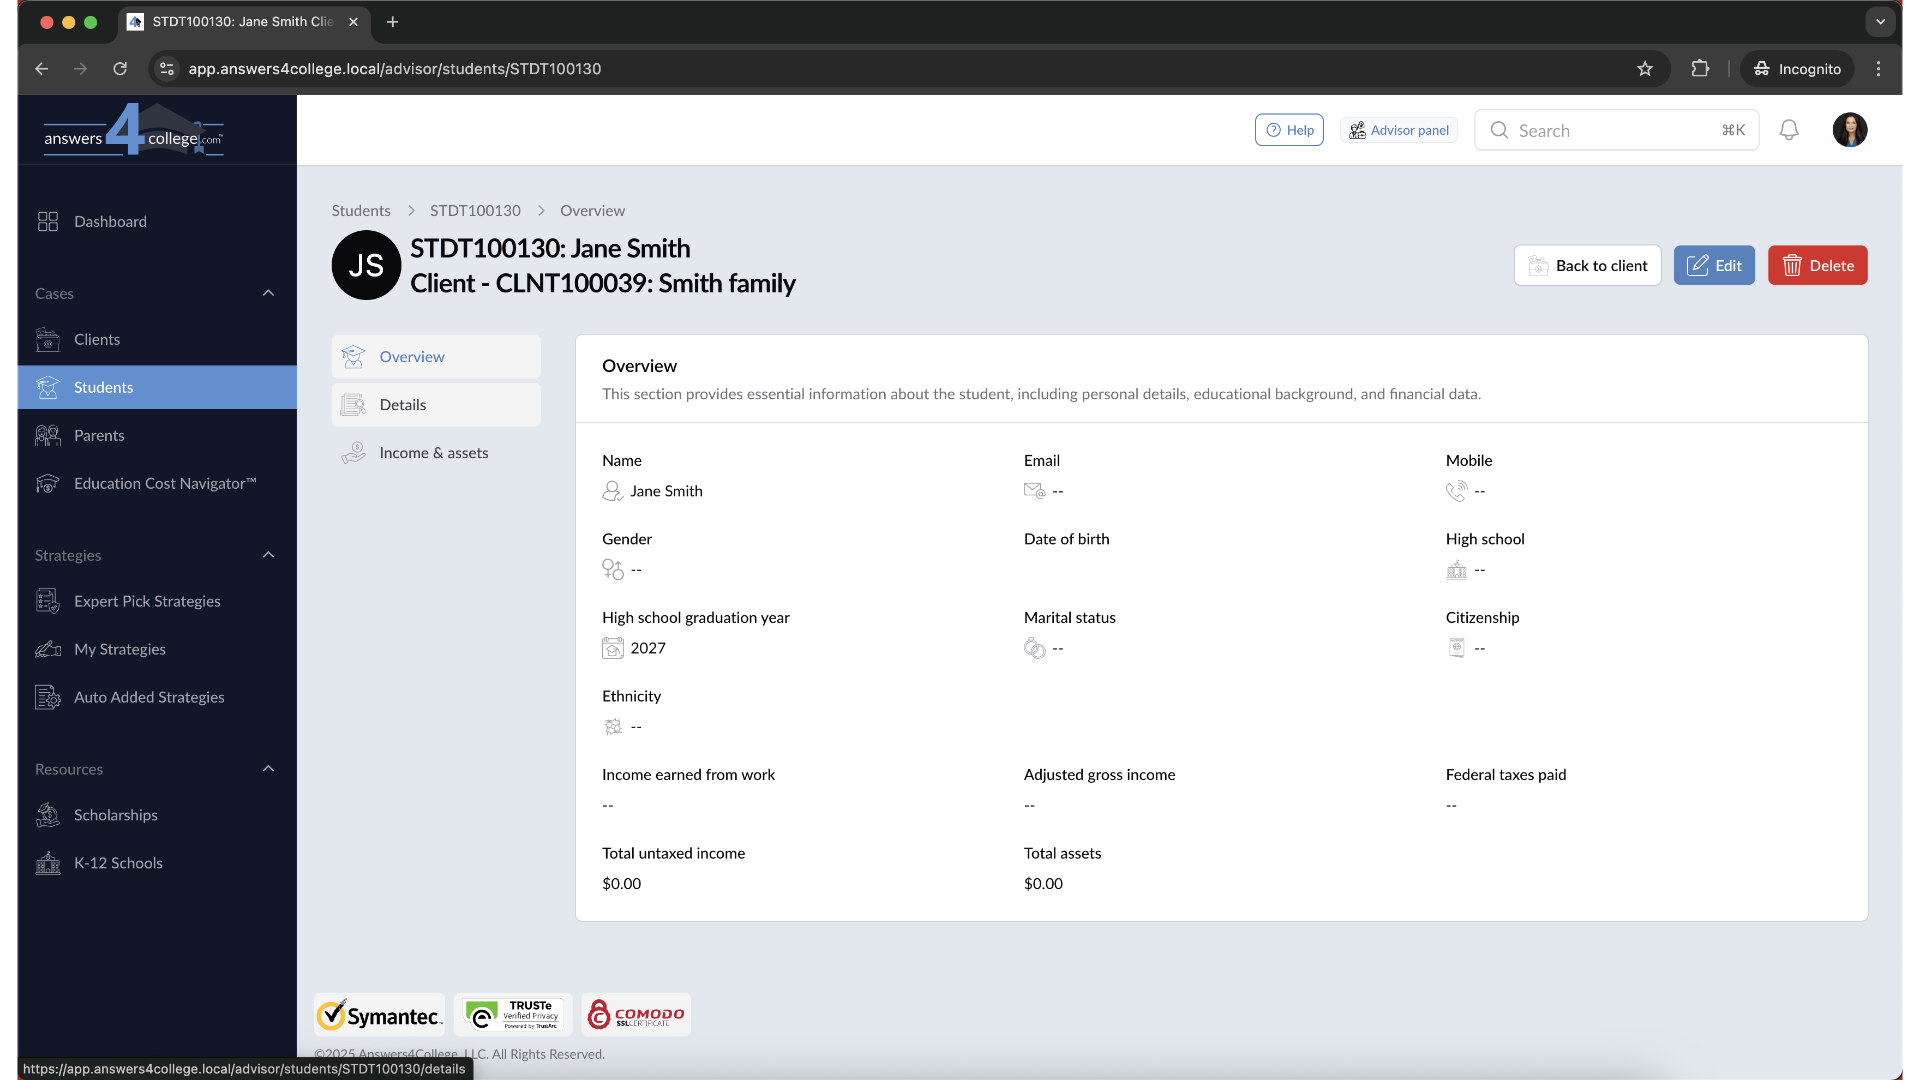
8. Review the Student Overview
You’ll be automatically redirected to the student’s profile page. Here, you’ll
get a quick snapshot of key information about the student.
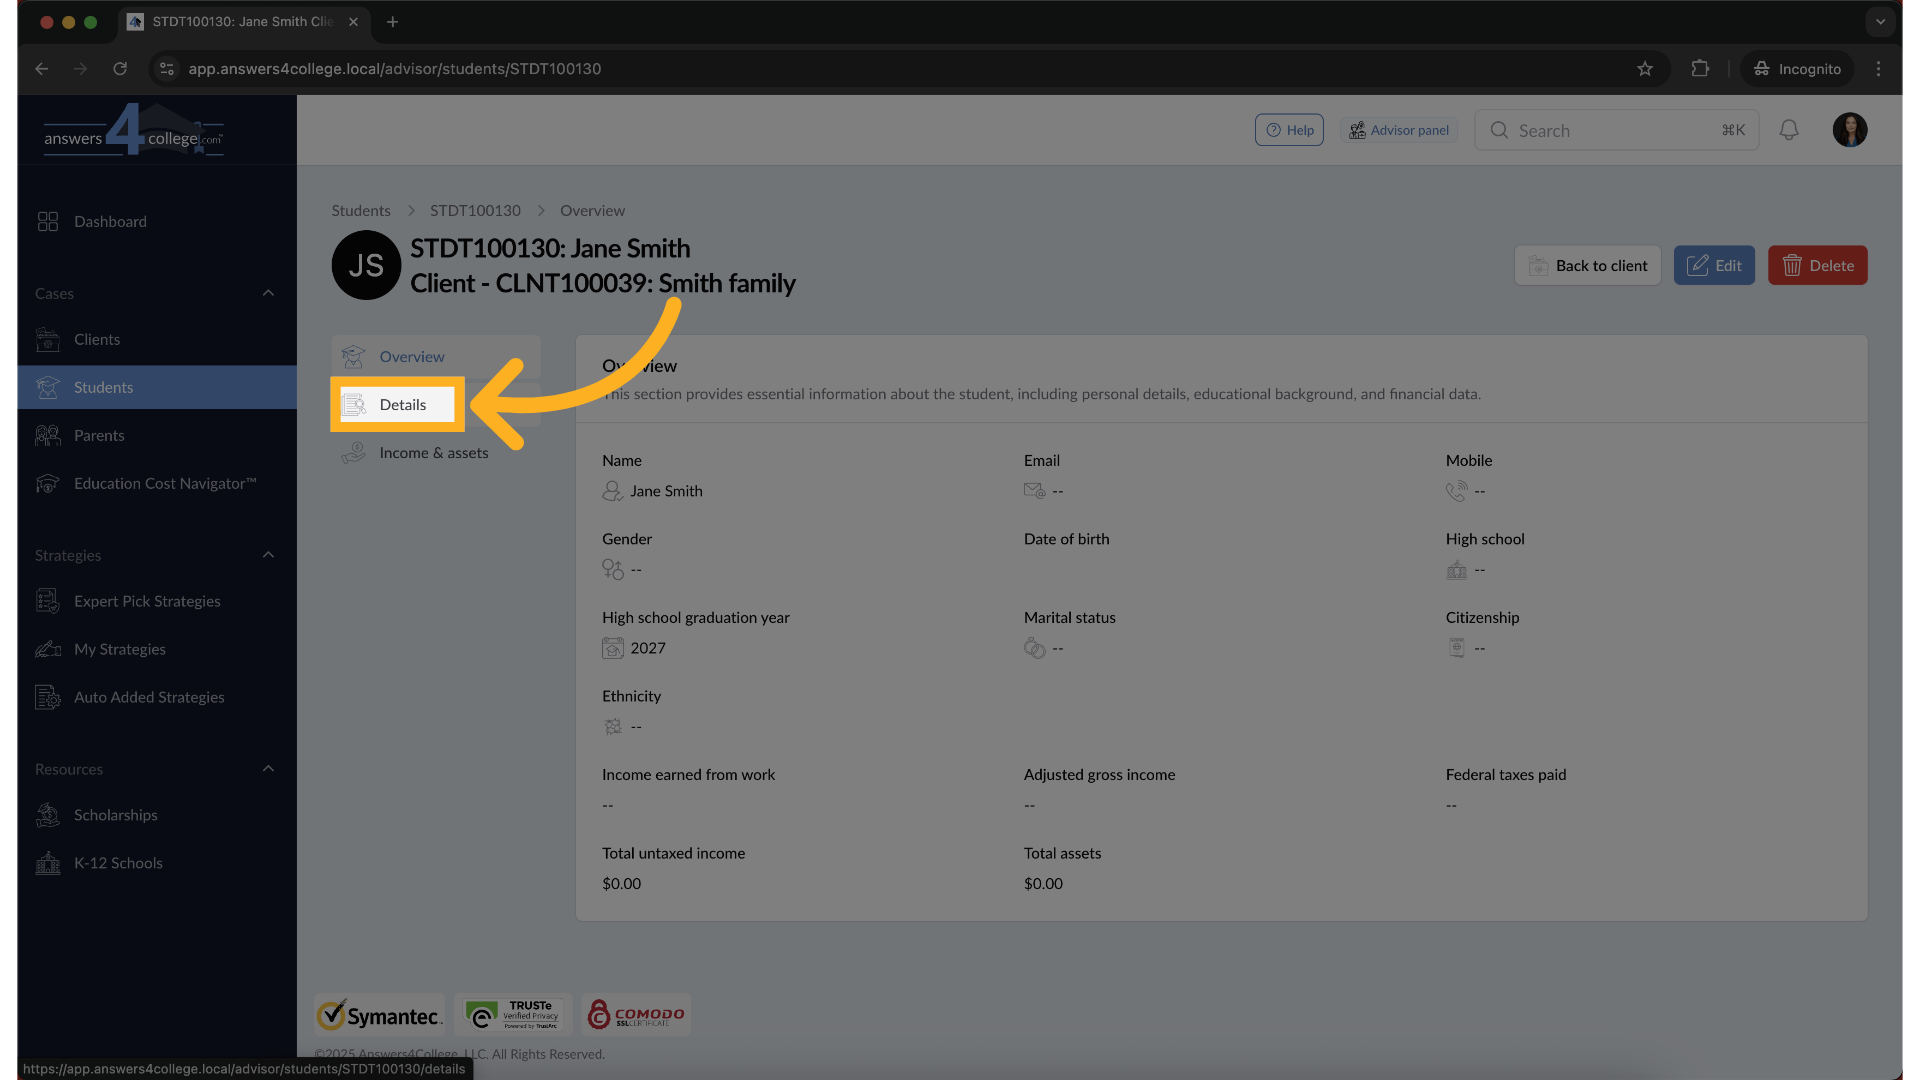
9. Explore Student Details
From the left-hand menu, click on Details. Take a moment to review the student’s
Contact Info, Academic Background, and Extracurriculars.
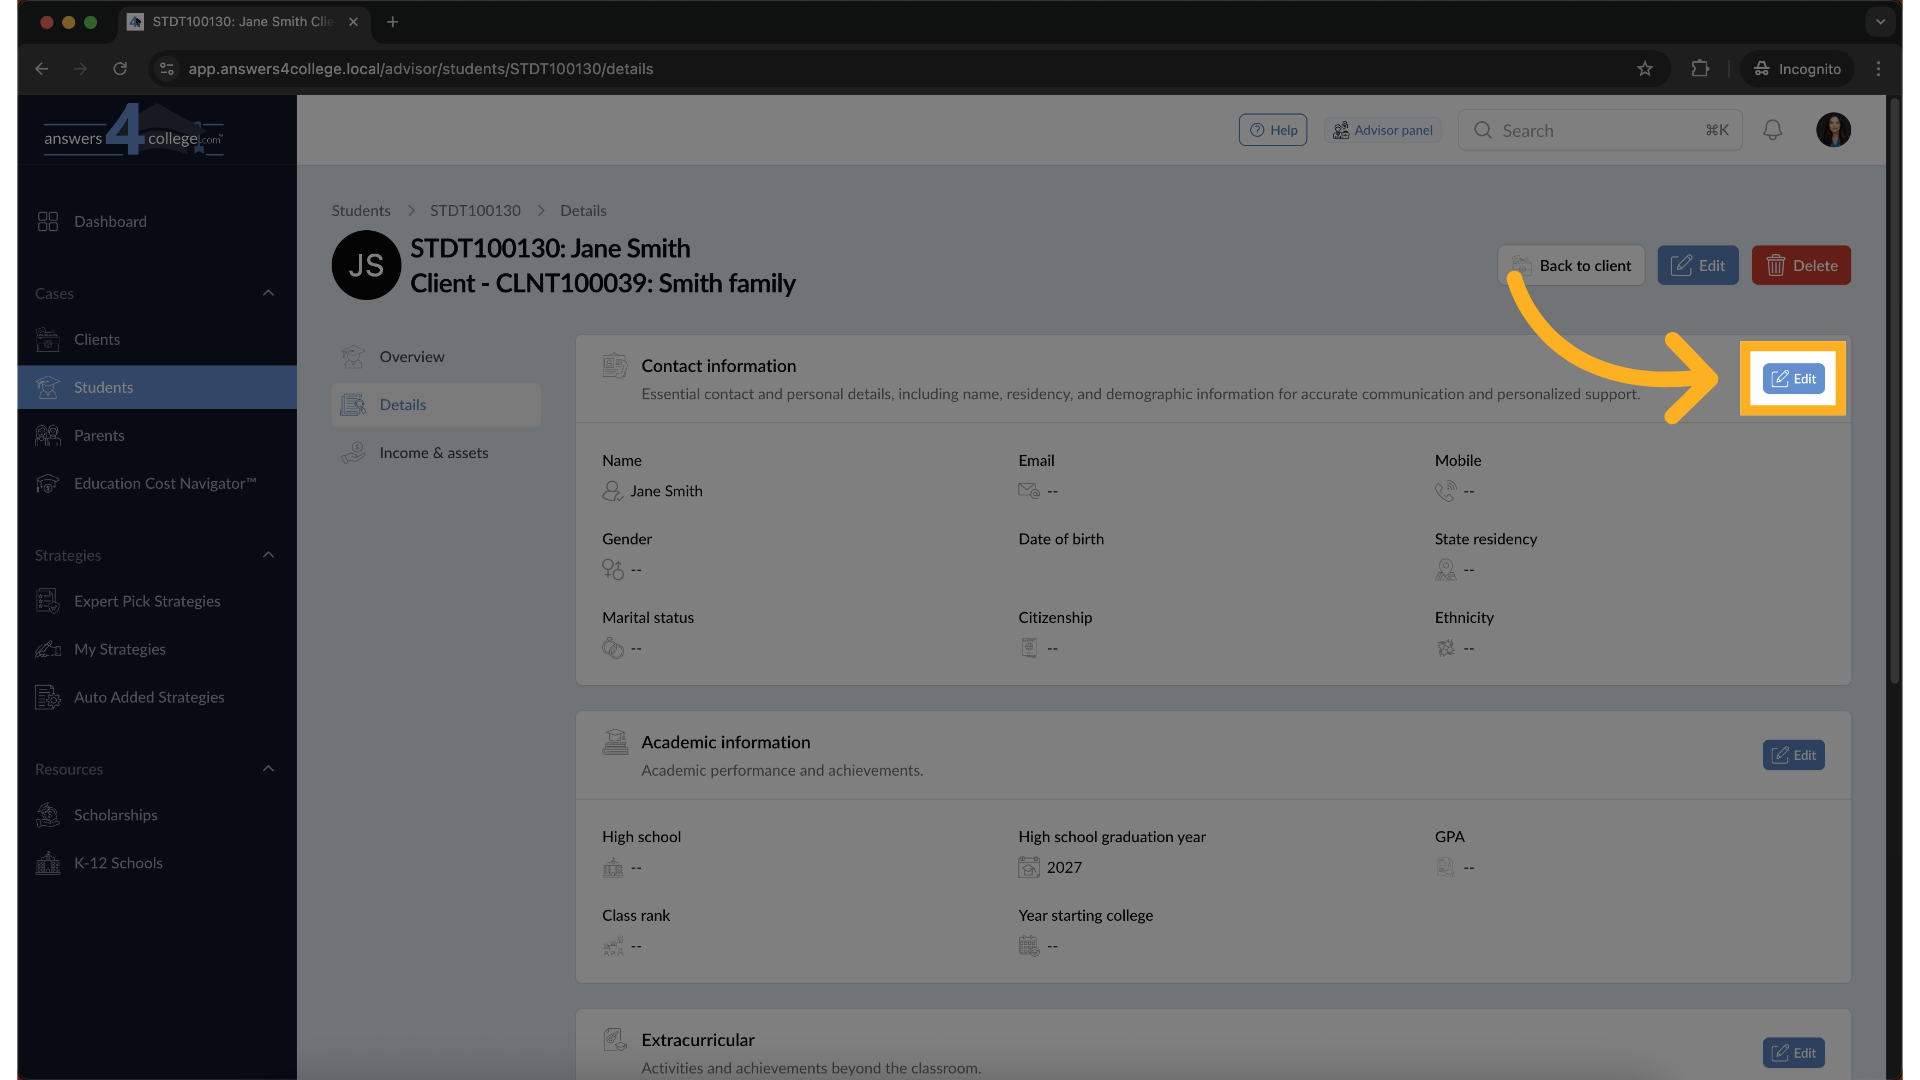
10. Make Updates
Need to make changes? Click the Edit button at the top.
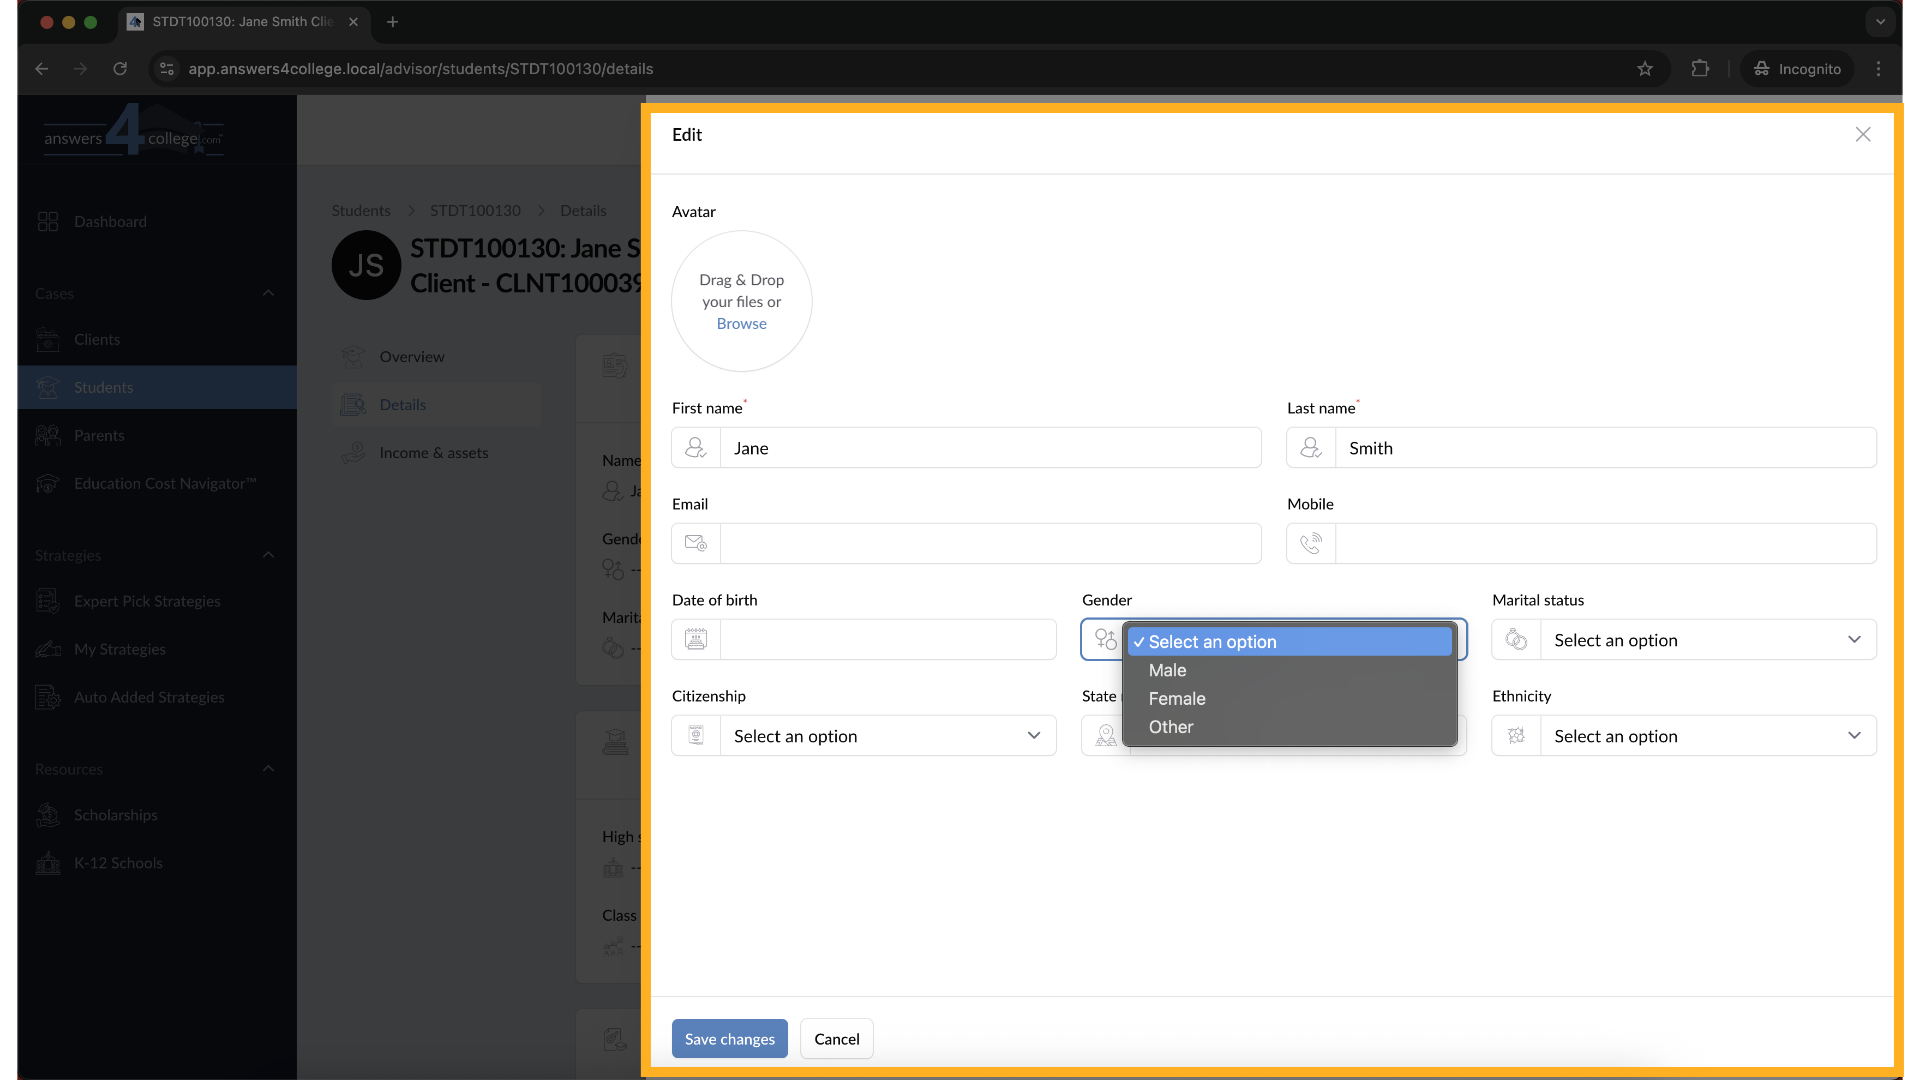
11. Making updates
You can now adjust any field that needs updating — whether it’s phone number,
GPA, or activities.
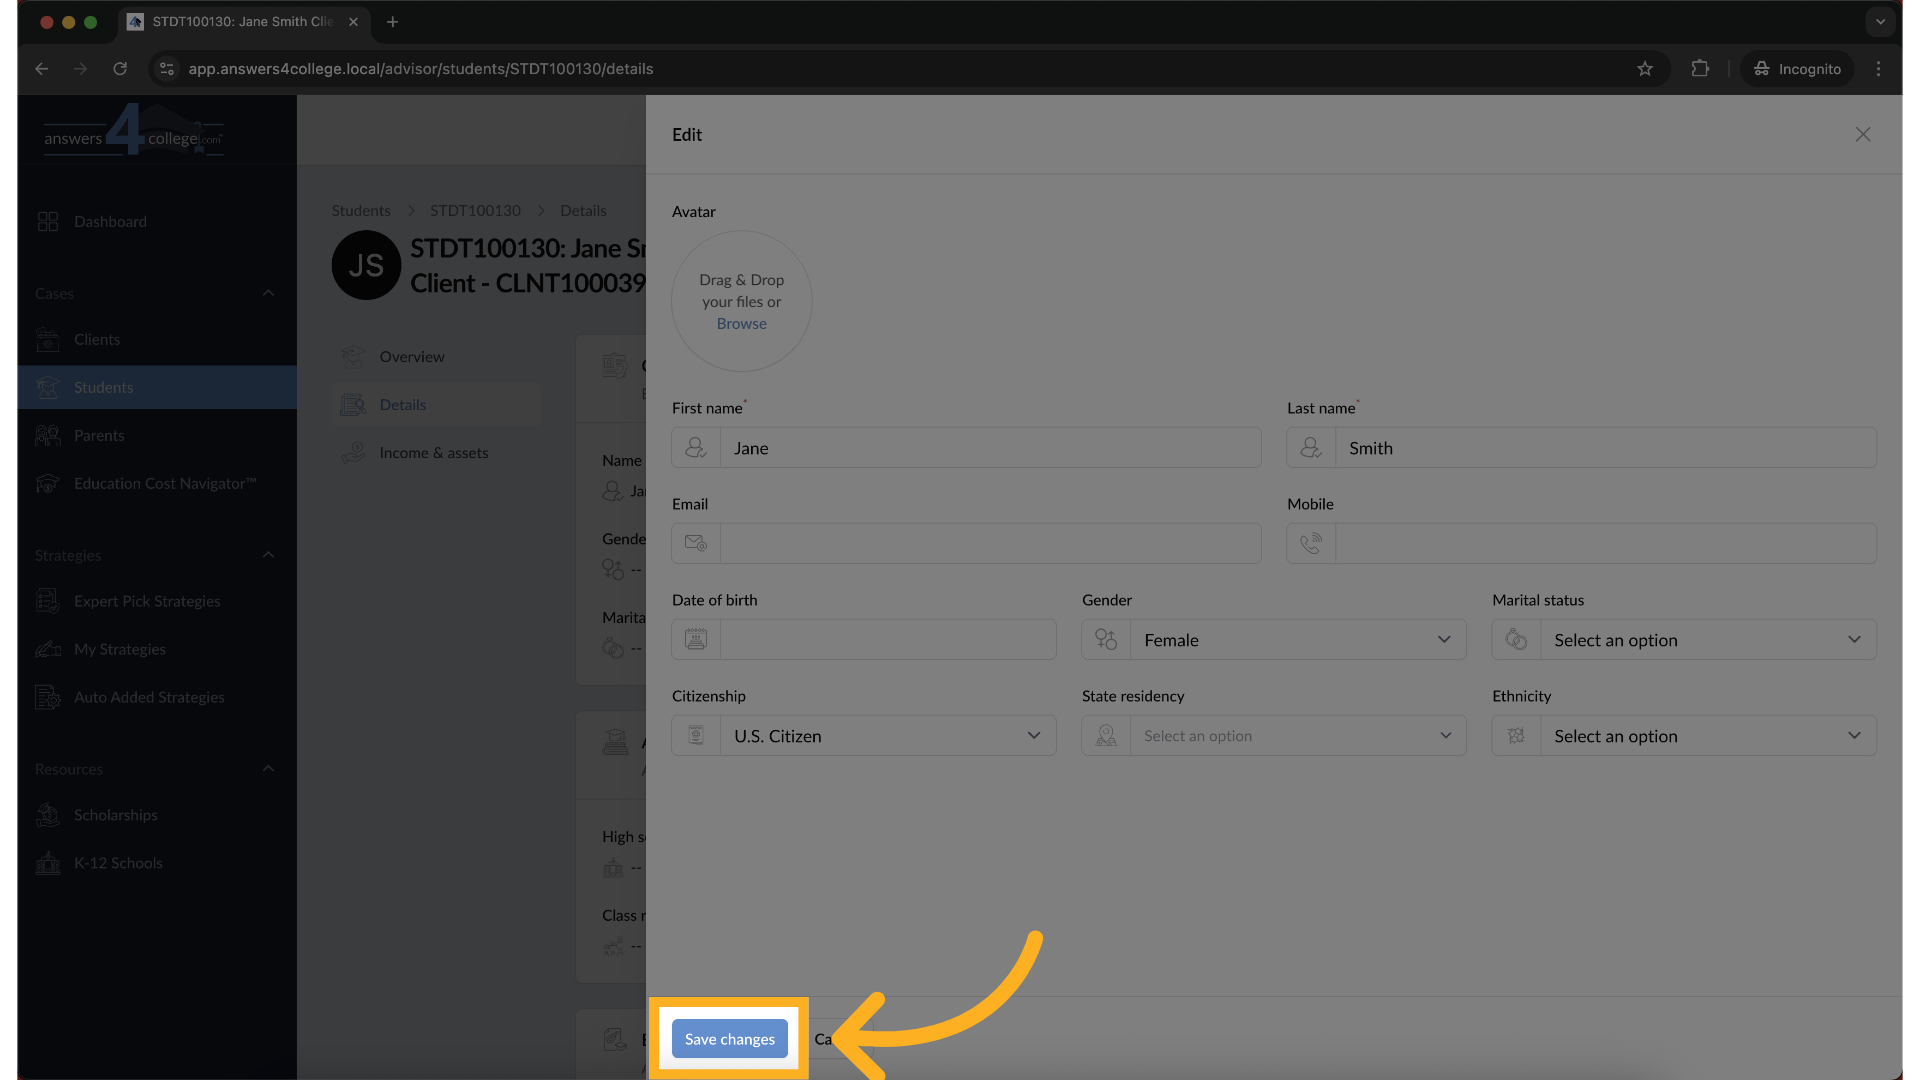
12. Save Your Changes
Once you've made all necessary edits, don’t forget to click Save Changes.
Everything updates instantly — so your data stays fresh and accurate.
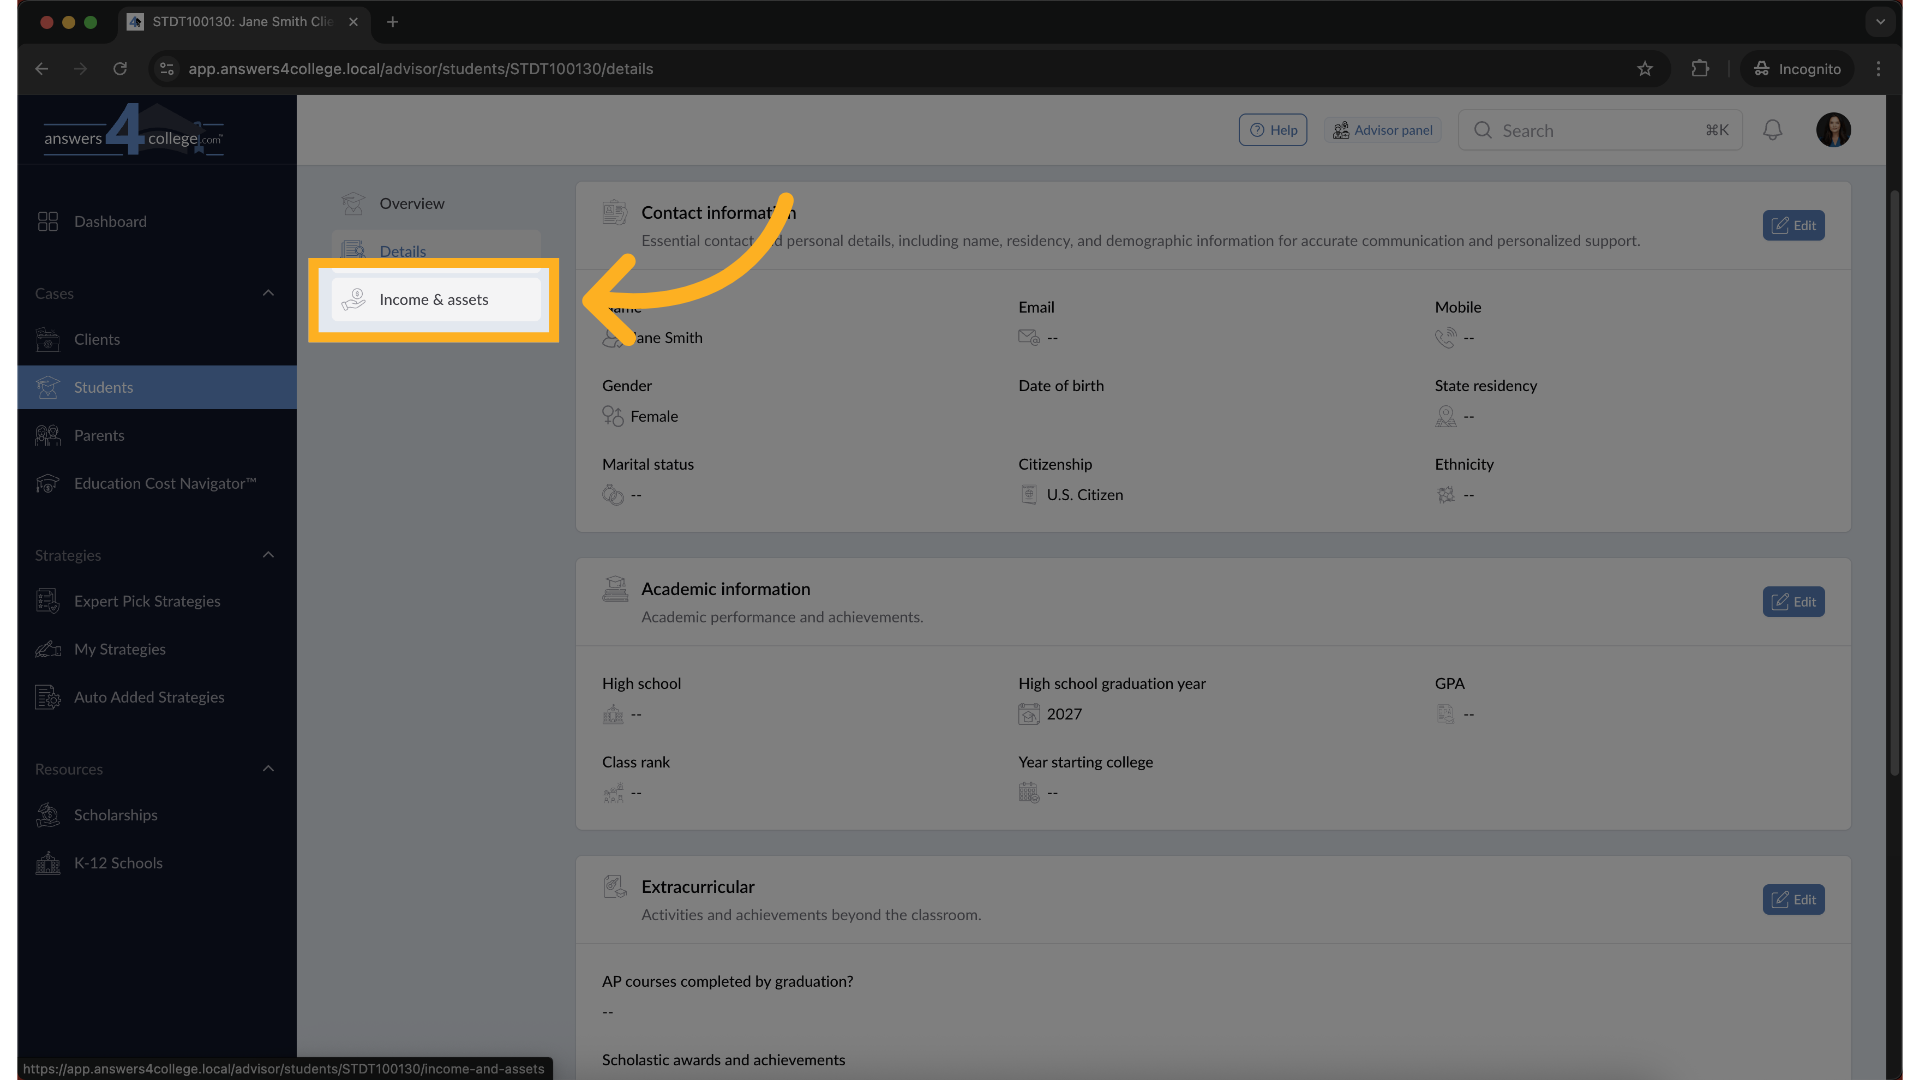
13. Navigate to Income & Assets
Next, let’s take a look at the student’s financial info. Click on Income
& Assets from the left menu to continue.
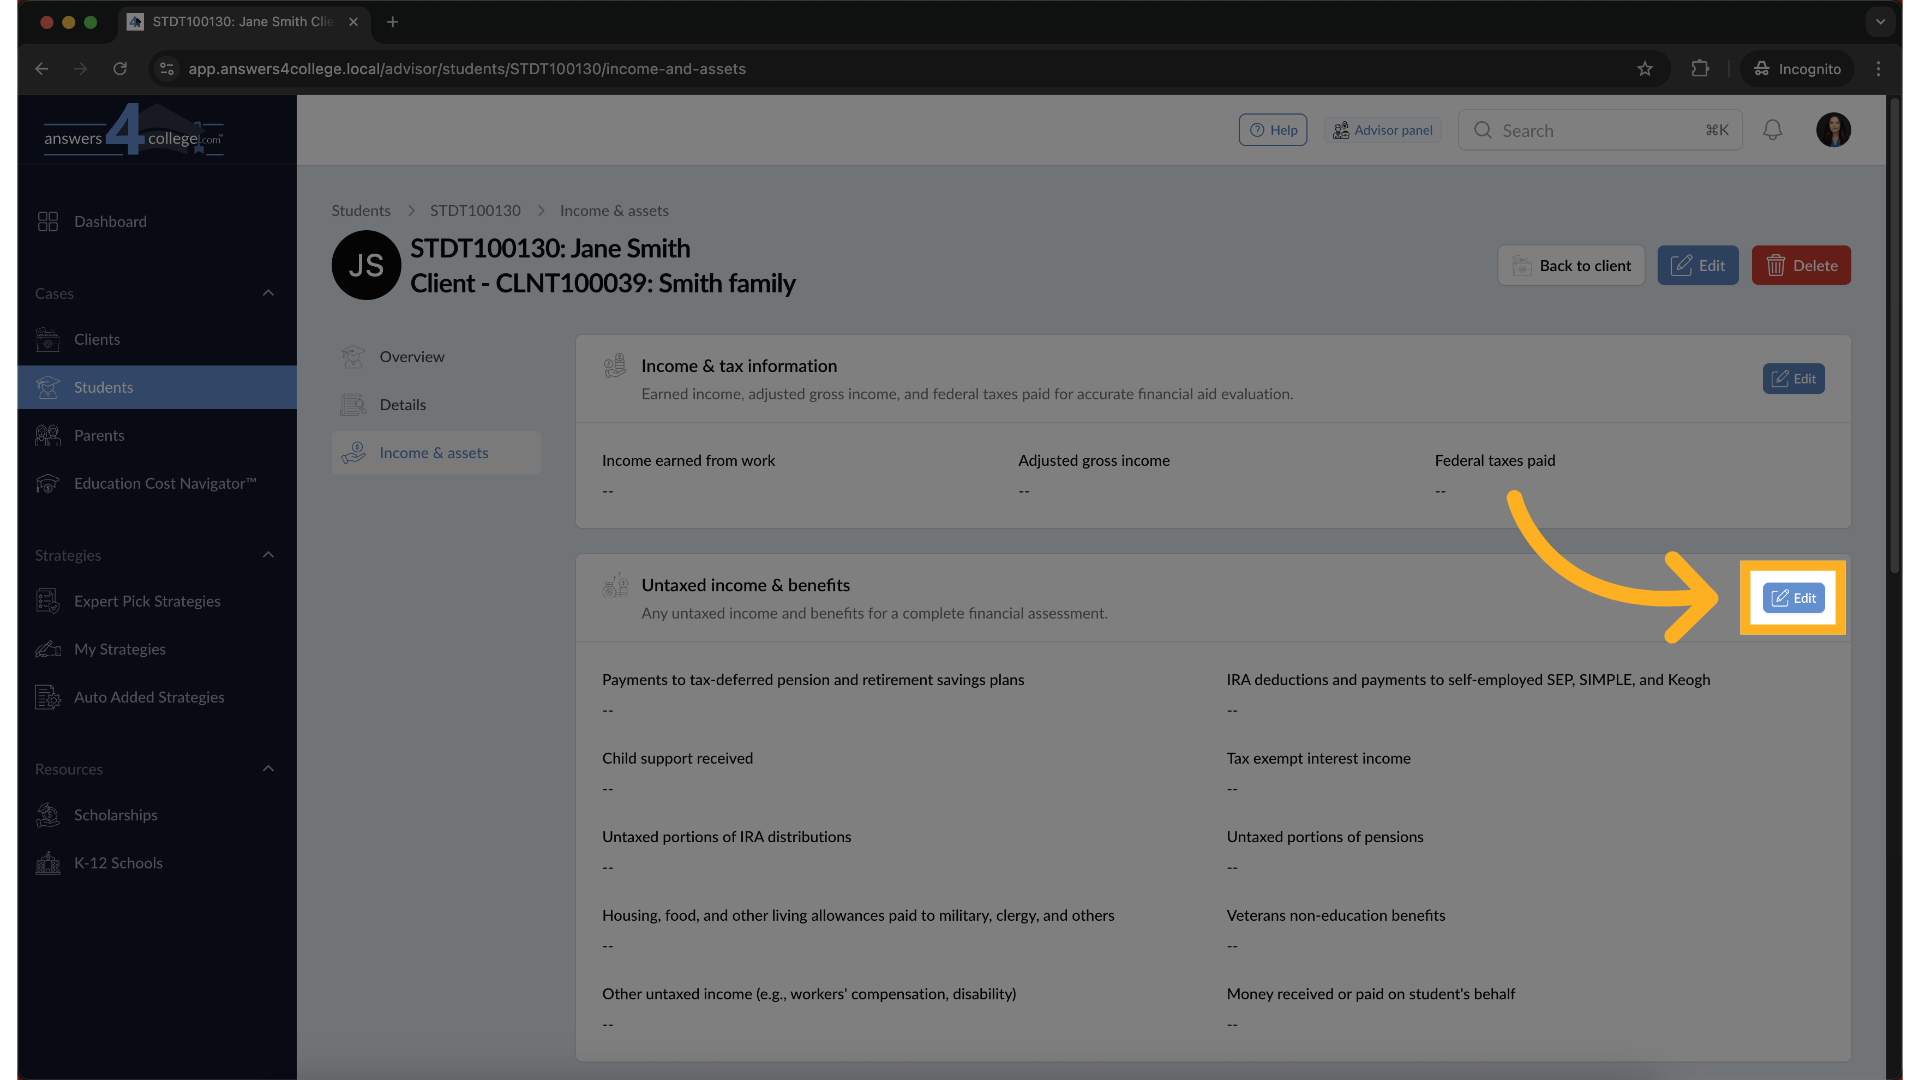
14. Edit Financial Information
Click the Edit button in this section. You can now enter income amounts,
assets, and other related values for the student.
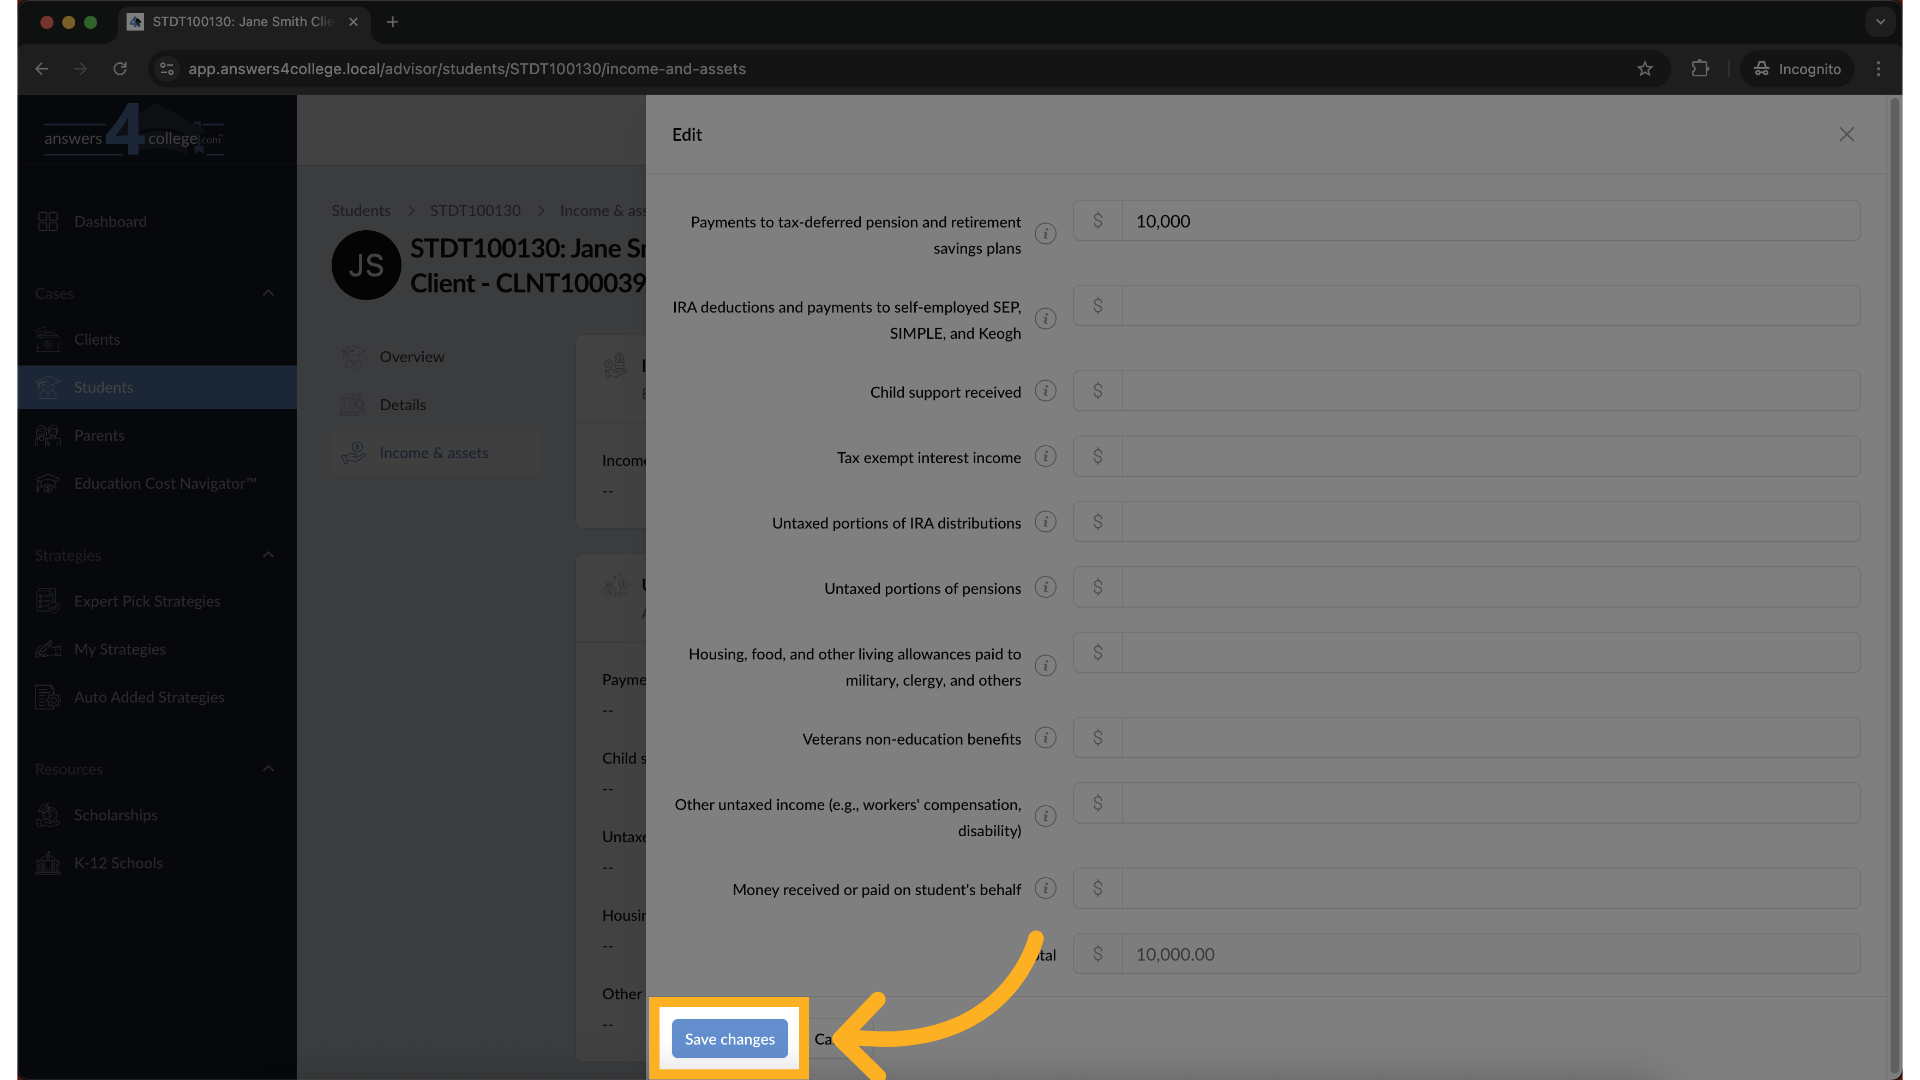
15. Save Income & Asset Changes
When you’re done, click Save. Your updates will now reflect in the student’s
financial profile.
16. Return to the Main Client View
To wrap up, click on Back to Client at the top. This brings you back to the
client’s main profile, where you’ll now see the student listed under their
account.

That’s it—you’ve successfully created and managed a student profile! Feel
free to repeat these steps for additional students, or continue exploring
other tools within the Advisor Portal.
Comments
0 comments
Please sign in to leave a comment.