Welcome to this tutorial on managing parent accounts in the Answers for College
Advisor Portal. I'll guide you through creating, activating, deactivating, and
impersonating parent accounts. Let's begin.
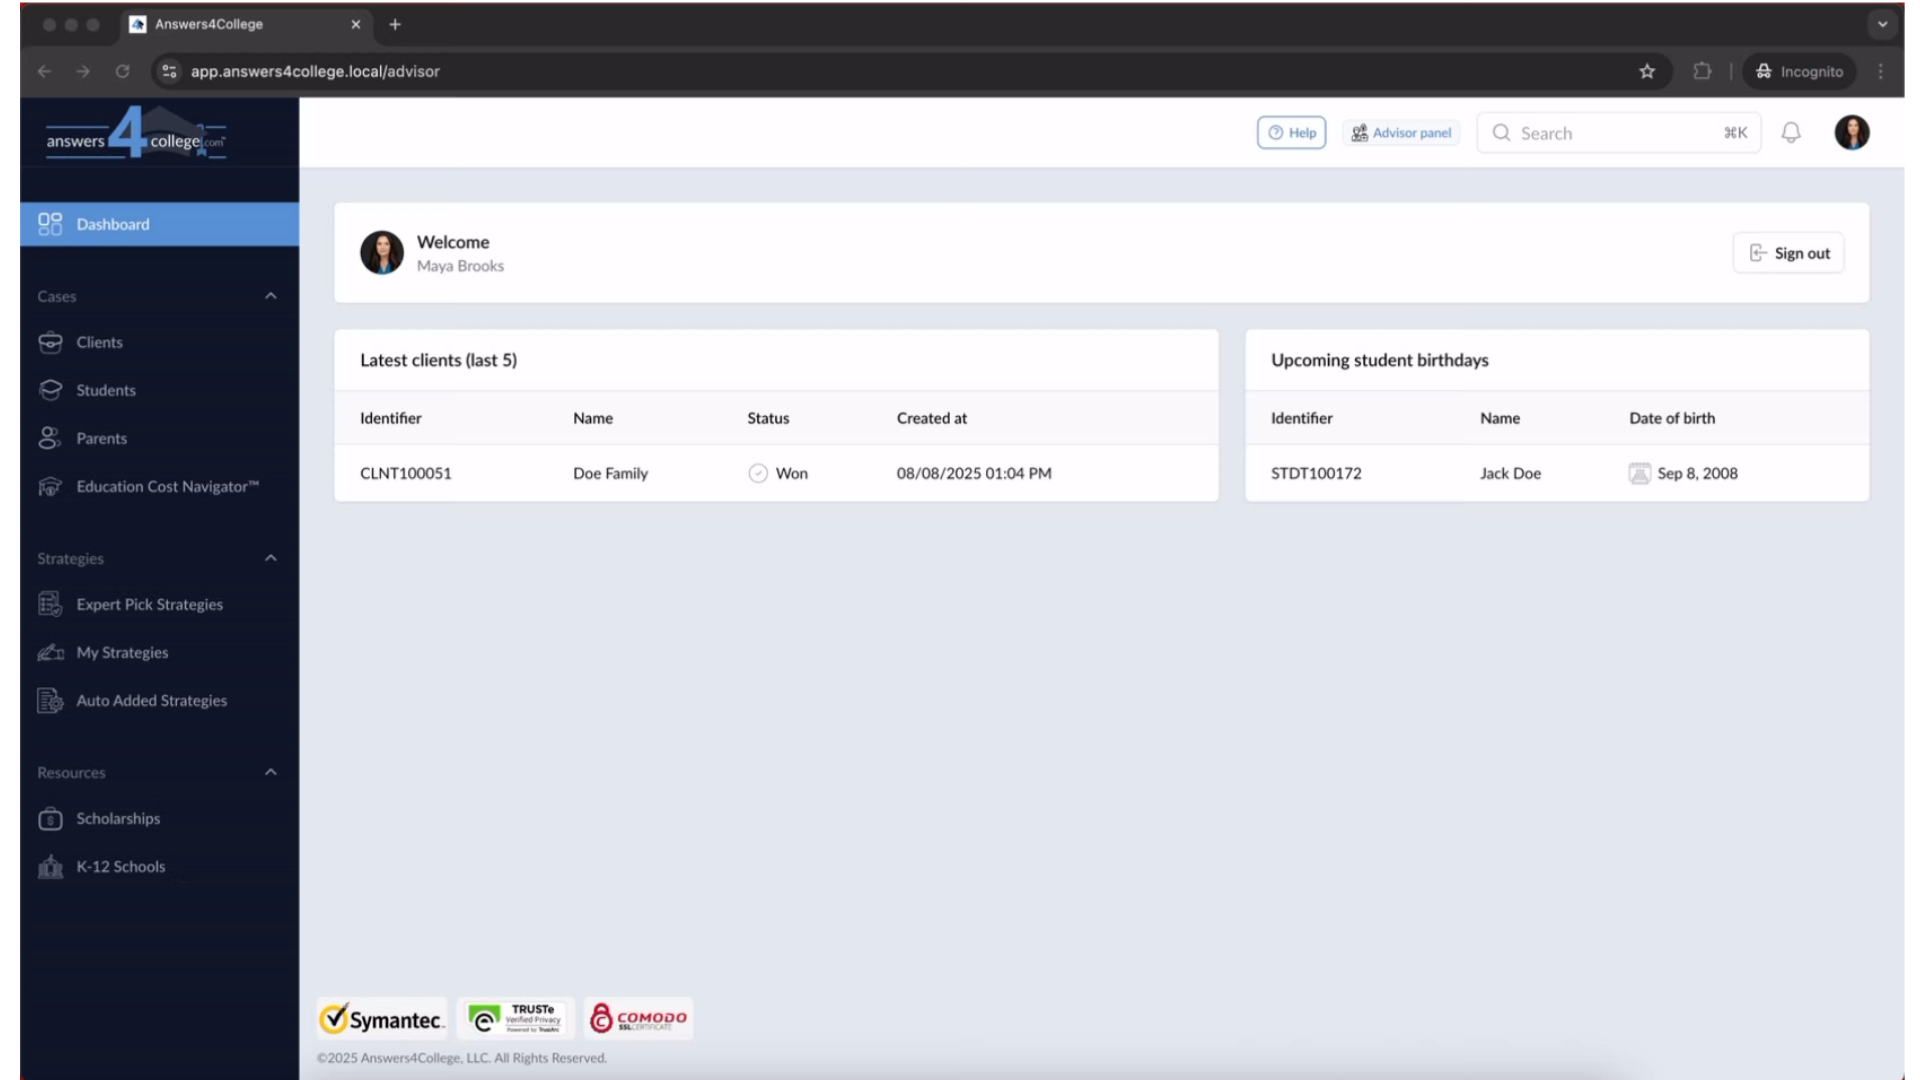
1. Logging Into the Portal
First, we'll need to log into the Advisor Portal. Go ahead and navigate to the
portal, then enter your login credentials. Once you're logged in, you'll see
your main dashboard.
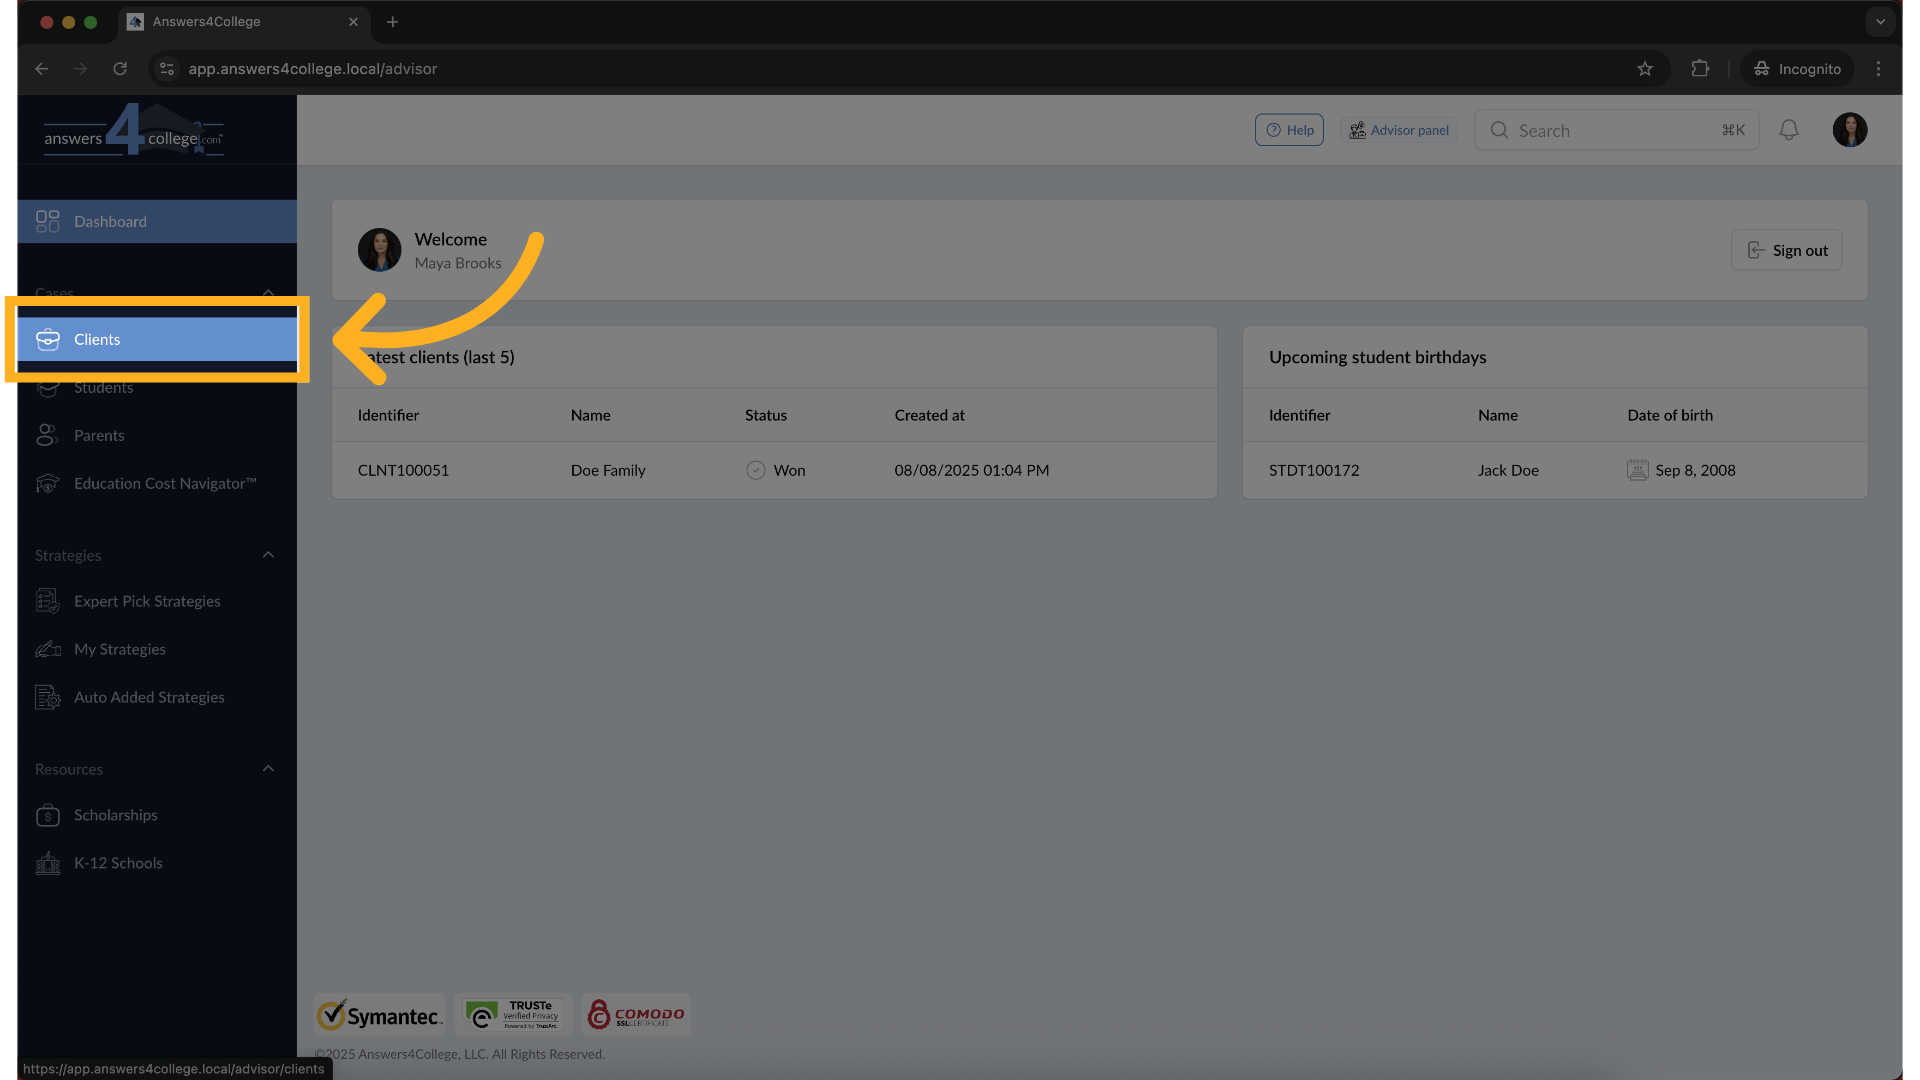
2. Opening the Clients Menu
Now, look at the left side of your screen where you'll find the navigation menu. You'll see an option labeled "Clients" - go ahead and click on that. This takes you to where all your client families are stored.
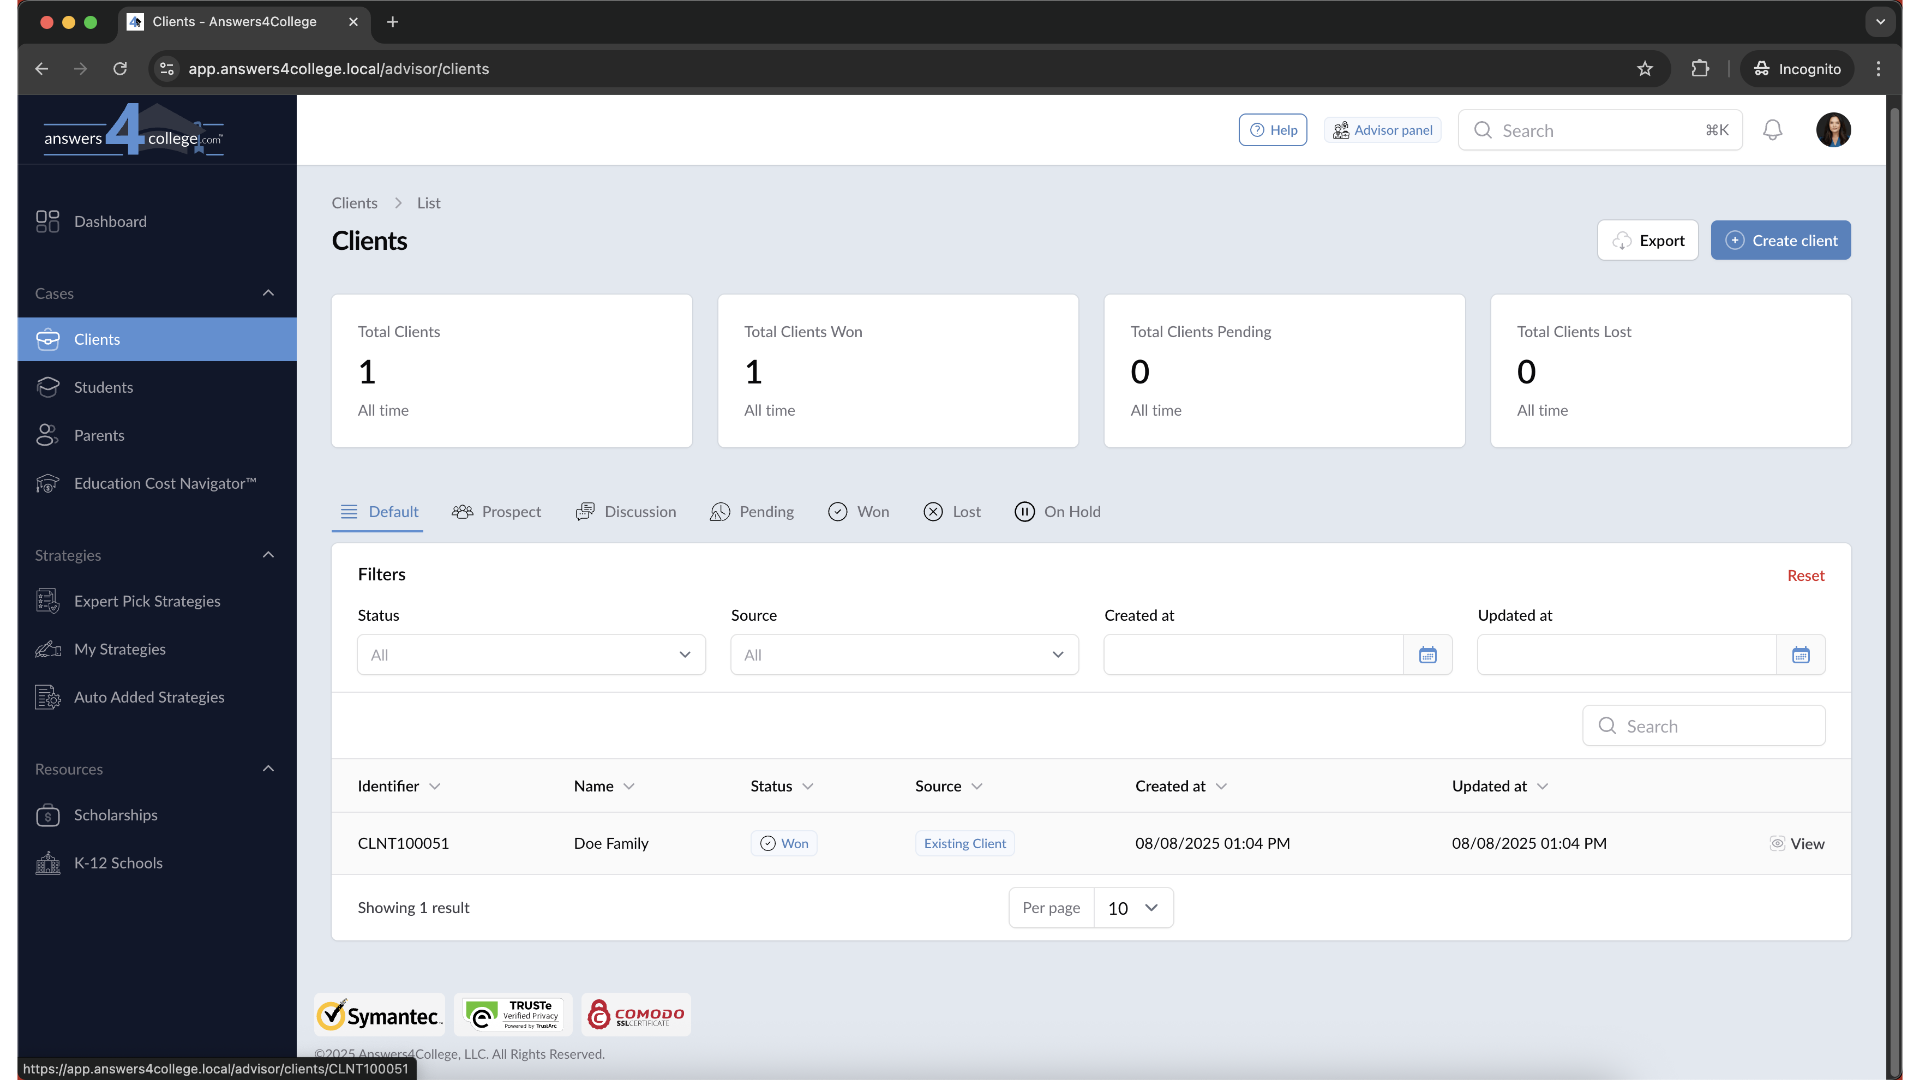
3. Finding Your Client
Great! You're now looking at your complete client list. You can either scroll through to find the family you need, or if you know their name, use the search bar at the top to find them quickly. Take a moment to locate the client you want to work with.
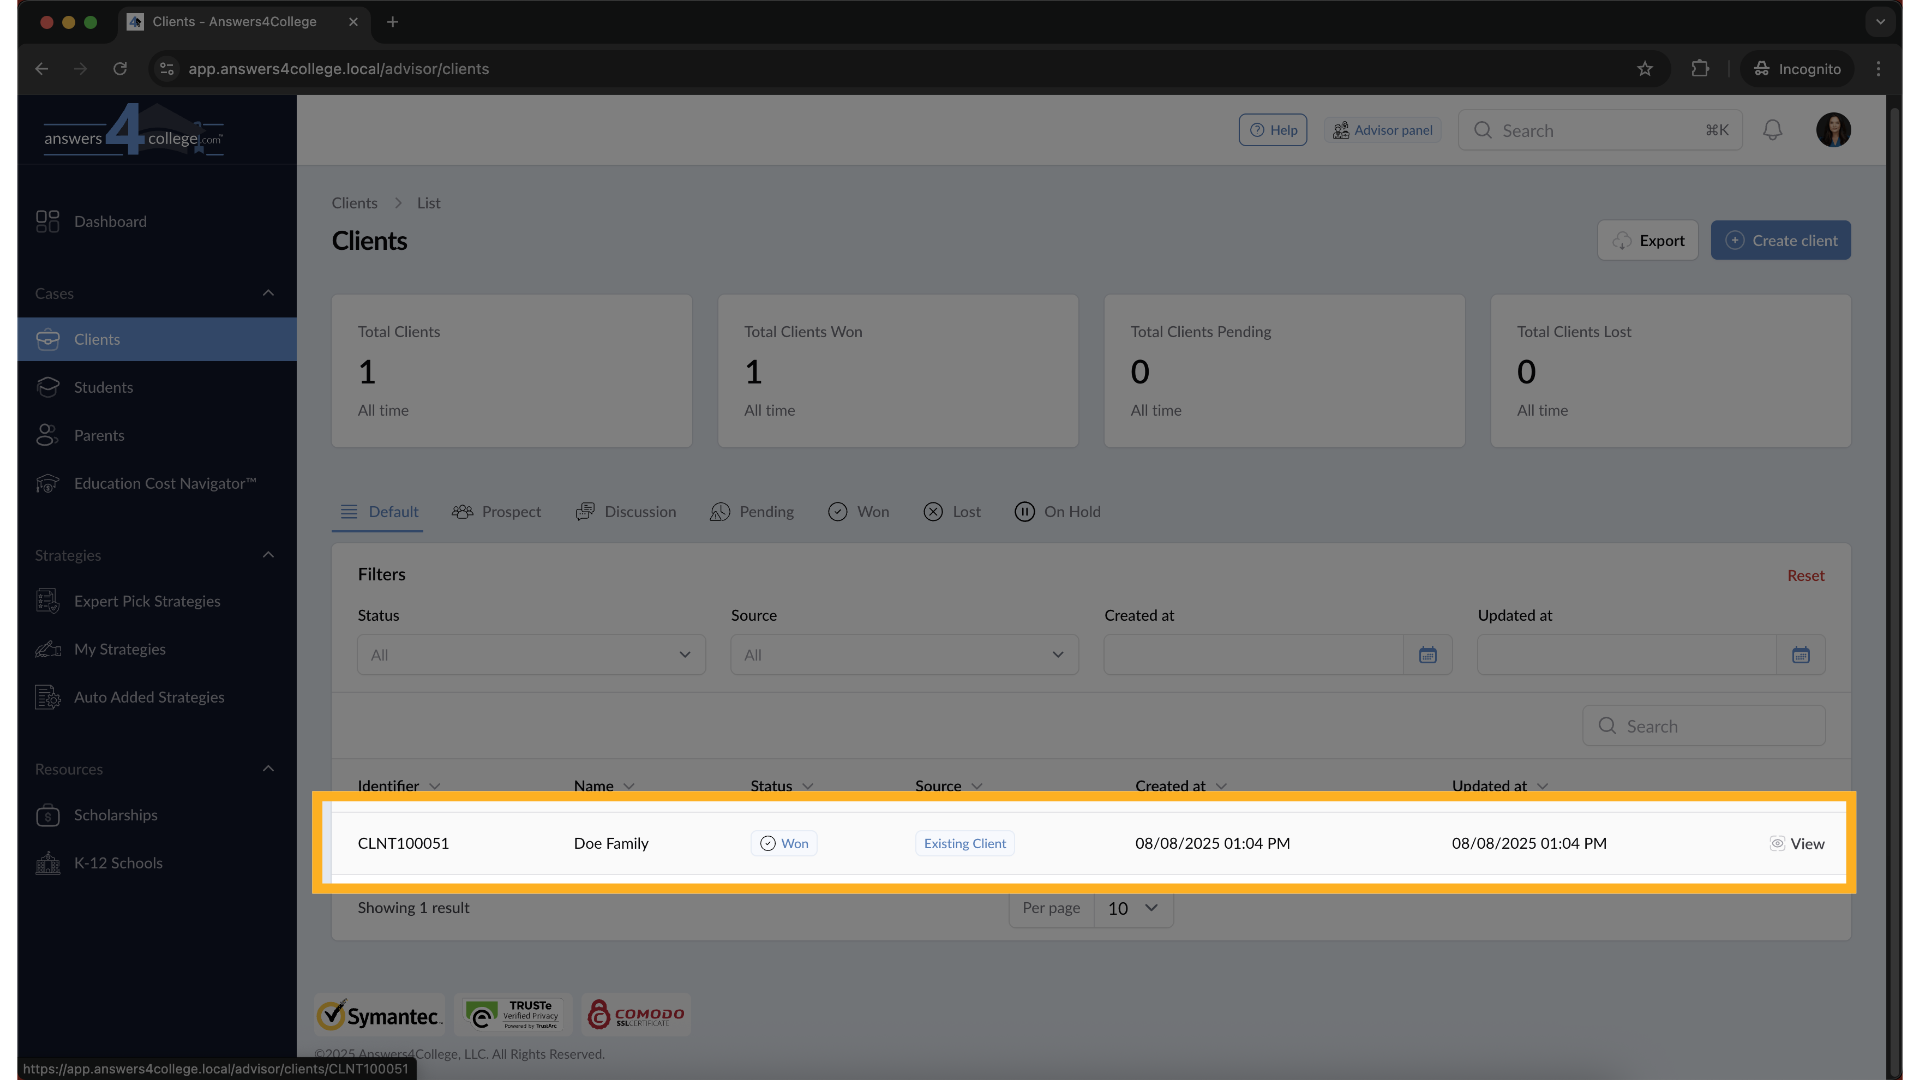
4. Opening the Client Profile
Once you've found the right client, click on their name. This opens up their complete profile. Before we continue, just double-check that you have the correct family selected - you'll see their information displayed on the screen.
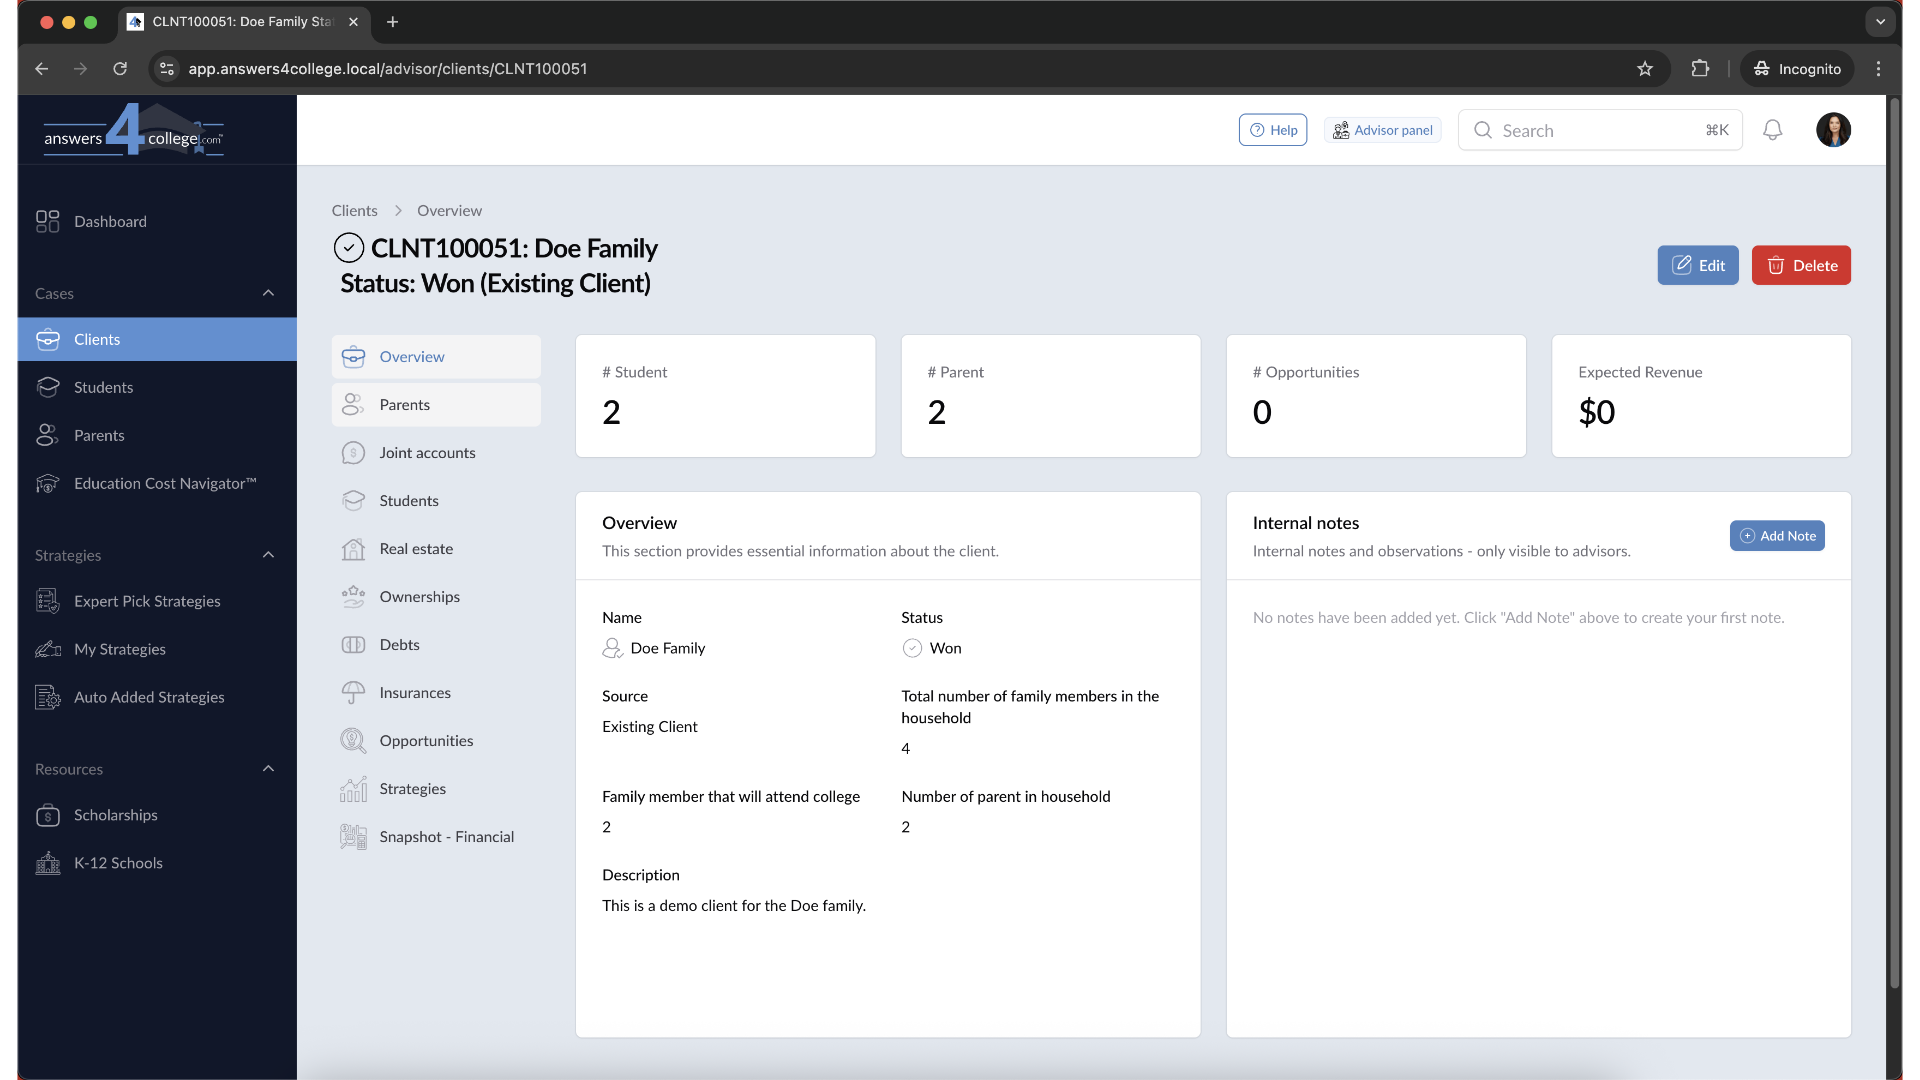
5. Understanding the Client Overview
Perfect. You're now in what we call the Client Overview. This is essentially your control center for this family. From here, you can access everything - their students, parents, financial information, and all other relevant data. Take a moment to familiarize yourself with this layout as you'll use it frequently.
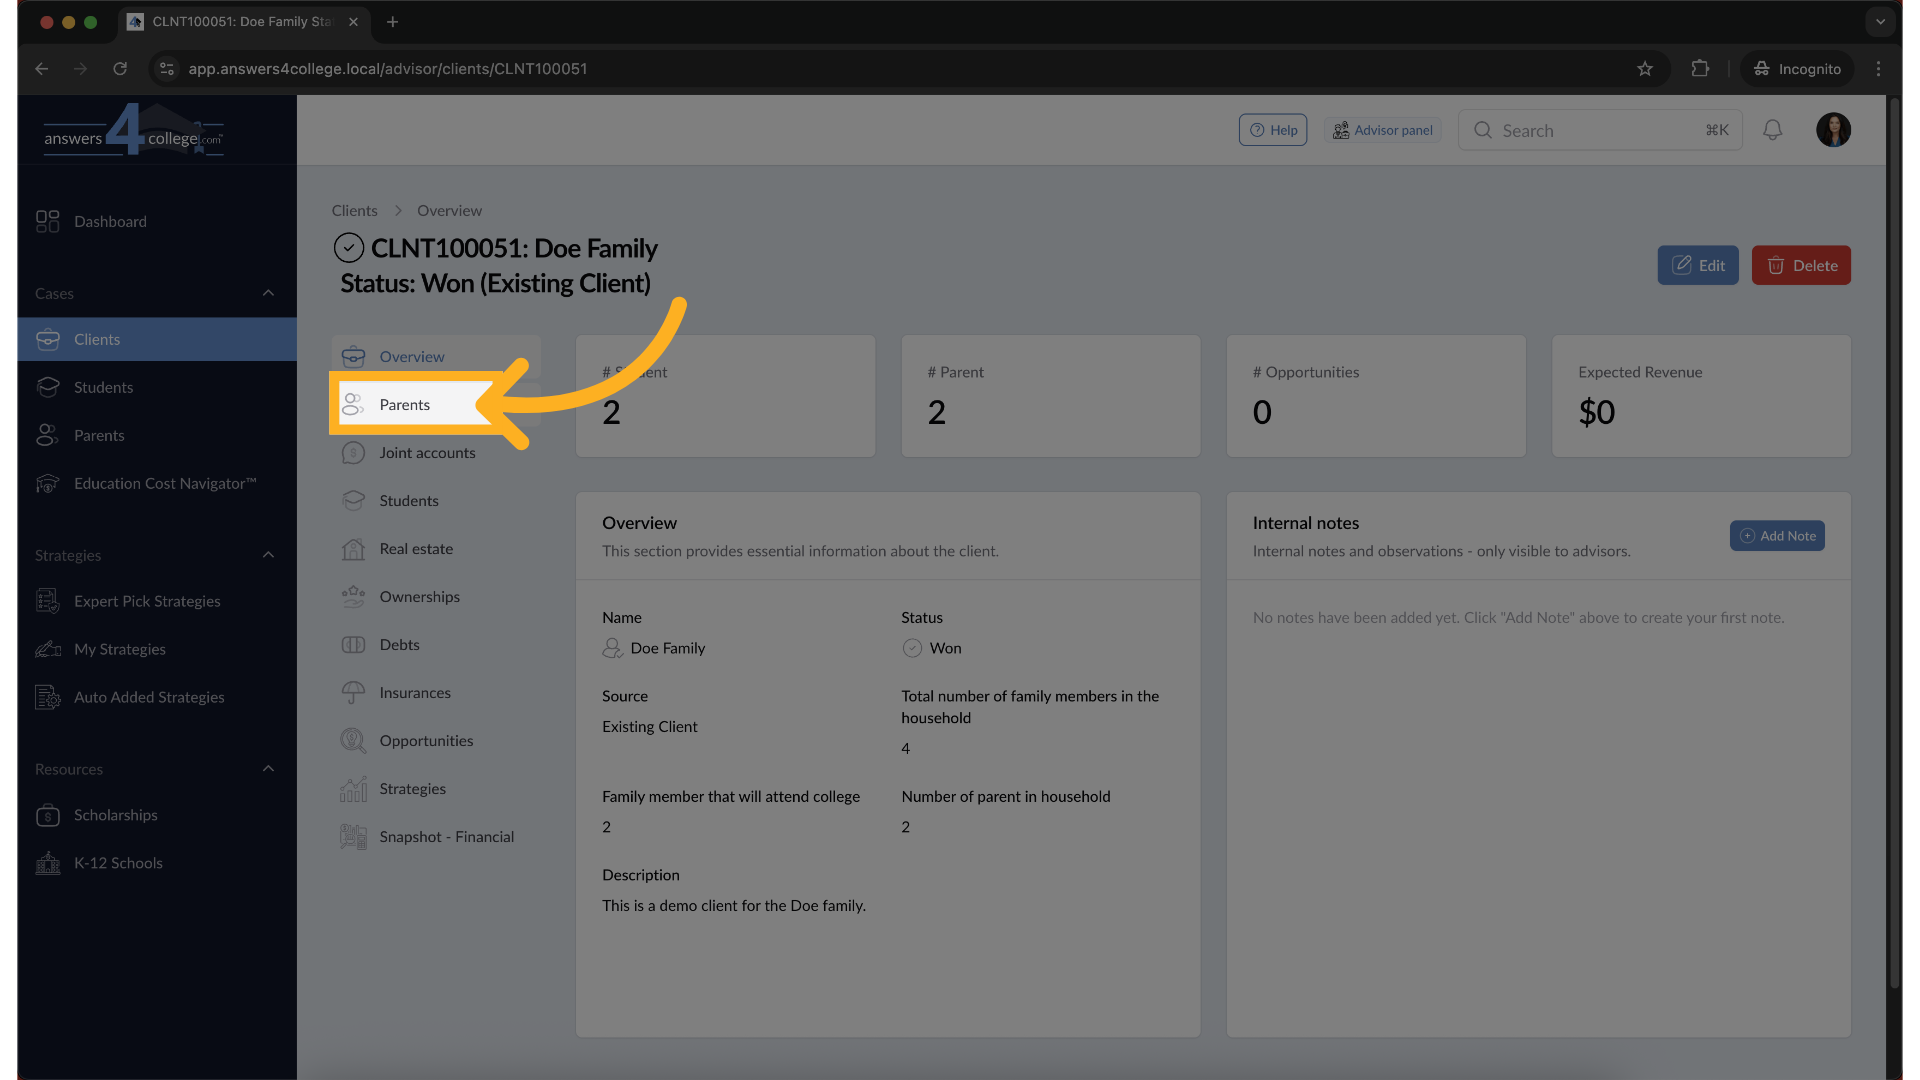
6. Navigating to Parent Accounts
Now, let's get to the parent accounts. Look back at that left-side menu - but this time, you'll notice it's specific to this client. Find and click on "Parents." This section shows you every parent connected to this particular family.
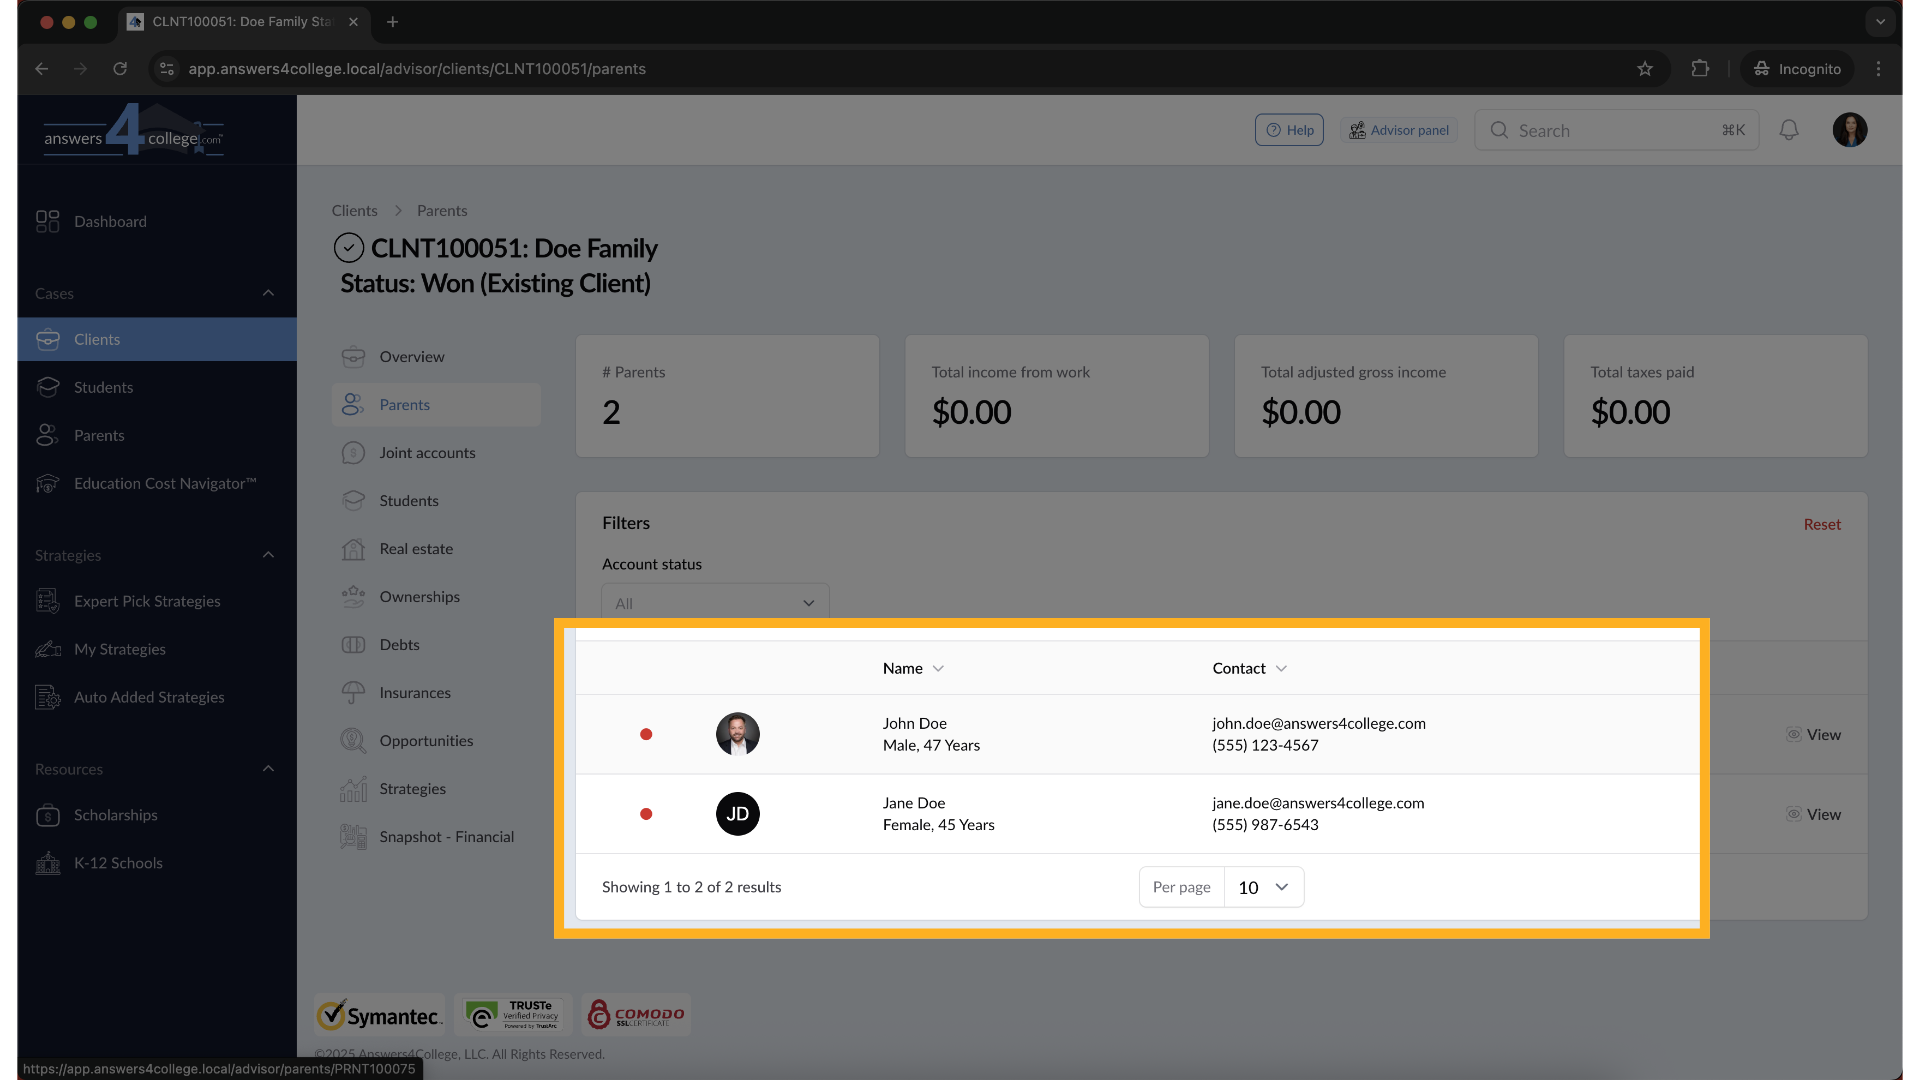
7. Reviewing Account Statuses
Excellent. You should now see a list of all parents associated with this client. Notice that next to each parent's name, there's a status indicator. It will show one of three things: "Inactive" means the account hasn't been set up yet, "Invited" means we've sent them an invitation and we're waiting for them to accept, and "Active" means they have full access to the portal. Find the parent you need to manage.
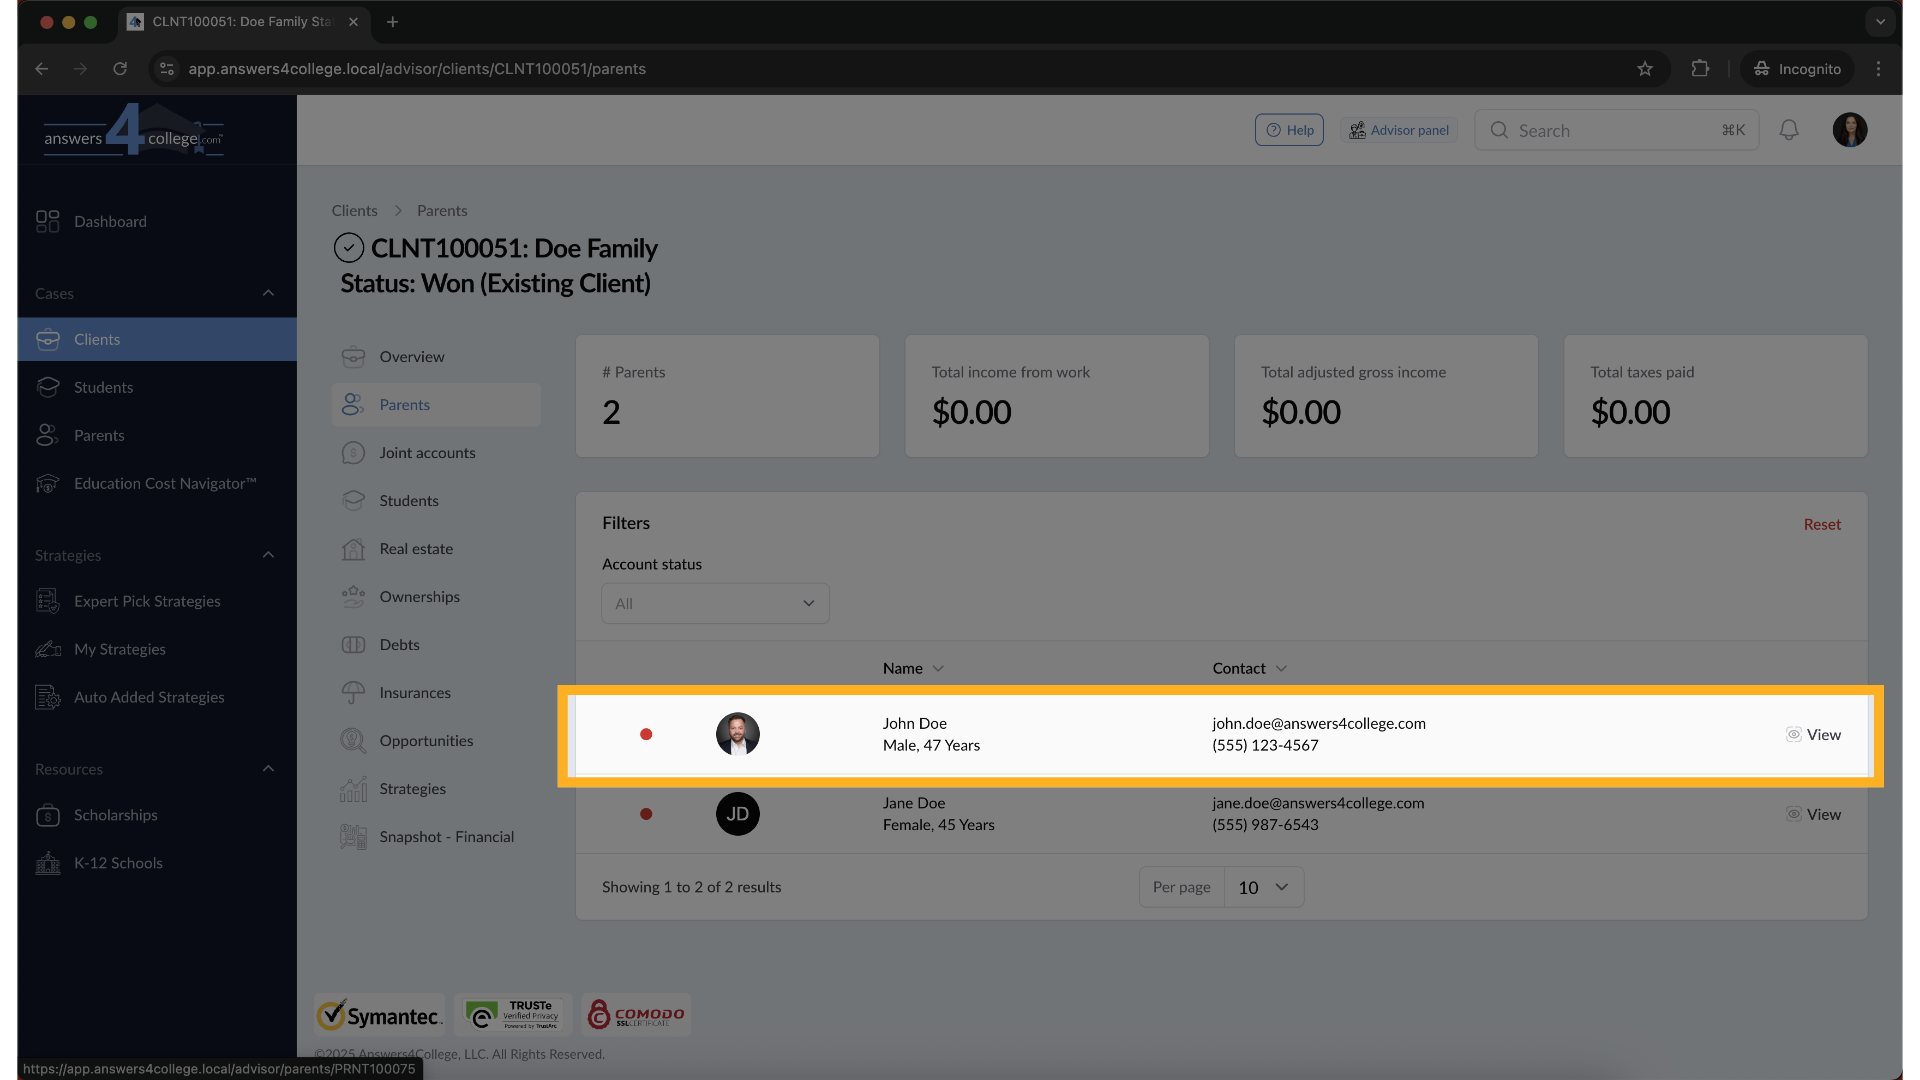
8. Accessing the Parent Dashboard
Click on the parent's name to open their individual dashboard. This is where you'll manage everything specific to this parent's account - their settings, permissions, and personal information.
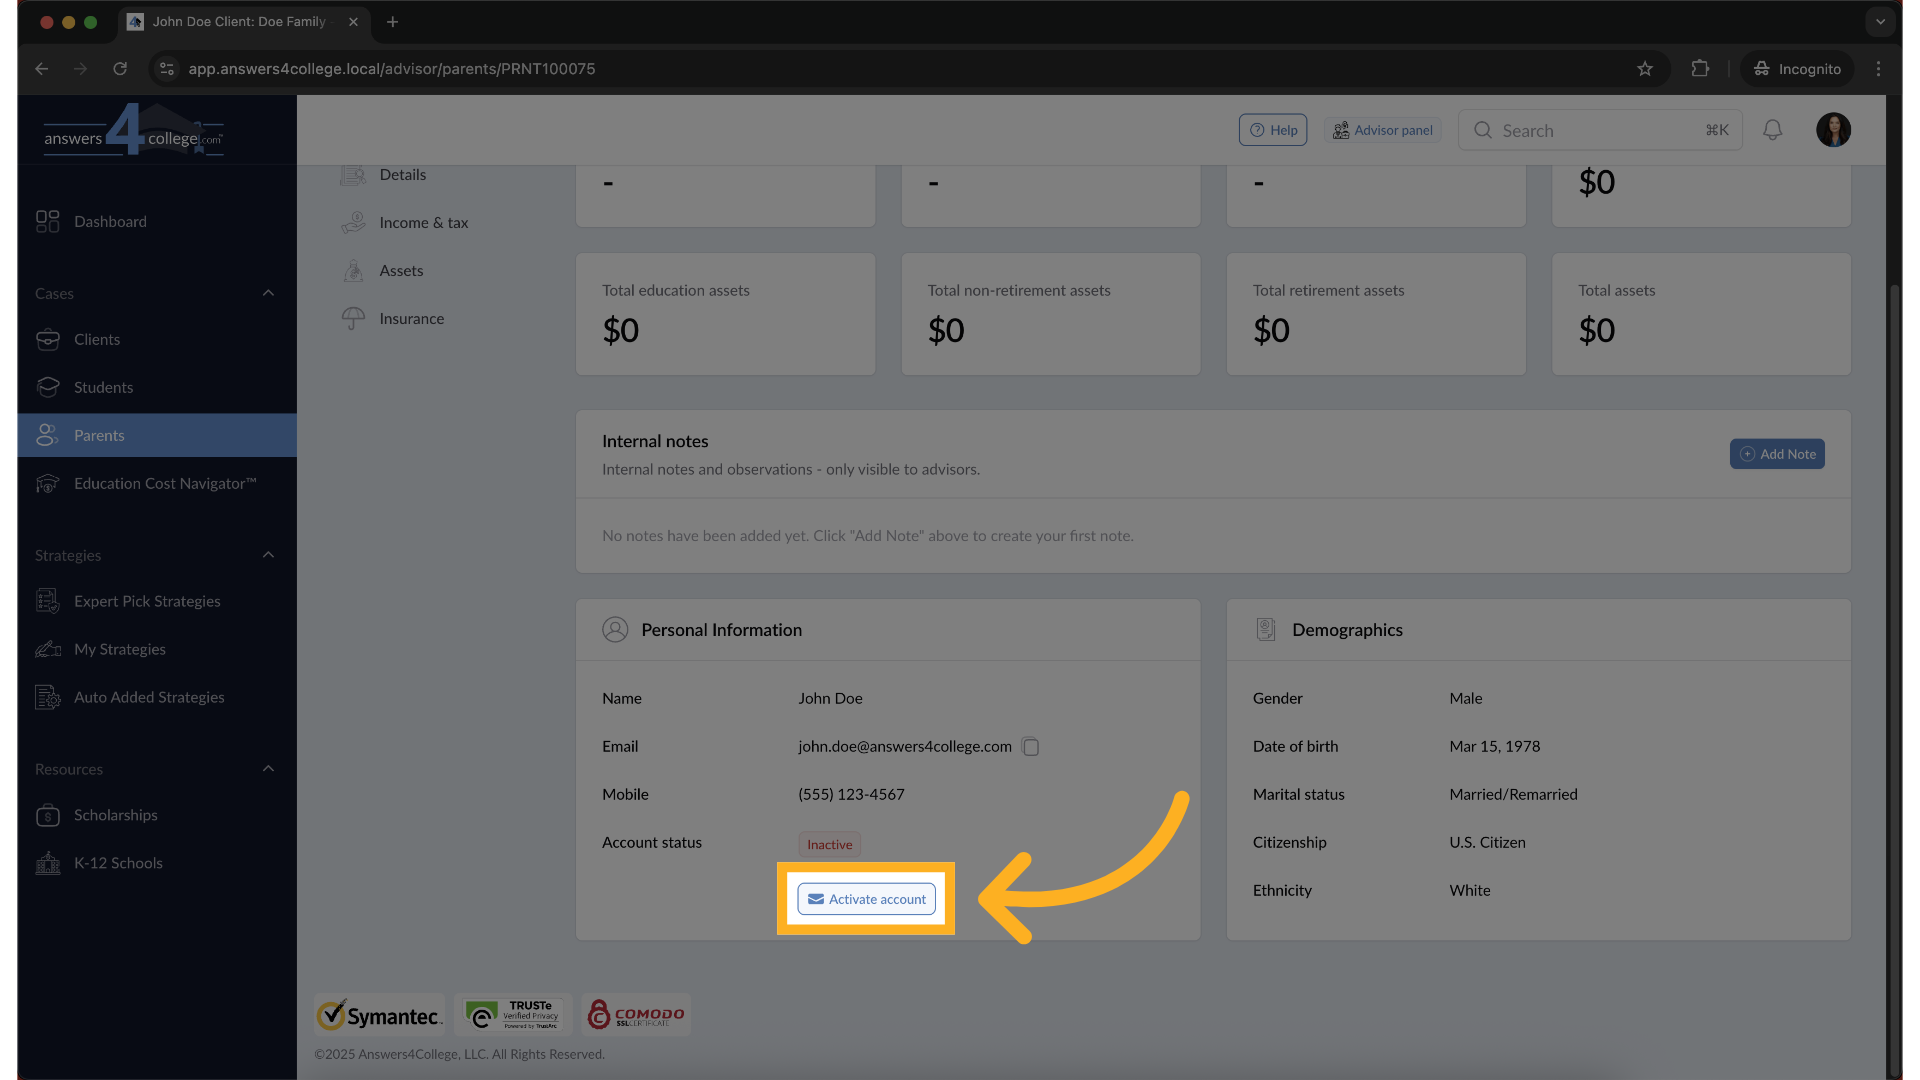
9. Beginning the Activation Process
On this dashboard, look for the Personal Information section. You'll see a field labeled "Account Status." If it currently shows "Inactive," you'll see an "Activate Account" button right there. Click on that button to start setting up their access.
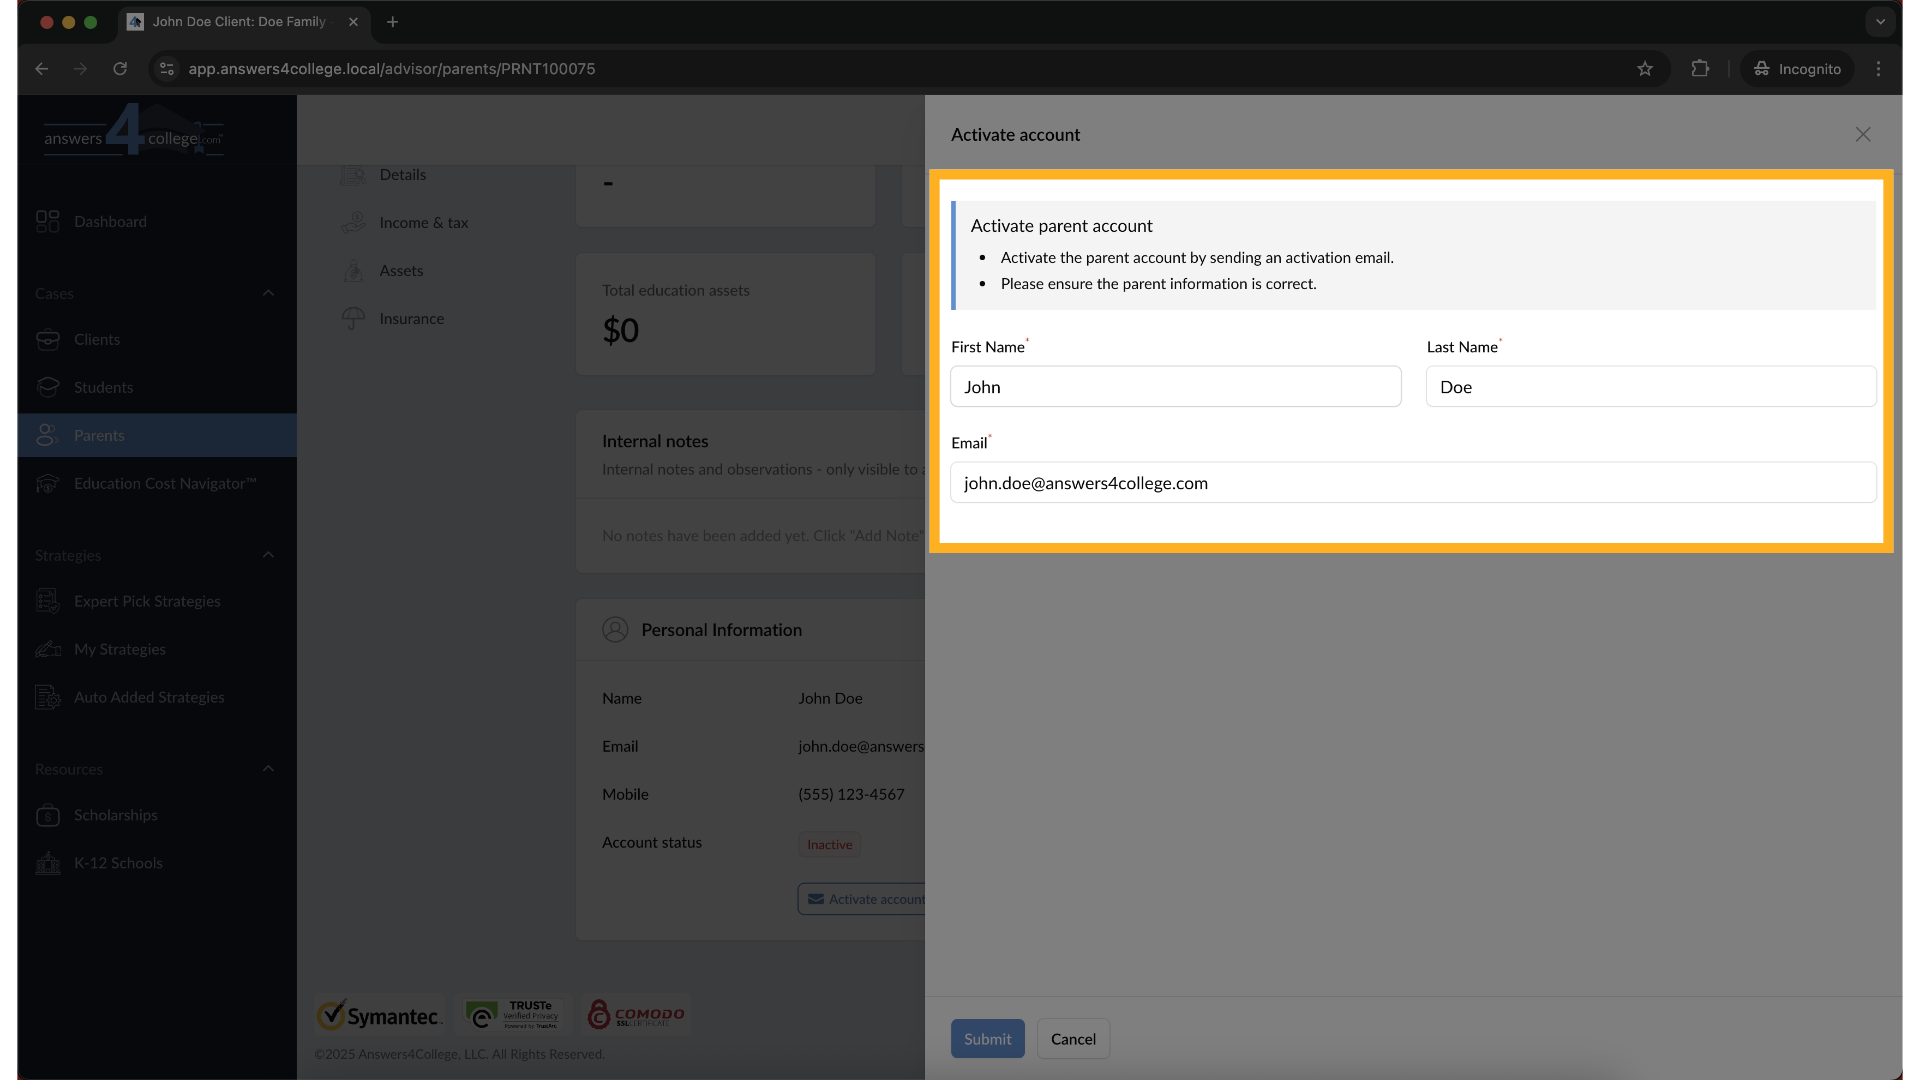
10. Entering Parent Information
A form will appear asking for some basic information. You'll need to enter the parent's first name, last name, and their email address. Make sure the email is correct - this is where their activation link will be sent. Notice that unlike student accounts, we don't need to verify the parent's age.
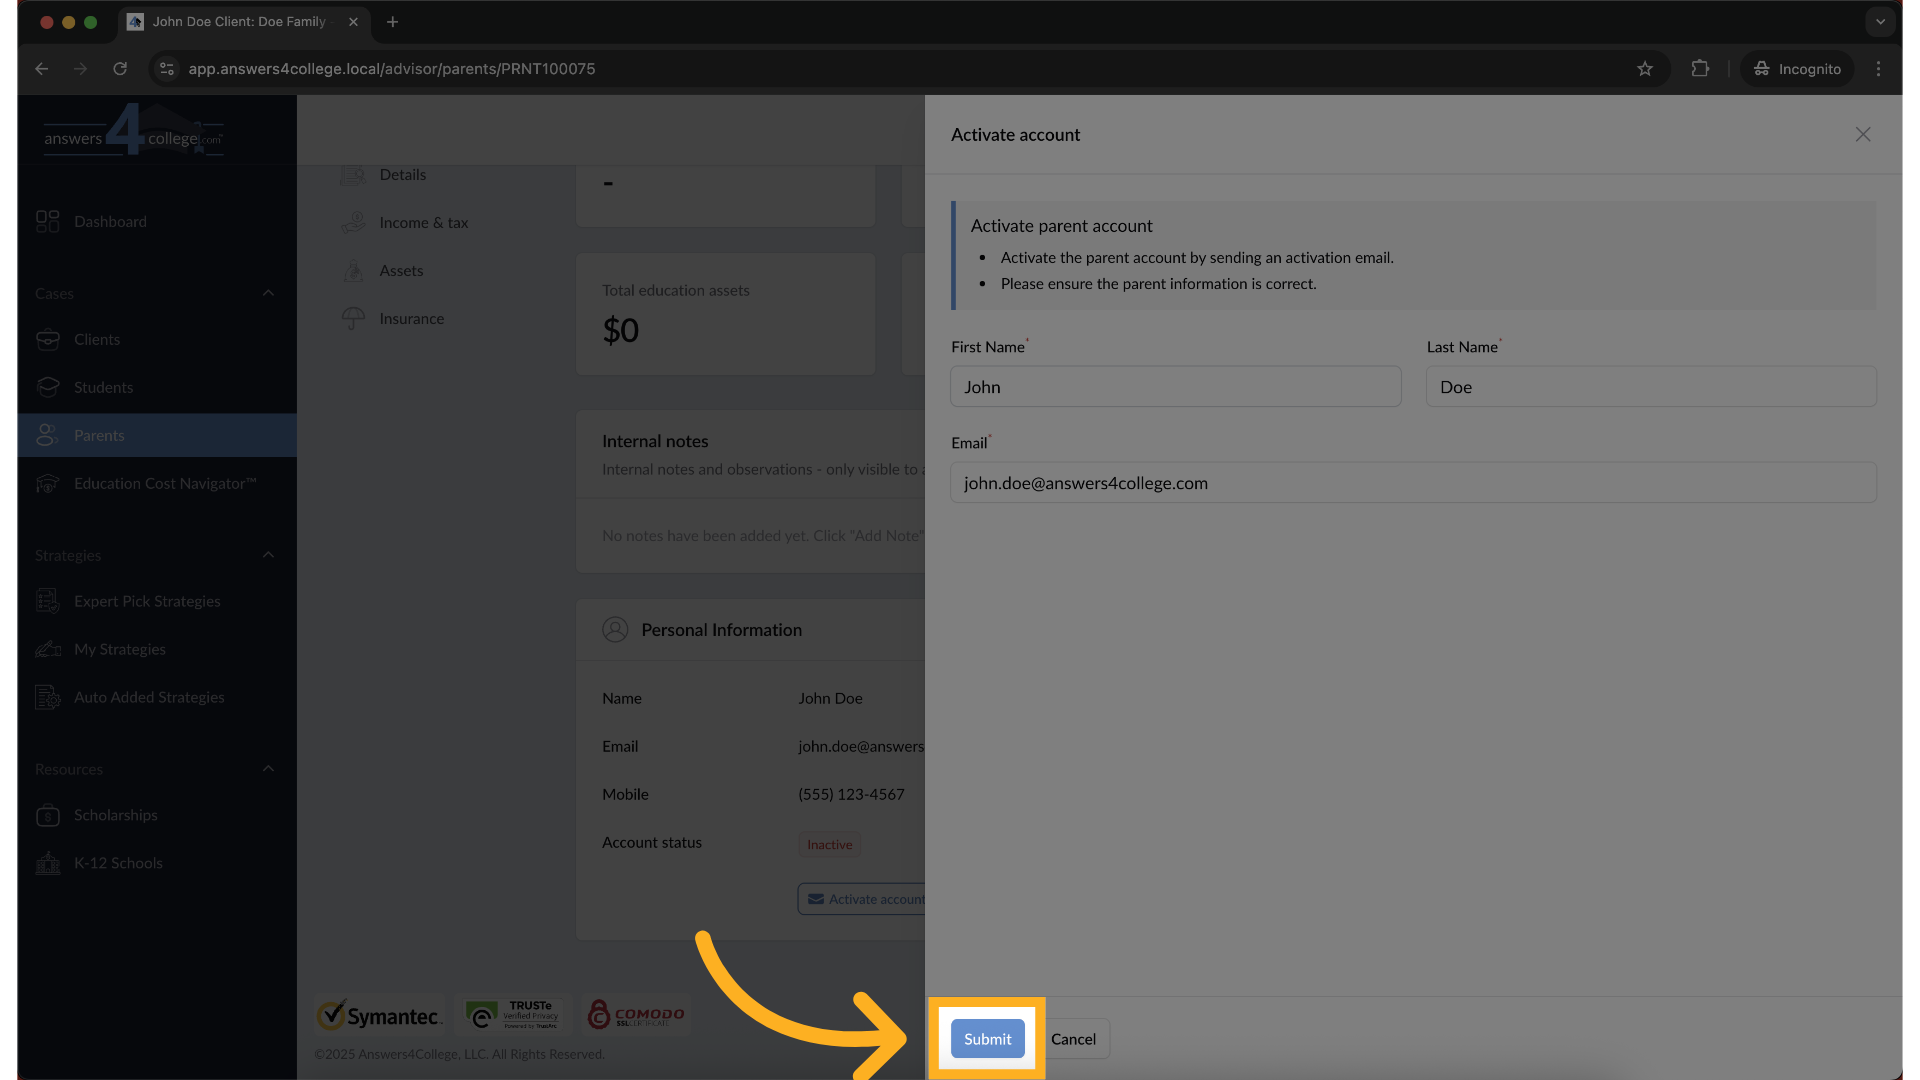
11. Submitting the Information
Once you've entered all the information and double-checked that email address, click the "Submit" button. The system will immediately process this request and send an activation email to the parent.
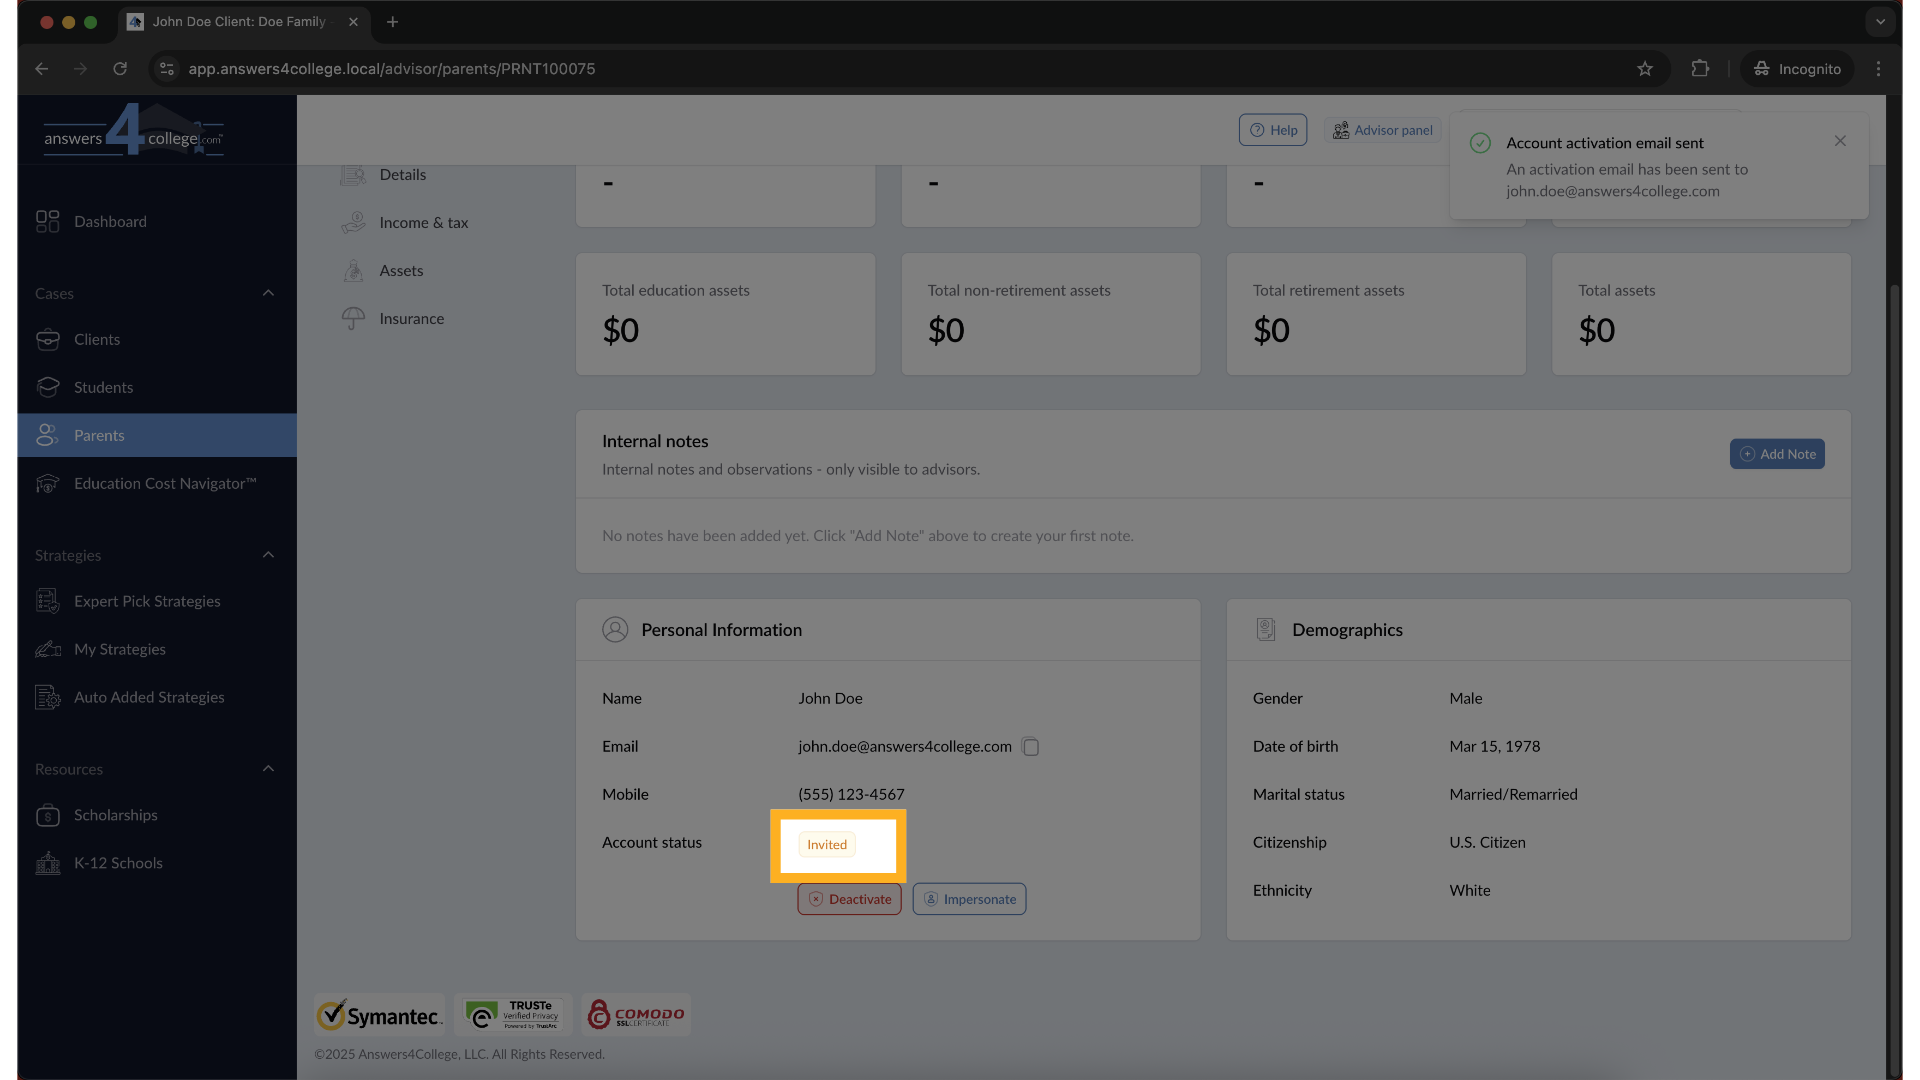
12. Understanding Status Changes
After you hit submit, watch the status - it immediately changes from "Inactive" to "Invited." This tells you the email has been sent successfully. The parent will receive an email with a link to complete their account setup. Once they click that link and finish the process, you'll see their status automatically change to "Active," which means they now have full access to their portal.
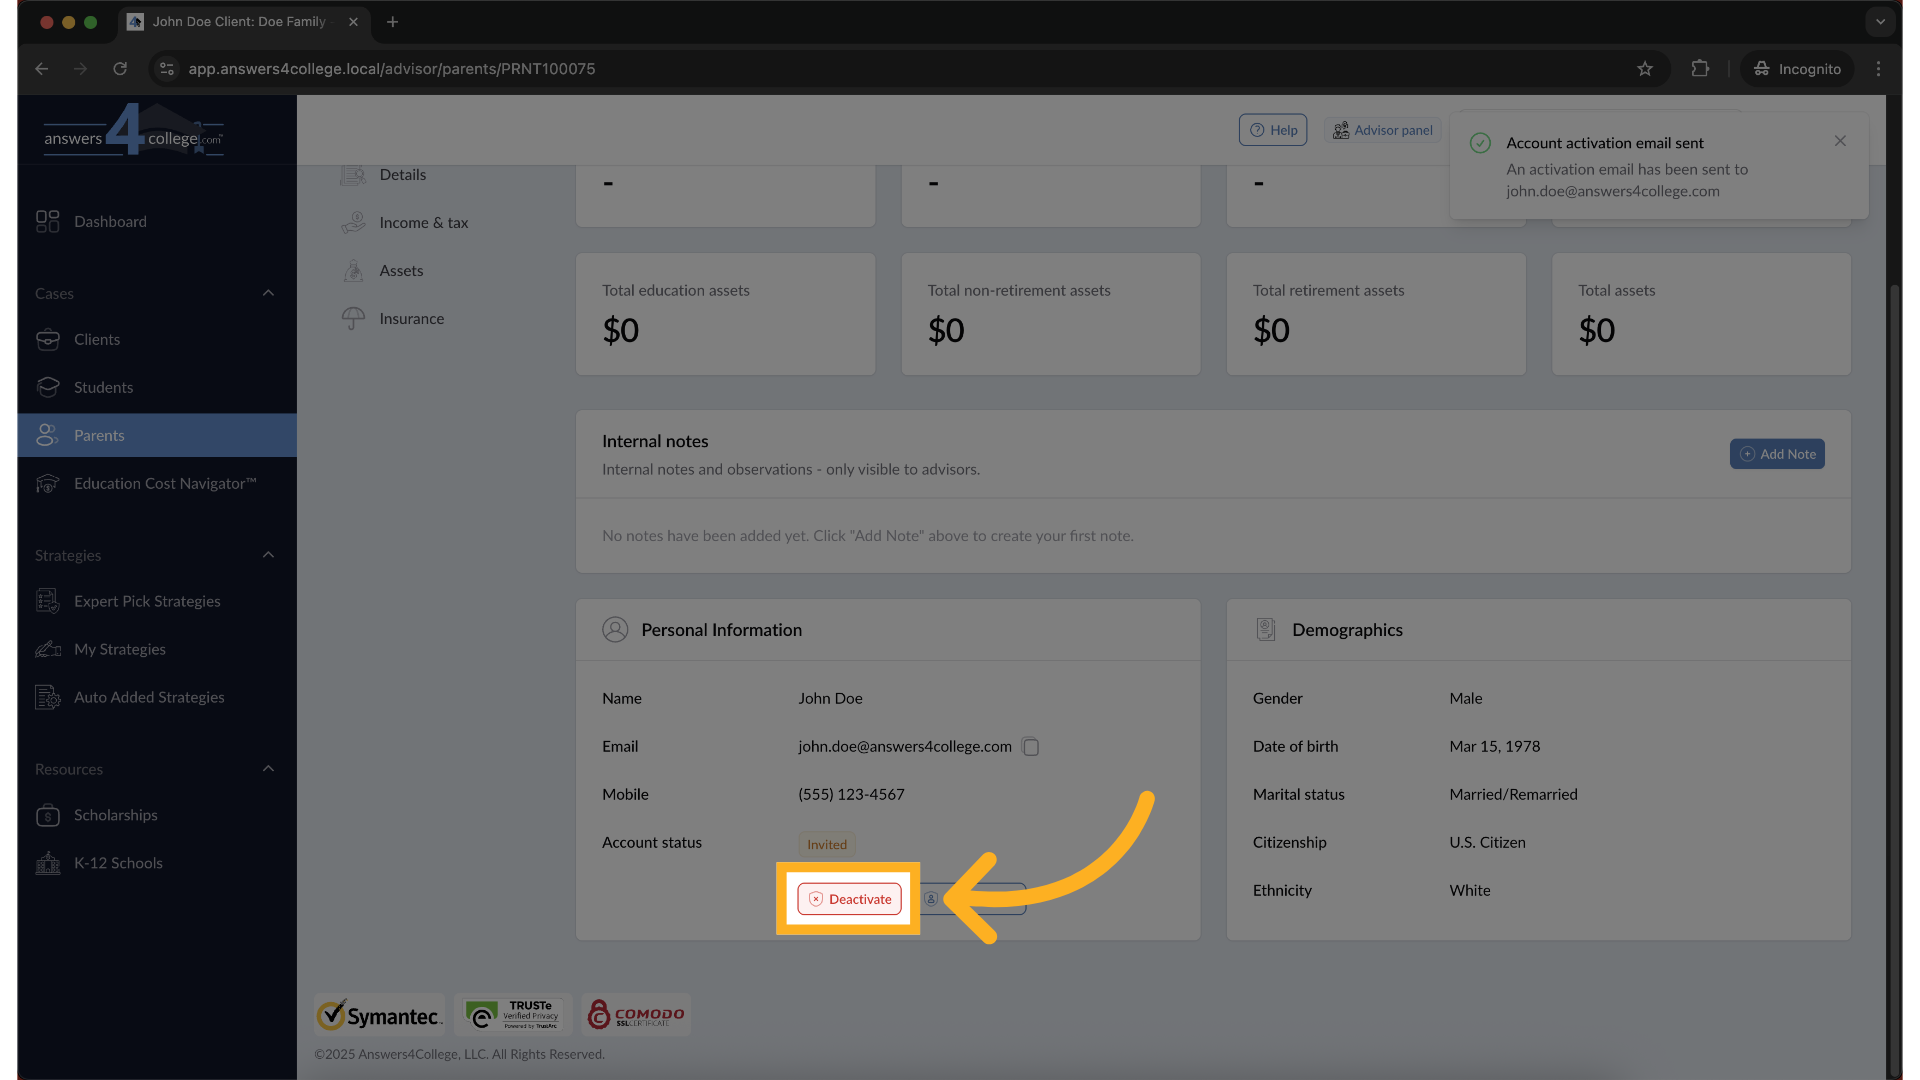
13. Deactivating an Account When Needed
Now, let me show you how to deactivate an account if you ever need to remove someone's access. From the parent's profile, you'll see a "Deactivate" button. Click it, and the system will ask you to confirm. Click "Deactivate" again to confirm. This removes their ability to log in, but don't worry - all their information remains saved in the system.
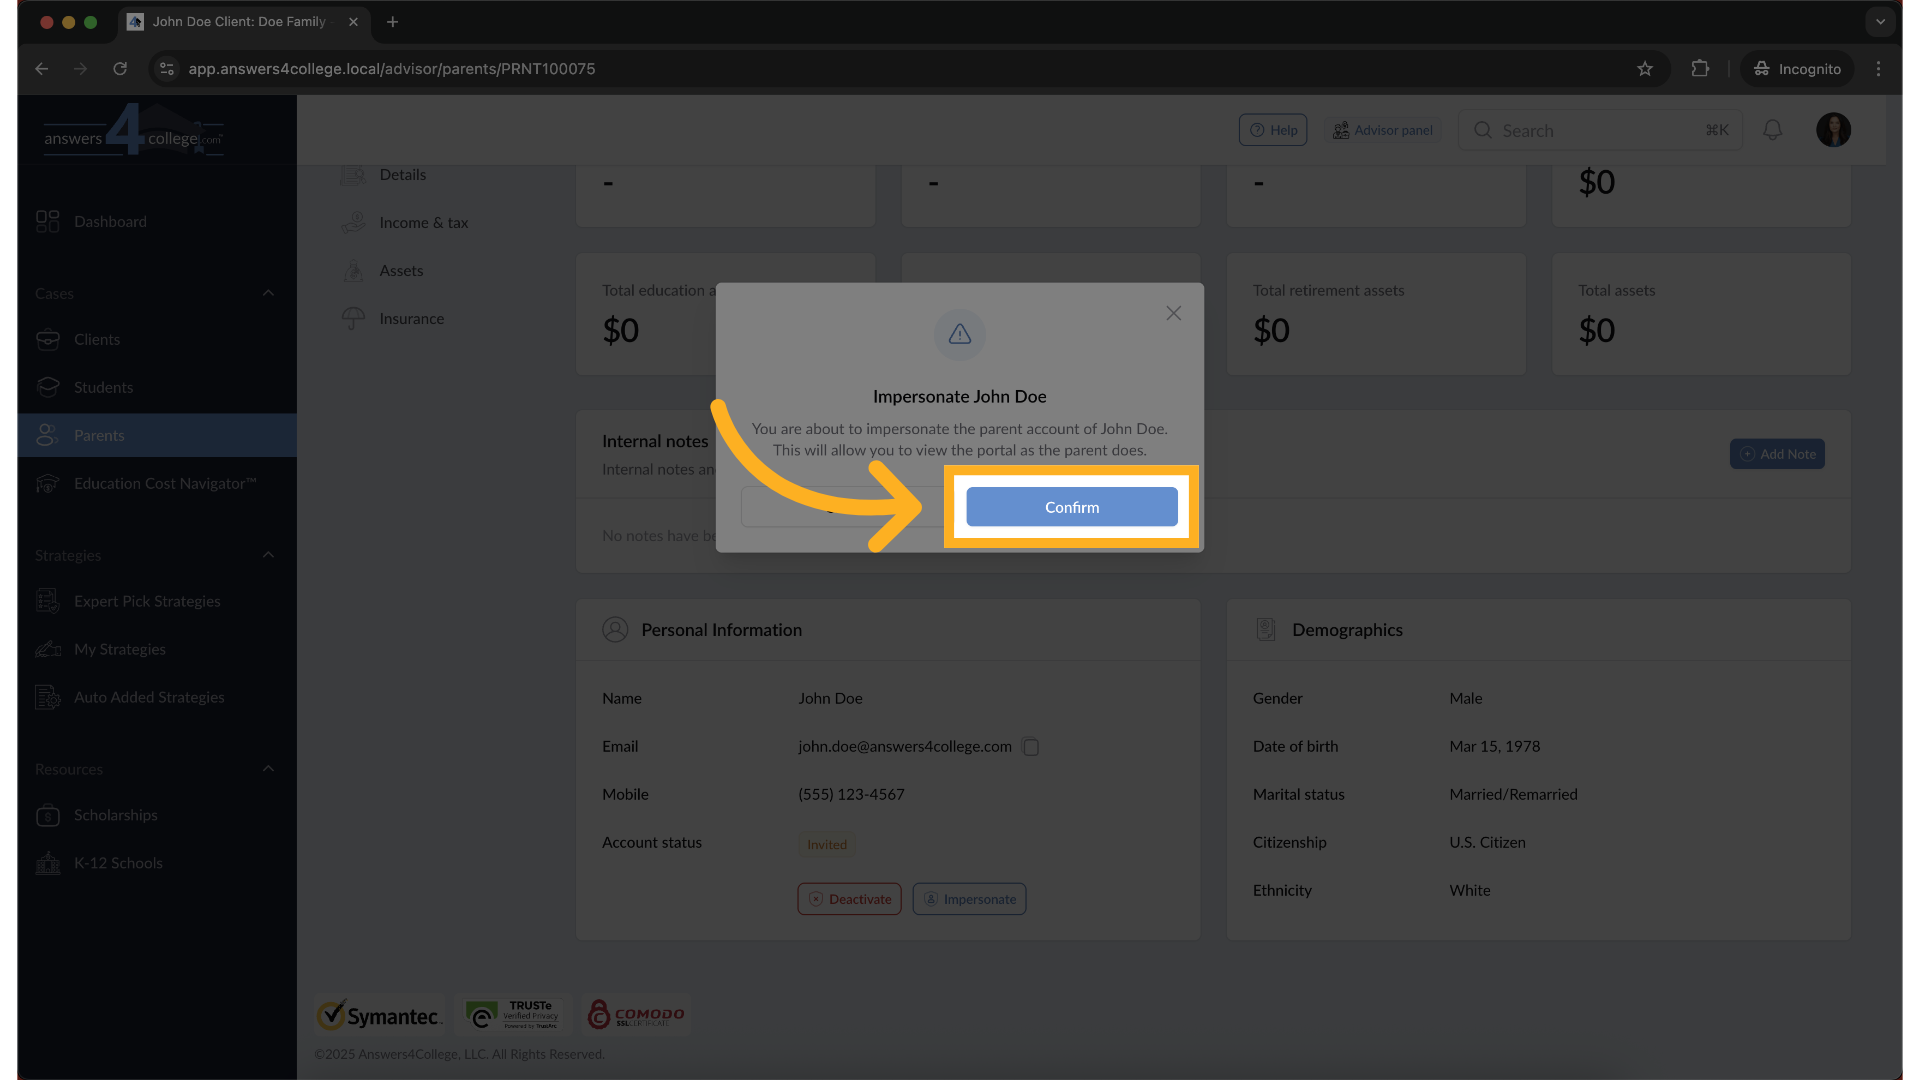
14. Using the Impersonation Feature
Here's a really useful feature - impersonation. This lets you see exactly what the parent sees when they log in. From the parent's profile, click the "Impersonate" button.

15. Confirming Impersonation
A confirmation window will appear. Click "Confirm" to proceed. This is a security measure to ensure you intentionally want to view the portal as this parent.
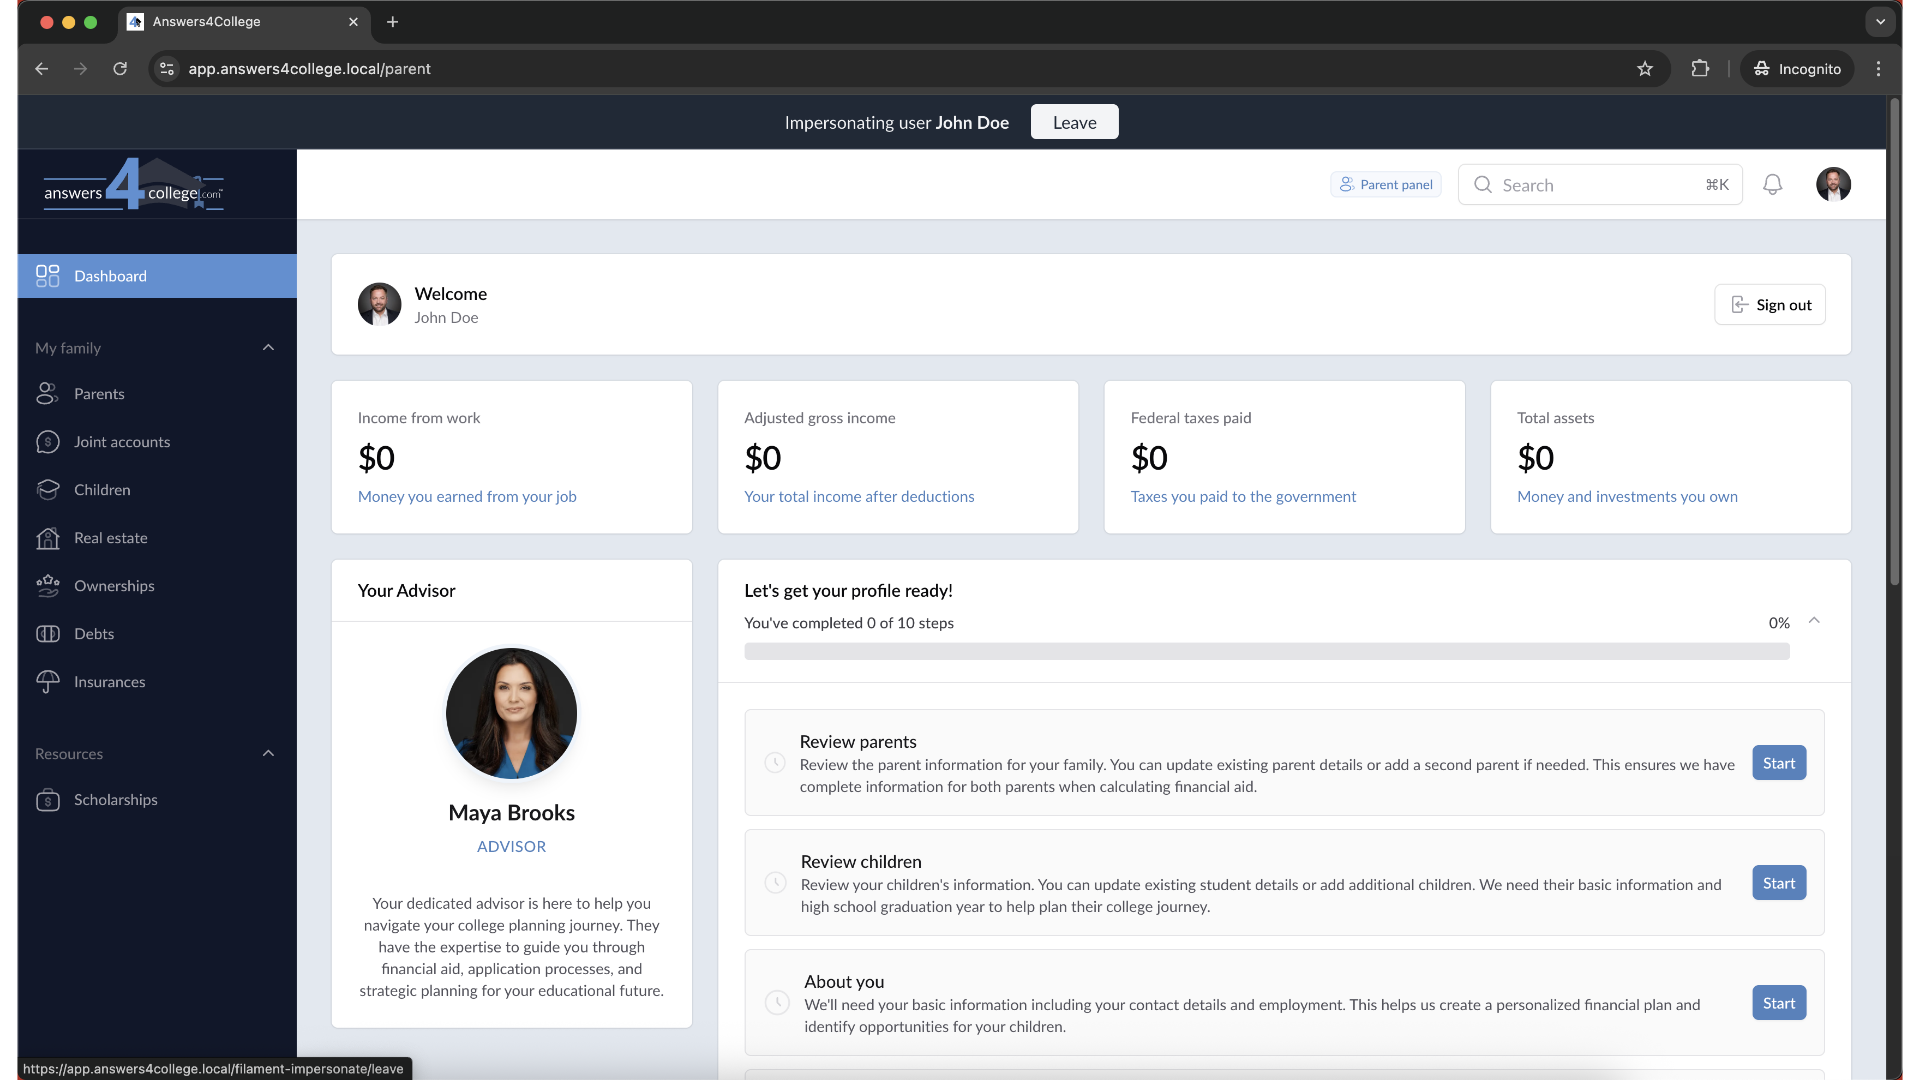
16. Exploring the Parent's View
You're now seeing the portal exactly as the parent does. You can see their dashboard, how they access student information, what financial tools they have available - everything from their perspective. This is incredibly helpful when you need to walk a parent through something over the phone or troubleshoot any issues they're experiencing.
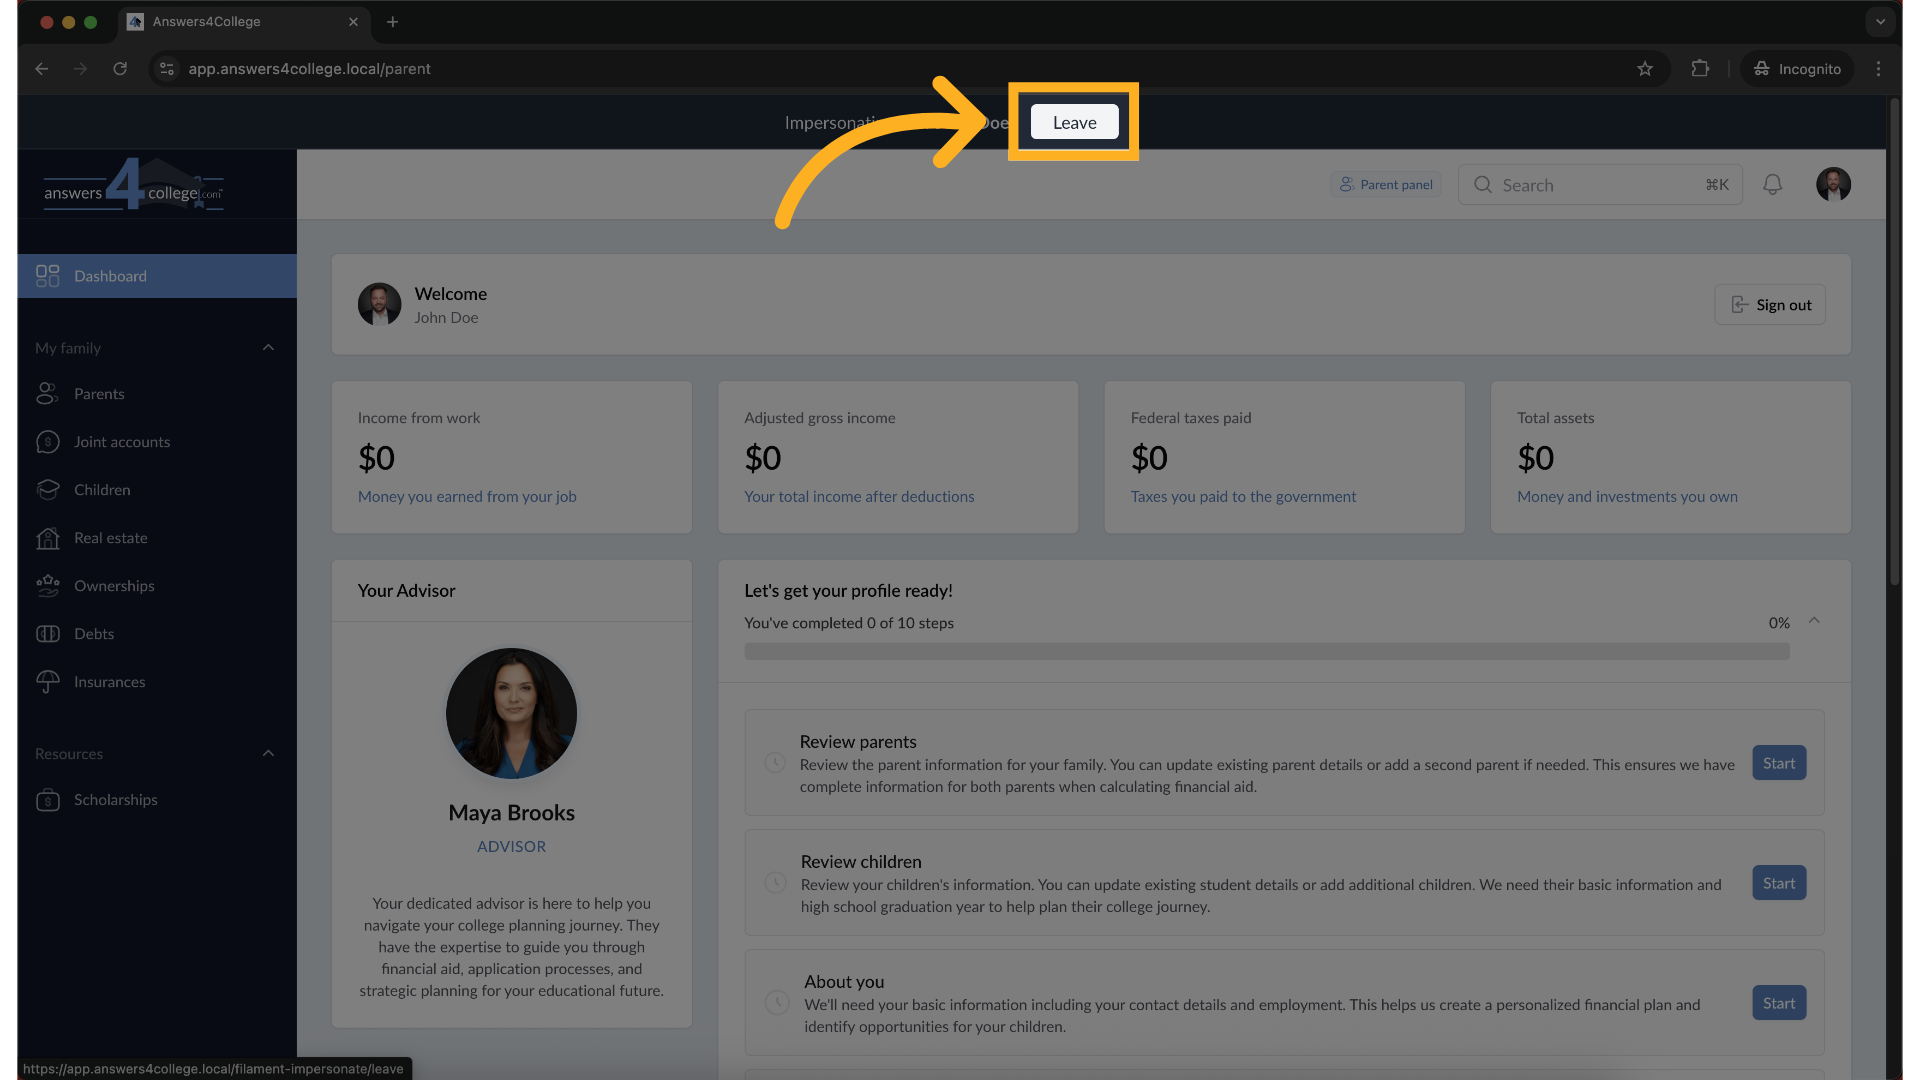
17. Returning to Your Advisor View
When you're finished exploring the parent's view, look at the top of your screen. You'll see a "Leave" button - click that to exit impersonation mode and return to your normal advisor dashboard.
And that's everything you need to know about managing parent accounts in the Advisor Portal. You've learned how to activate accounts, monitor their status, deactivate when necessary, and use impersonation to see what parents see. These tools will help you provide excellent support to all your client families.
Comments
0 comments
Please sign in to leave a comment.